


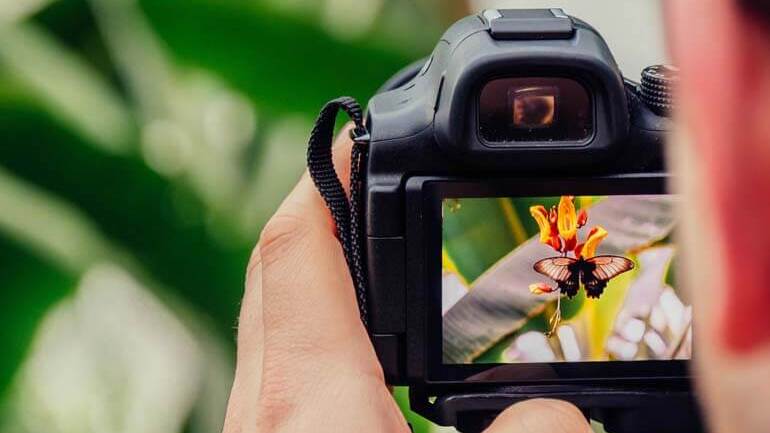
Are you trying to figure out when to use HDR in photography or not? We know this is a tricky question, so we’ll do our best to answer it in a straightforward way.
The solution to getting a well-blended photo is known as HDR photography, and this technique is easier to achieve than you may think. However, in some cases, it’s better to avoid it altogether.
In this post, we’ll show you when to use HDR in photography and discuss some benefits and disadvantages of using this technique. We’ll also cover what HDR means and give you tips for shooting HDR for real estate photography.
Let’s dive in!
What Does HDR in Photography Mean?
HDR stands for High Dynamic Range, which refers to the amount of contrast between the darkest and the lightest areas of a photograph.
Most regular cameras struggle to balance photos where there is a high contrast between dark and light areas.
HDR photography is a technique that is used to blend multiple images, taken at different exposures, and later combine them in post-processing. That way, photographers can capture the full detail in the scene, both in the dark and light areas.
How Does HDR Work?

An HDR photo is a series of photos of the same subject taken at different shutter speeds and exposure levels.
Basically, it’s a set of three images that are called “bracketed” images, where each image shows varying degrees of luminosity. (For you who don’t know what bracketing means, it’s a technique where a photographer takes shots of the same image using different camera settings).
With the use of photo editing software, bracketed images are then blended together to create a final image that shows all details in perfect exposure.
But why use photo editing software when you can just use a camera with a built-in HDR setting, you may ask?
Photo Editing Software vs Camera With Built-In HDR Setting
First of all, with a simple HDR camera setting, you don’t have control over the blending settings.
Also, you won’t be able to utilize extra frames for different purposes. And you don’t have access to the RAW image format to make further adjustments.
Lastly, correcting sections of an image where the camera did a poor job can be extremely difficult without using good software.
That said, there are several starter HDR blending software out there such as Photomatix, Aurora HDR, and Luminance HDR.
Better yet, if you don’t know how to use these programs or don’t have time to learn, PhotoUp’s expert photo editors can help blend bracketed photos for you.
Plus, our photo editing service is super affordable and the turnaround is only 12-24 hours.
When to Use HDR in Photography?
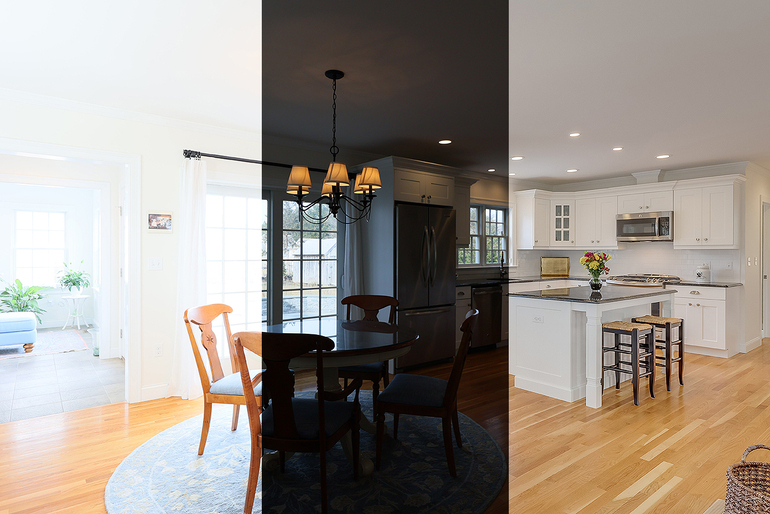
HDR photography is best used when the contrast of the scene exceeds your camera’s dynamic range. In other words, when you have trouble balancing a photo’s light.
HDR adds a more dynamic range to photographs.
The main goal is to produce a range of luminance similar to that perceived by the human eye. Or simply speaking, capture and show all the details in a photo.
To give you a better understanding, the dynamic range is the difference between the darkest dark and lightest light in a photo.
So, if the image exceeds your camera’s dynamic range, the highlights can wash out or the shadows can become black spots.
Fortunately, the HDR technique can easily fix this issue.
High-Quality & Consistent
Real Estate Photo Editing
Hire a dedicated editor with performance metrics from $7/hour.

Benefits and Disadvantages of HDR Photography
There are times when HDR can boost image quality and enhance your photos and other times when it’s better to avoid using this technique.
For example, HDR is great when:
- Shooting landscapes: When shooting landscape photography, HDR can help show the details of where the sun is hitting as well as where the shadows fall.
- Using low-light and backlit scenes: If your scene has too much backlight, HDR can brighten up the foreground without washing out the well-lit portions of your photo.
- Shooting portraits or objects in sunlight: Too much lighting on an object or a person’s face, like from the glaring sun rays at midday can cause harsh shadows, bright glares, and other unflattering characteristics. HDR can even that all out and make your subject look better.
In contrast, you should avoid HDR when:
- Wanting to capture movement: When you want to capture motion, such as in sports photography. HDR increases the chance of a blurry photo since it always takes three photos.
- Shooting silhouettes: Some photos, like silhouettes, look better with a stark contrast between the dark and light parts of the photo. You then have a dark shadow or silhouette you want to highlight and HDR will make this less intense.
- Dealing with vivid colors: When dealing with vivid colors, such as in a field of flowers or brightly colored walls, HDR can actually wash them out or give them an extremely vibrant look, making the final image look “cartoonish”.
To learn more about HDR and what equipment to use, you can check out our post on how and when you should use HDR.
Tips for Shooting HDR for Real Estate Photography

If you’re a real estate photographer, HDR can certainly elevate the quality of your property photos.
Here are some tips to consider when shooting HDR:
- Keep the camera still: For starters, keeping the camera still is crucial in exposure bracketing. Remember that HDR is not meant for moving subjects.
- Post-processing is key: Second, be watchful for subjects and scenes that have very noticeable contrasts between light and darkness. These images benefit most from post-processing, which is vital for shooting captivating real estate images.
- Always shoot in RAW format: Finally, you should shoot in RAW format to preserve the image quality, prevent loss of detail, and make editing easier. For instance, JPEG uses too many compressions to reduce your file size, which makes the photo lose detail.
And that’s it!
Final Thoughts
If you want help with HDR image processing or other real estate photo editing services, PhotoUp has a team of expert editors ready to help you take your photography to the next level.
Browse Top Dedicated
Real Estate Photo Editors
Ready-to-hire editors for real estate photo editing, and more.
All you need to do is sign up for a free PhotoUp account, upload your photos, and wait for the edited versions to be delivered in 12-24 hours.
Besides, you’ll have access to a comprehensive all-in-one photo management system, where you can leverage additional real estate marketing services such as:
You can upload and receive photos, send instructions and feedback, track and manage team members and clients, and more!
So, why wait?
Get started with PhotoUp today, and let us help you enhance your images while you can focus on scaling your photography business.
We hope this blog post helped you learn when to use HDR in photography to boost image detail and when it’s better to avoid this technique.
If you enjoyed reading this post, make sure to also check out the following resources:

