


Table of Contents
- What Is Color Correction in Real Estate Photography?
- When Is Color Correction Used?
- How to Do Color Correction in Photoshop
- Color Correction FAQ
- Handle Over Your Photo Editing to the Experts at PhotoUp
Do you want to learn how to do color correction in Photoshop? Then, this is the guide for you!
Listings with high-quality photos receive 118% more online views compared to those with lower-quality images. A well-lit, color-accurate photograph helps showcase a property in its best light, making it more appealing to viewers.
However, lighting conditions, artificial lights, and camera settings can sometimes result in unwanted color casts or inaccurate tones. This is where color correction comes in.
In this guide, we’ll explore what color correction is, when it should be used, and provide you with a step-by-step guide on how to do color correction in Photoshop.
Let’s get started!
What Is Color Correction in Real Estate Photography?
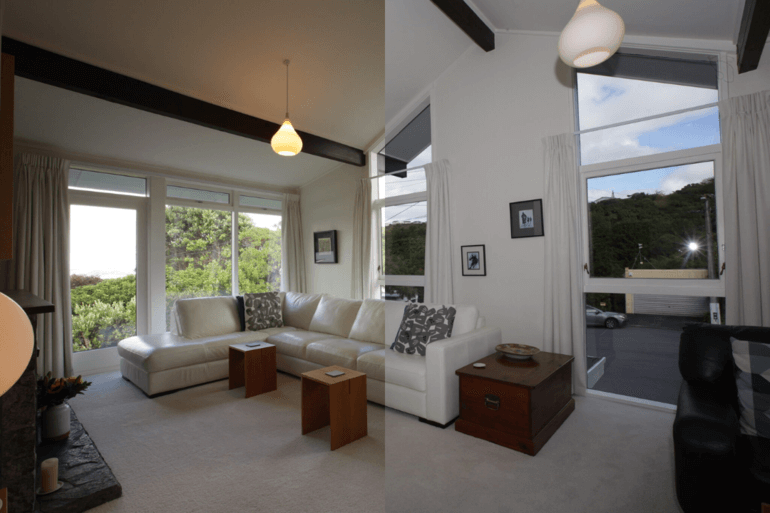
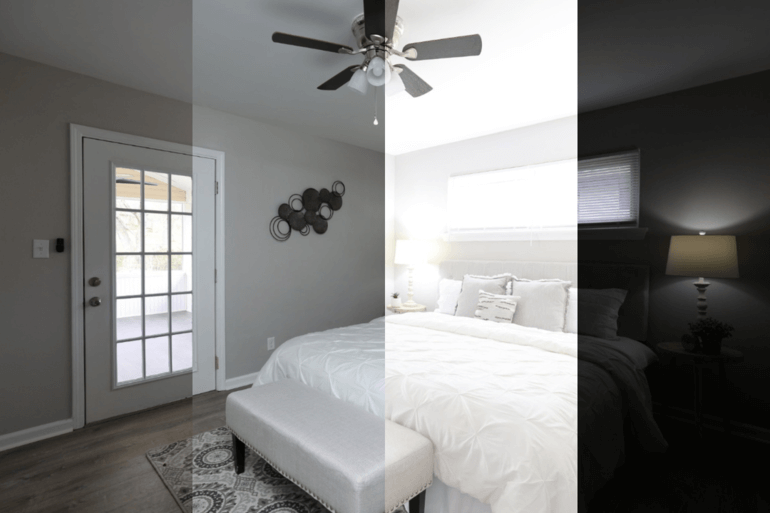
Color correction is a crucial step in real estate photo editing, ensuring that images look natural, vibrant, and true to life.
Color correction is the process of adjusting the colors, tones, and white balance of an image to ensure accurate and visually appealing results.
In real estate photography, color correction plays a crucial role in making images look natural, well-lit, and true to life.
The goal is to enhance the visual appeal of the property while maintaining realistic colors that attract potential buyers.
When Is Color Correction Used?
Real estate photographers use color correction to address various issues in their images, including:
| White Balance Adjustments: Ensuring that the colors in the photo match the actual lighting conditions and removing unwanted color casts. |
| Exposure and Contrast Corrections: Enhancing the brightness and contrast to make the image more vibrant. |
| Saturation and Hue Adjustments: Tweaking colors to make them more appealing while keeping them realistic. |
| Fixing Artificial Lighting Issues: Correcting yellowish or bluish tints from indoor lighting to ensure consistency in all images. |
| Balancing Interior and Exterior Lighting: Adjusting brightness and tones to maintain a cohesive look between indoor and outdoor spaces. |
| Removing Color Casts: Eliminating unwanted tints caused by reflections from walls, furniture, or window glass. |
By making precise adjustments to white balance, exposure, contrast, and saturation, photographers can enhance their photos while maintaining authenticity.
Have You Ever Thought To
Outsource Photo Editing?
Try it today with 10 free edits from three professional photo editors.

How to Do Color Correction in Photoshop (2 Techniques)
With this in mind, let’s show you how to do color correction in Photoshop.
There are two powerful ways to adjust image color—Adjustment Layers and Adobe Camera Raw.
Both offer precise, nondestructive editing, preserving your original file while allowing flexible tweaks or reversals.
Adjustment Layers in Photoshop let you edit specific areas on separate layers, keeping the background intact. You can also stack multiple layers for complex edits.
Adobe Camera Raw provides an organized set of tools for adjusting color and tone across JPEGs, TIFFs, and raw files. Plus, you can save presets to quickly apply adjustments to multiple images.
Let’s get started by showing you how to do color correction using adjustment layers.
Color Correction Using Adjustments Layers
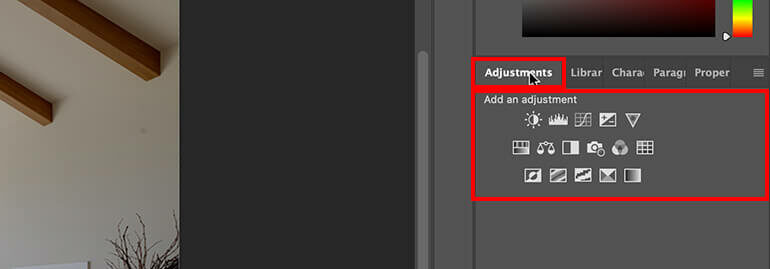
Step 1. To make color corrections in Photoshop in an image using Adjustment Layers, you need to first navigate to the Adjustment Panel.
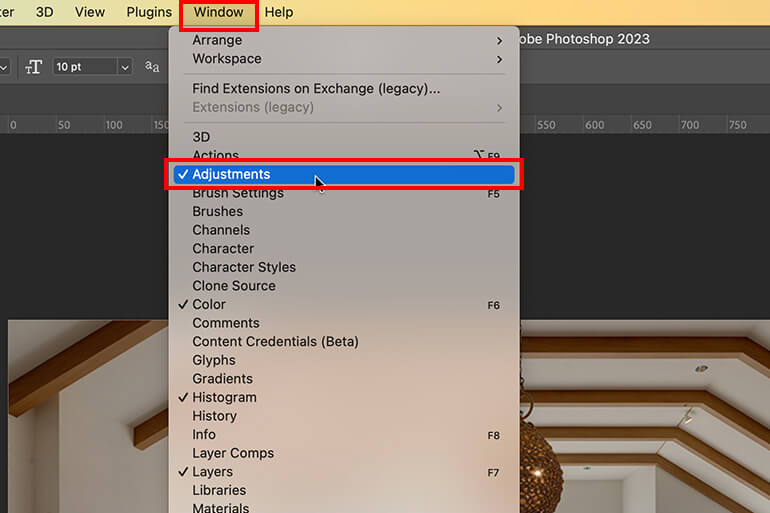
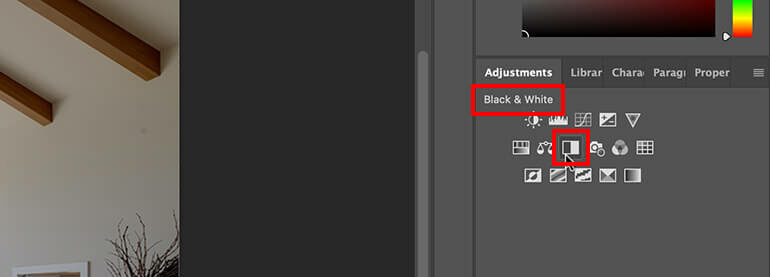
Step 2. In the Adjustments Panel, click the Tool Icon for the adjustment you want to make.
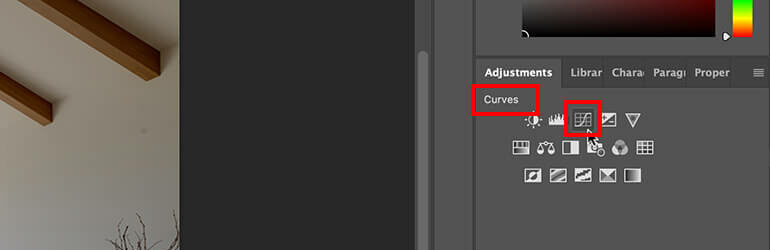
For tonality and color, click Levels or Curves.
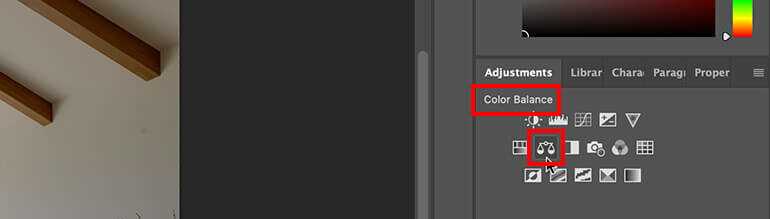
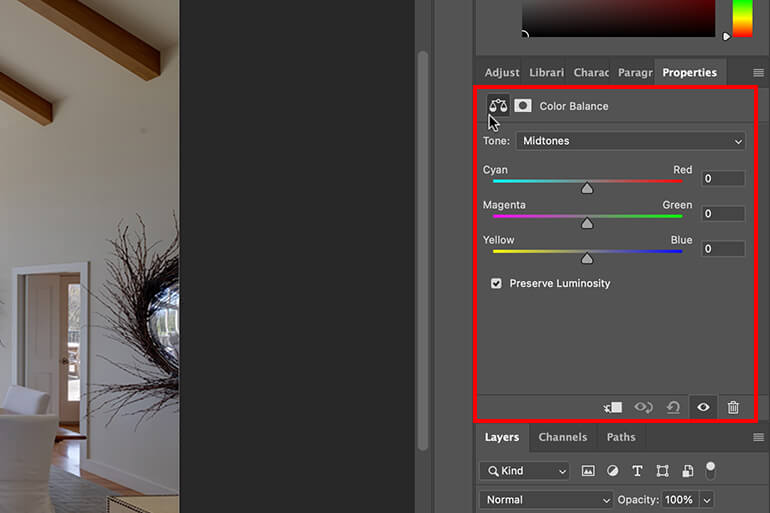
To adjust the color, click Color Balance or Hue/Saturation.
To make an image black and white, click Black & White.
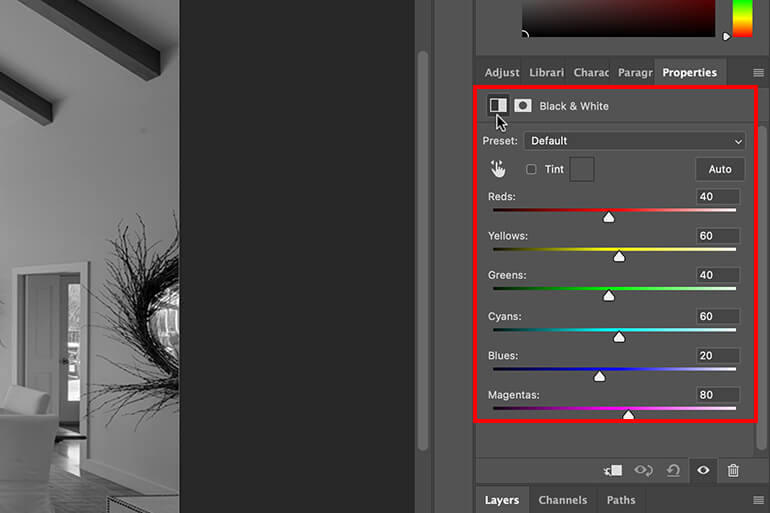
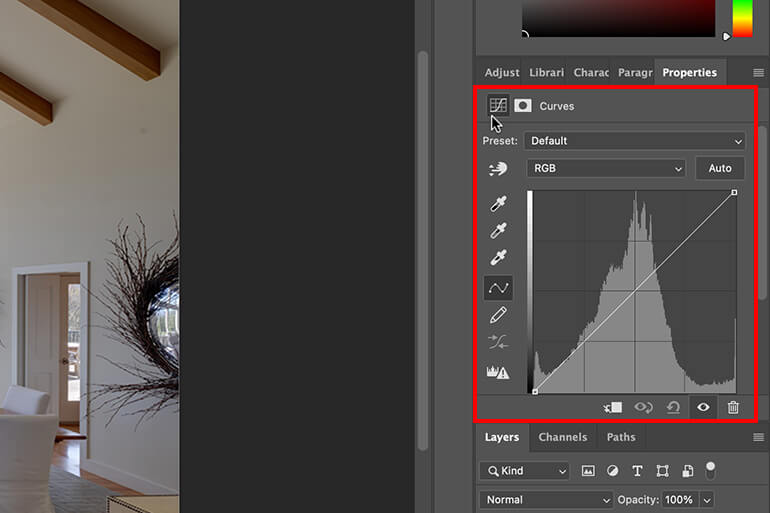
Using these tools, you can then adjust the colors and tones until you’re satisfied.
Let’s now move on to showing you how to make color corrections with the help of the Camera Raw plug-in.
Correcting the Color in Camera Raw
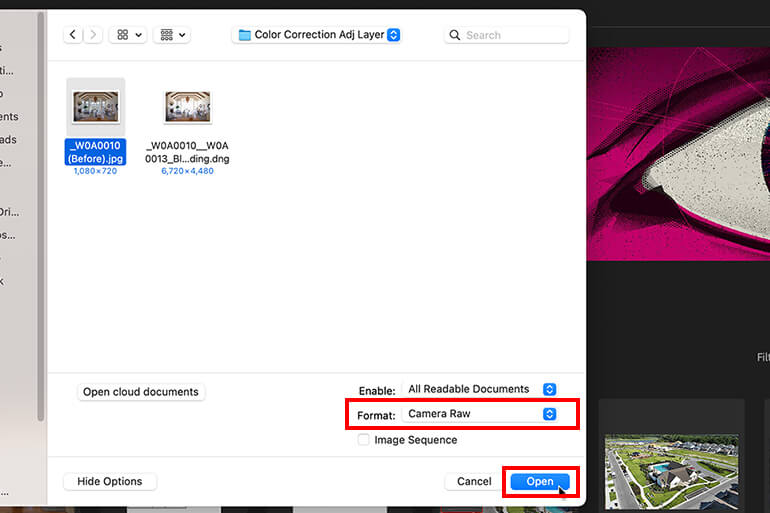
Step 1. To do color corrections using the Adobe Camera Raw plug-in, choose File > Open.
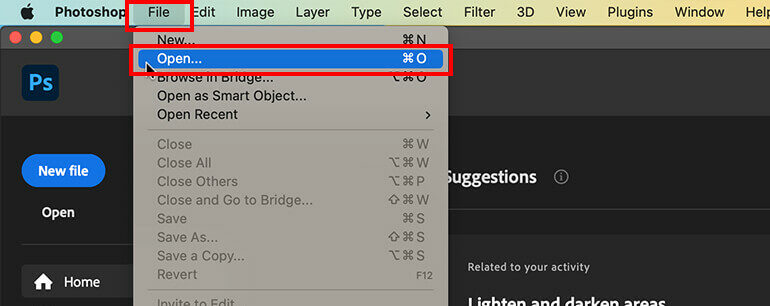
Step 2. In the Open window, select one or more camera raw files, TIFFs, or JPEGs, and then choose Camera Raw from the Format menu and click Open.
Step 3. Use the Controls in Adobe Camera Raw to adjust the settings. For example, you can use the Adjustment Brush to apply edits to specific areas of the image.
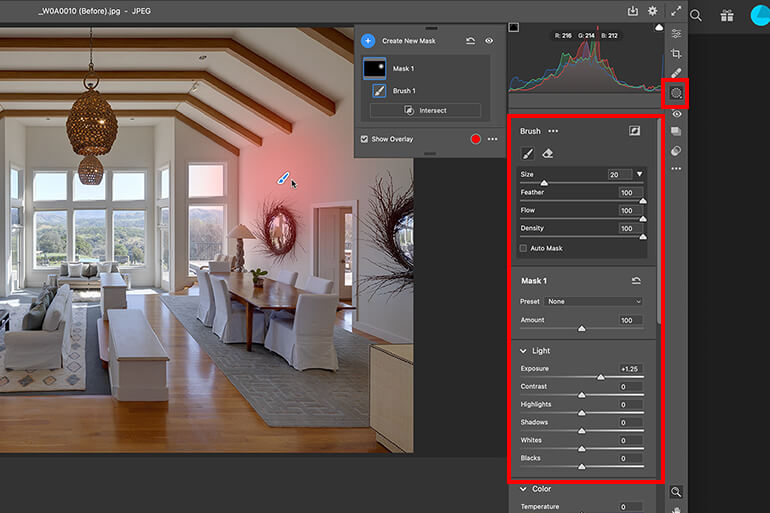
And that’s it!
Other Color Correction Tools
There are other effective tools you can use to make adjustments to the color and tone of an image.
For example, you can right-click on your Adjustment Layer and select Create Clipping Mask. Now, your color adjustments will only be transferred to the single layer beneath it.
You can also use the Eyedropper Tool to sample a color from your image and use it to correct the color of another area.
Lastly, the Color Balance window lets you easily adjust the Midtones, Highlights, and Shadows in your images.
And there you have it! You’ve now learned how to do color correction in Photoshop.
Final Thoughts
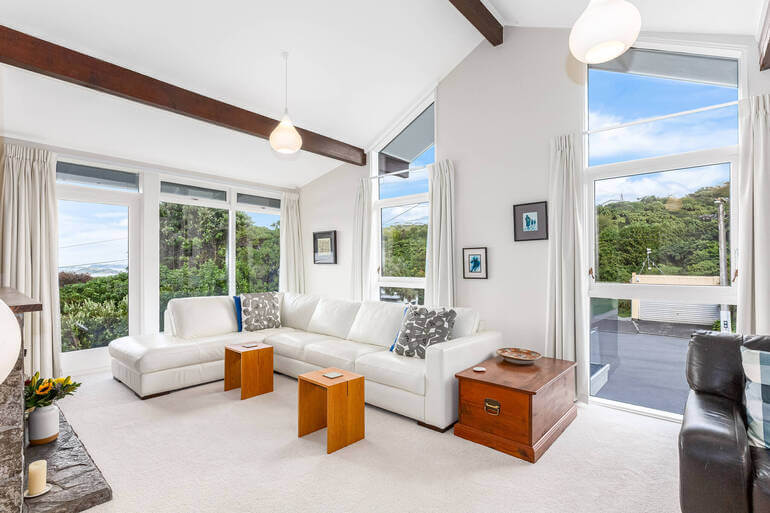
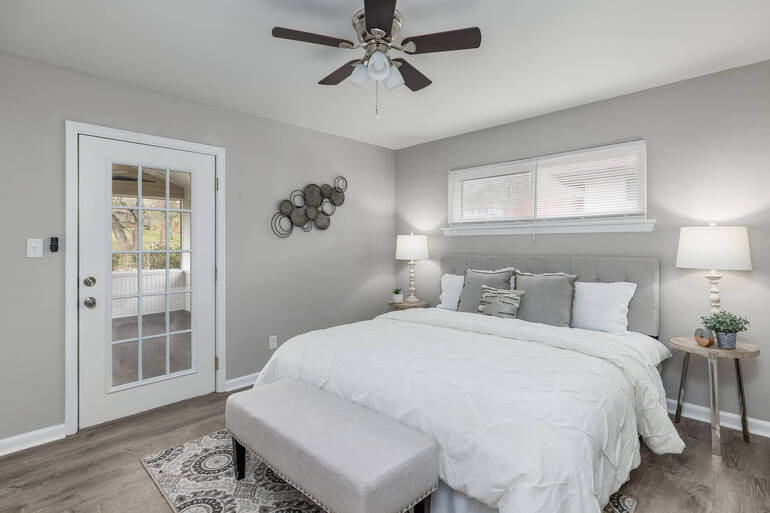
To recap, color correction is an essential step in real estate photo editing that enhances the professionalism and appeal of property images.
By following the steps outlined above in Photoshop, real estate photographers can produce high-quality, color-accurate images that help attract potential buyers and showcase properties in the best light.
Whether adjusting white balance, fixing exposure, or eliminating color casts, mastering color correction techniques will elevate your real estate photography to a professional level.
Color Correction FAQ
1. Why is color correction important in real estate photography?
Color correction ensures that real estate images look natural, well-balanced, and visually appealing.
It helps remove unwanted color casts, correct white balance, and enhance the overall quality of photos, making properties more attractive to potential buyers.
2. What causes color casts in real estate photos?
Color casts can be caused by artificial lighting, mixed light sources (e.g., daylight and incandescent lights), reflections from colored walls or furniture, and incorrect camera settings.
Color correction helps neutralize these unwanted tints for a more natural look.
3. How does white balance affect real estate photos?
White balance controls the temperature of an image, making it appear warmer (yellow/orange) or cooler (blue).
Accurate white balance ensures that the colors in a property’s interior and exterior appear realistic and consistent across all photos.
4. What is the best tool in Photoshop for color correction?
The Camera Raw Filter is one of the most effective tools for color correction in Photoshop. It allows users to adjust white balance, exposure, contrast, saturation, and color tones efficiently.
Other useful tools include Selective Color Adjustment, Curves, and HSL (Hue, Saturation, Luminance) adjustments.
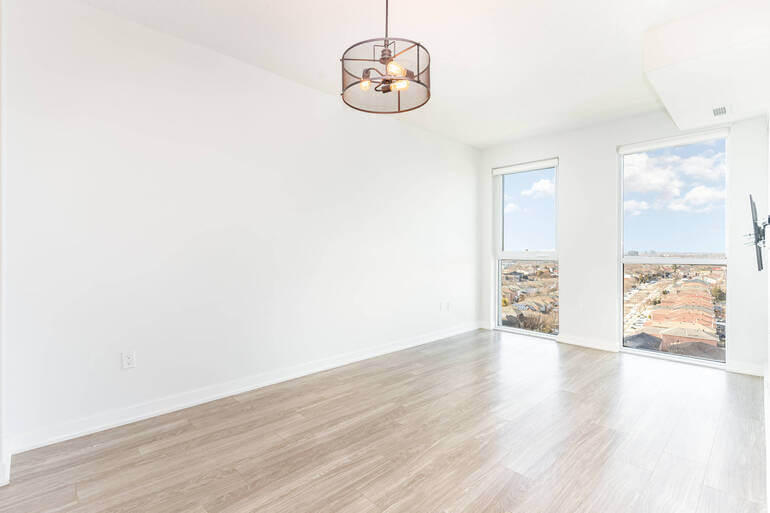
5. Can color correction make a poorly lit photo look professional?
Yes, color correction can significantly improve a poorly lit photo by adjusting exposure, contrast, and brightness levels.
However, it cannot completely fix extreme underexposure or overexposure. Proper lighting during the shoot is still essential for the best results.
Handle Over Your Photo Editing to the Experts at PhotoUp
Let PhotoUp handle your editing so you can focus on shooting more properties and growing your business.
Our expert real estate photo editors are ready to transform your images into stunning, market-ready visuals.
PhotoUp provides fast turnaround times, user-friendly photo management tools, and expert editing techniques, including:
- Image correction and enhancement
- Color and tone adjustments
- Window masking and glare reduction
- Clutter and object removal
- Perspective corrections
- HDR editing
- Manual blending
- Sky replacements
- Day-to-dusk conversions
- And much more!
By outsourcing editing to us, you can save hours of work you can use to shoot more homes and grow your real estate photography business.
Browse Top Dedicated
Real Estate Photo Editors
Ready-to-hire editors for real estate photo editing, and more.
PhotoUp Is a Trusted Brand
PhotoUp is a trusted brand and has been featured on some of the most well-respected real estate photography blogs/podcasts like the PFRE and Shooting Spaces, plus other big new stations such as NBC, Fox News, USA Today, and CBS.
Also, with hundreds of 5-star reviews on verified review sites, you can rest assured your real estate marketing is in safe hands!
Your Real Estate Marketing Partner
Beyond standard photo editing, PhotoUp is a complete real estate marketing partner and also offers powerful services such as:
✅ Single property websites
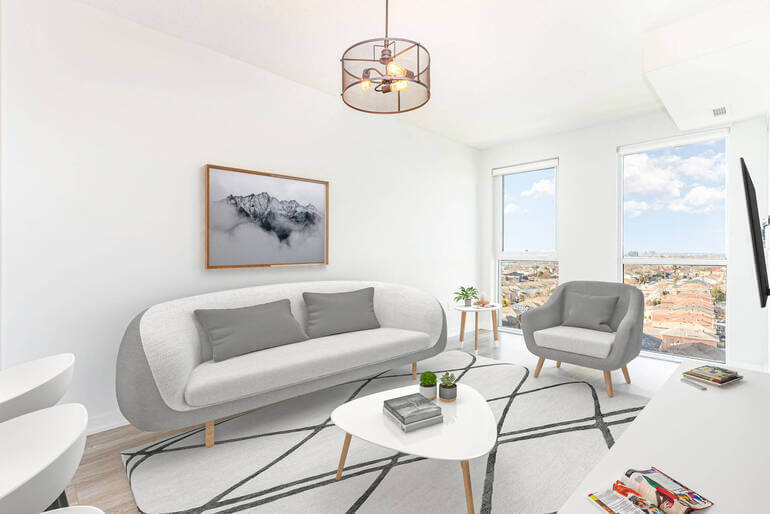
✅ Virtual staging
✅ Virtual house tours
✅ Custom house portraits
✅ And property flyers
Enjoy fast 24-hour turnaround times, with editing services starting at just $1.50 per image for on-demand editing. Dedicated editing can go as low as $0.50 per image depending on the style and editing batch.
How to Get Started
Getting started is super easy – this is what to do:
Step 1. Sign up for a free PhotoUp account.
Step 2. Upload your photos to our easy-to-use software.
Step 3. Choose the level of editing that you need and provide instructions (optional).
Step 4. Wait for PhotoUp professional editors to edit and return the photos in less than 24 hours (48 hours for virtual staging).
Step 5. Download and start using your beautifully edited photos.
PhotoUp Real Estate Photo Editing Uploader Demo
To see how easy it is to get started with PhotoUp, check out our real estate photo editing uploader demo:
It’s really that easy to get your beautifully edited photos returned to you in less than 24 hours!
Sign up for a free PhotoUp account today, and take your real estate photography to the next level with the help of our professional editors!
For a limited time, we even offer 10 free credits you can use on any of our services when you sign up for an account.
We hope this guide helped you learn how to do color correction in Photoshop. Before you go, you may also want to check out some related resources:

