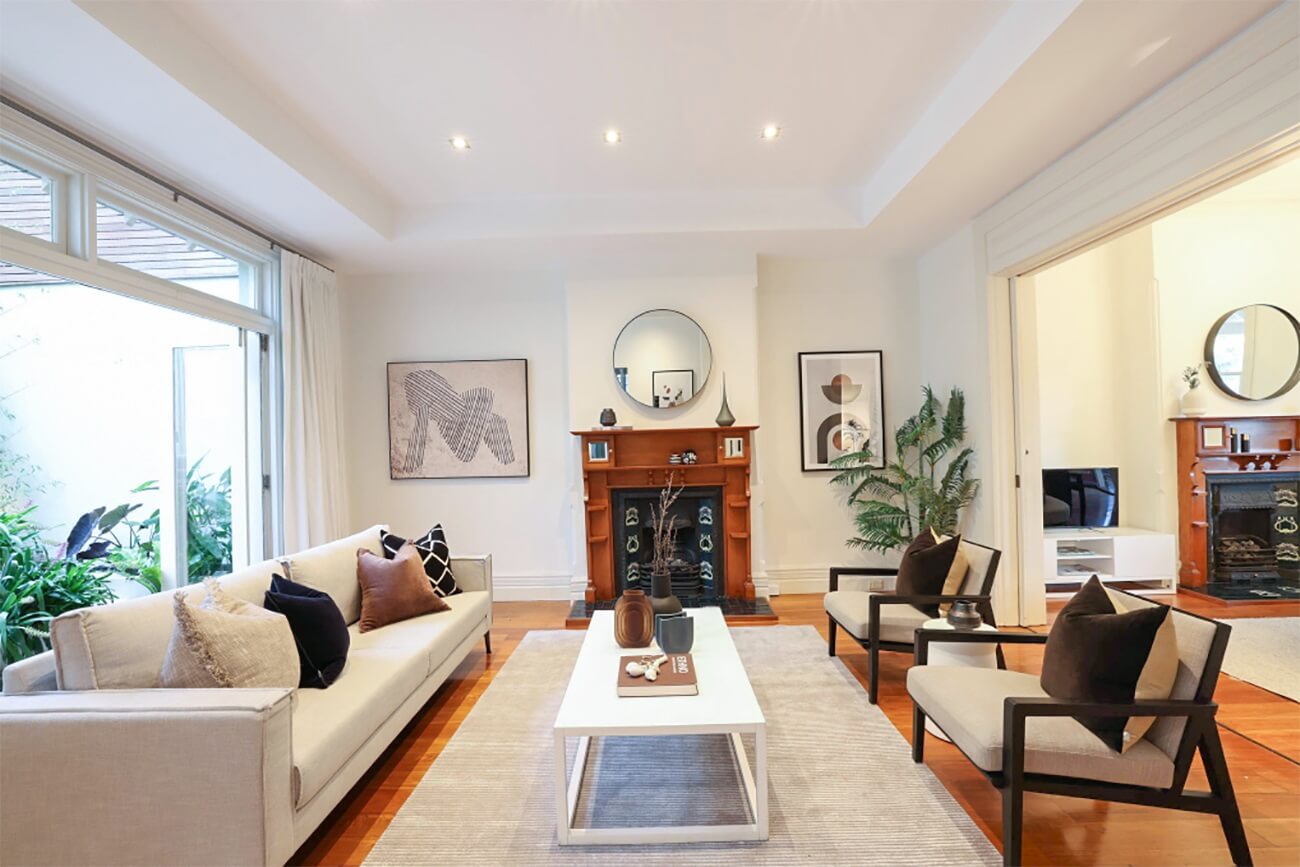
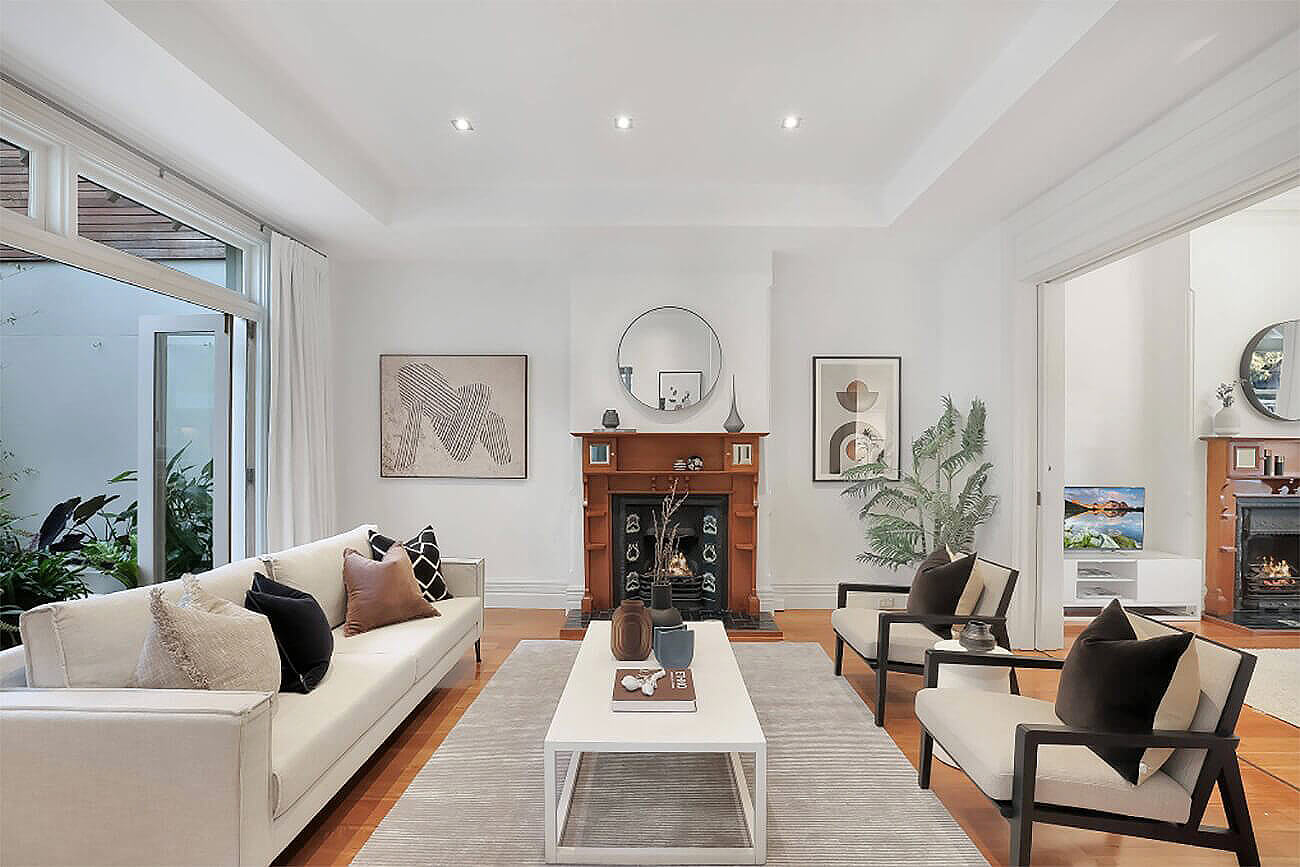
Table of Contents
- What Is Real Estate Photo Enhancement?
- Is Real Estate Photo Editing Really Necessary?
- Popular Real Estate Photo Enhancement Programs
- Is AI Real Estate Photo Editing Worth It?
- Top 7 Real Estate Photo Enhancements
- Save Time on Real Estate Photo Editing With PhotoUp!
Real estate photography isn’t just about capturing spaces, it’s an art that requires bringing out the very best in a property. High-quality images can make a monumental difference in how a listing is perceived and ultimately how quickly it sells.
But snapping the picture is only half the battle – the other half is skillful enhancement to make the property look its absolute best.
In this guide, we’ll share the essentials of real estate photo enhancement, helping photographers turn good shots into great sales tools. We’ll also cover 7 edits to help you transform dull images into stunning real estate photos.
What Is Real Estate Photo Enhancement?


Real estate photo editing or real estate photo enhancement is the process of adjusting and enhancing photographs to make them more appealing and realistic to potential buyers.
This practice involves altering various elements like brightness, contrast, saturation, and other visual aspects to create an eye-catching result that draws buyers in.
Is Real Estate Photo Editing Really Necessary?
Absolutely! In today’s competitive real estate market, first impressions are crucial, and often, the first interaction a potential buyer has with a property is through its photos.


Consider these stats:
- 83% of buyers said pictures are very important in helping them choose which homes they will visit
- 61.3% of brokers believe high-quality photography is ‘crucial’ for selling homes
- Homes with drone photos or aerial photos sell 68% faster
- And property listings featuring high dynamic range (HDR) photos sell 50% faster and increase online views by 118%
When also taking into account that 99% of home buyers used the Internet to find homes in their home-buying process in 2022, we can boldly state that editing is essential to make your real estate photography stand out online and attract buyers.
Overall, editing can highlight a property’s best features, correct lighting issues, and present the property in its best light regardless of the environmental conditions at the time of the shoot.
Popular Real Estate Photo Enhancement Programs

There are numerous programs and software available for photo enhancement, ranging from simple, user-friendly applications to professional-grade tools such as:
- Adobe Photoshop
- Adobe Lightroom
- Corel PaintShop Pro
- Serif PhotoPlus
- Canva
- And more.
Each of these offers a different interface and tools that cater to various editing styles and preferences.
To learn more about each program and its features, you can visit our blog post on the 5+ best photo editing programs for real estate photographers.
Is AI Real Estate Photo Editing Worth It?
AI photo editing is becoming increasingly popular due to its automation and efficiency. It can save significant amounts of time while producing consistent results.
AI tools like AgentUp can detect elements within an image, make smart adjustments for lighting and colors, and even replace skies or clear clutter. They are worth considering, especially for large batches of images.

However, for more advanced editing and maximum image consistency, we recommend working with a dedicated editor who learns your style and can help with photo management and branding.
Top 7 Real Estate Photo Enhancements
With this in mind, let’s look at 7 real estate photo editing techniques that will help you create eye-catching images that are sure to impress potential buyers.
1. Brightness, Color, and Contrast Adjustments
Adjusting the brightness, color, and contrast can help your photos pop and emphasize different areas of the property.


Even though these edits may seem simple and obvious, they can transform an image from looking bland into a bright and appealing one.
Altogether, these basic retouching techniques can turn a mediocre photo into a captivating one that will capture buyers’ attention and help your clients sell their listings.
To learn how to adjust the colors and make your real estate photos pop, check out our blog post tutorial on how to color correct in Photoshop.
Additionally, this video tutorial walks you through how to brighten a photo in Photoshop:
2. Perspective Correction
In the world of real estate photography, precision is key, and every line tells a story. The mission is clear: ensure that every horizontal and vertical line stands perfectly true.


But many factors, like the lens’s inherent curve, the room’s unique contours, furniture arrangement, or even the camera’s placement, can throw these lines off, leaving you with an image that feels a bit…off-kilter.
No need to fret, though! There’s a magic wand in the editing world known as perspective correction, ready to vanquish any skewed lines hindering your shot’s perfection.
To learn how to align verticals, you can check out our video tutorial on how to straighten verticals in Photoshop:
3. Sky Replacement
A gloomy, dull sky can be swapped out for a sunny backdrop or a beautiful twilight to create the right mood and make potential buyers stop and take an extra look.


A sky replacement in real estate photos can:
- Make the property look more appealing
- Offer a mood booster
- Make viewers look extra long at your property photo
- It also provides real estate photographers more freedom when not having to worry about the weather or the time of day to do the photoshoot
So with a few tricks, you can replace gray, cloudy, or overcast skies with summery, sunny ones in Photoshop.
To learn how to transform dull winter skies into bright and inviting ones, check out our video tutorial on how to do a sky replacement in Photoshop:
Additionally, here’s another tutorial video on how to replace a summer sky in Photoshop:
4. Lawn Enhancement
Making the greens greener can go a long way in creating captivating exterior real estate photography. A lush lawn can add life to exterior shots.


Sometimes you need to take photos in the wrong season when the lawn has dead spots. Or when there hasn’t been a lot of rain and the grass is brown.
While that’s unfortunate, the good news is that you can use Photoshop to adjust the color of your lawn to enhance the landscaping of your photo.
To learn how to create a green beautiful lawn, check out our video tutorial on how to make grass green in Photoshop:
High-Quality & Consistent
Real Estate Photo Editing
Hire a dedicated editor with performance metrics from $7/hour.
5. Object Removal
More often than not, real estate photography includes unwanted objects that you need to remove to clean up the image and make it more appealing.


For example, some common situations where you may want to remove an object are:
- There’s a car in the driveway, blocking the wonderful view of the garden
- The TV cords show and make the image appear cluttered
- The granite counter would have been perfect if not for that old frying pan that was overlooked during the shoot
- There’s an ugly crack in the bathtub, or the wallpaper is coming off in the kitchen
- You failed to notice that someone passed by the property while making the shot
To learn how to use the Clone Stamp Tool to declutter your images, watch this tutorial video on how to remove cords in Photoshop:
For more details and expert tips, check out this video tutorial on how to remove a car from a driveway in Photoshop:
6. Window Masking
Unmanageable sunlight streaming through a room’s windows can wreak havoc on photo quality, casting excessive glare, blurring fine details, and washing out colors.


Even spotless windows can become an unintended focal point when blinds impose their patterns or obscure the view. These commonplace scenarios can mar the picture-perfect appeal vital for real estate imagery.
Window masking not only rectifies issues with light but also offers the creative liberty to modify or enhance the exterior landscape as viewed through the windows.
To learn how to do window masking, visit our blog post on how to mask windows for real estate photography in Photoshop or watch this tutorial video:
7. Adding Fire in the Fireplace
You can make your interior images warm, interesting, and inviting by adding a beautiful fire in that unlit fireplace.


Who wouldn’t feel drawn to a nice, crackling fire in a beautiful fireplace? Potential buyers can imagine themselves cozying up with a loved one in front of that fire.
Check out this video tutorial to learn how to add fire to a fireplace using Photoshop:
And that’s it!
Incorporating these real estate photo enhancements can dramatically impact your real estate photos, potentially leading to quicker sales and more satisfied clients.
Remember, real estate photo enhancement isn’t about deceptive practices but optimizing photographs to reflect the real potential of properties.
With these skills in your toolbox, you’re well on your way to mastering the art of real estate photography.
Have You Ever Thought To
Outsource Photo Editing?
Try it today with 10 free edits from three professional photo editors.
Save Time on Real Estate Photo Editing With PhotoUp!
Transforming real estate photos into true masterpieces demands attention to detail and significant time commitment.
Savvy photographers and agents, valuing the essence of time, typically opt to pass on the intricate editing responsibilities to experts who specialize in this craft.


This is when entrusting the photo editing process to professionals becomes a strategic move that can reshape the way photographers manage their workflow.
PhotoUp, based in the US and with additional offices in the Philippines, offers a full range of services to cater to all your photo editing needs, including:
- Brightness and color correction
- Vertical lines adjustments
- Advanced object removal
- Day-to-dusk conversion and Twilight editing
- Lawn greening and sky replacements
- HDR editing
- Manual blending
- Flambient editing
- And much more!
PhotoUp’s team of editors can handle any editing job — big or small, complex, or simple.
Browse Top Dedicated
Real Estate Photo Editors
Ready-to-hire editors for real estate photo editing, and more.
Plus, our pricing is also affordable, with most photo editing services starting at only $1.10 per image depending on your subscription.
Full-Service Real Estate Marketing Partner


Additionally, PhotoUp does much more than just real estate photo editing. We are a full-service real estate marketing partner and also offer powerful marketing tools such as:
- Virtual staging
- Virtual house tours
- Single property websites
- Real estate photographer websites
- Property flyers
- Floor plans
- Video editing
- Virtual Assistants
- House portraits
- And more!
As you can see, we have everything you need to enhance and market real estate in one user-friendly platform.
How to Get Started
Getting started using PhotoUp’s real estate photo editing service is super easy.
All you need to do is sign up for a free PhotoUp account, upload your images, choose export settings and turnaround time, download your edited images, and that’s it!
PhotoUp Real Estate Photo Editing Demo
Have a look at the real estate photo editing uploader video demo to see how easy it is to get started with PhotoUp:
As simple as that!
So, take the next step and have all your listing photos look their absolute best.
Sign up for a free PhotoUp account today, and give PhotoUp’s professional real estate photo editing service a try!
For a limited time, we even offer 10 free credits you can use on any of our services when signing up for an account.
We hope this real estate photo enhancement 101 guide helped you learn how to create captivating images that will impress your clients and accelerate sales. If you found this guide useful, you may also want to check out some related resources:


