


Table of Contents
- Essential Principles to Consider When Editing Interior Photos
- How to Edit Interior Photos (Step-by-Step Tutorial of 10 Techniques)
- Outsource Your Real Estate Photo Editing to PhotoUp!
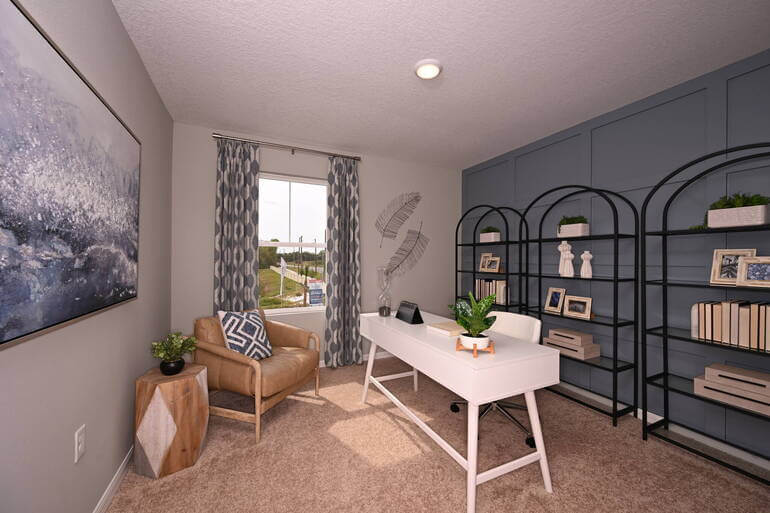
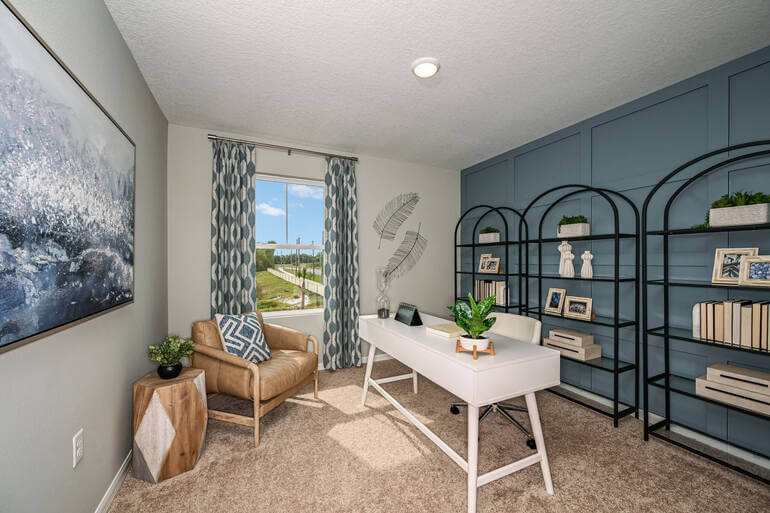
Do you want to learn how to master interior photo editing with 10 powerful and relatively simple techniques?
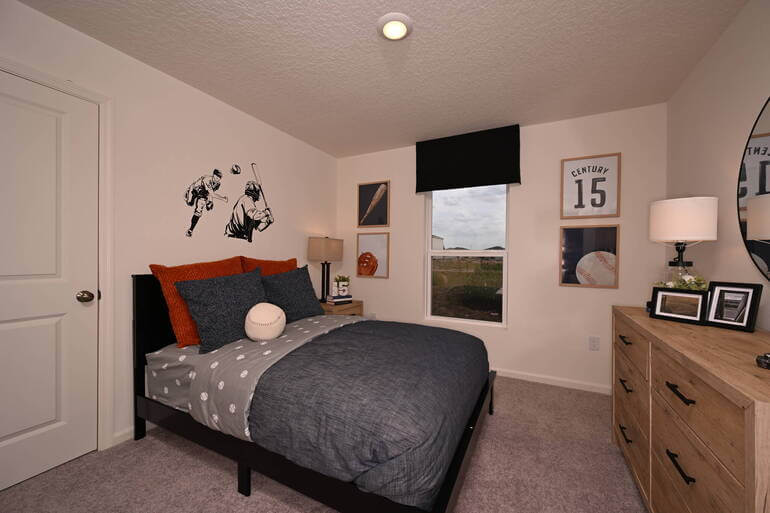
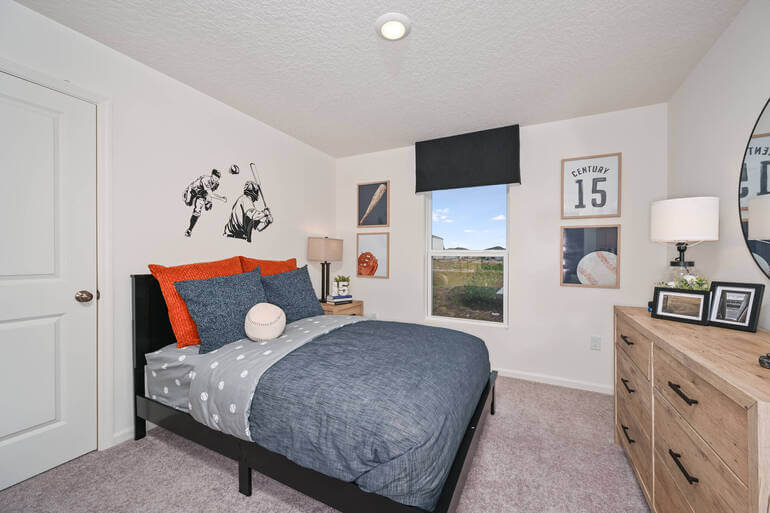
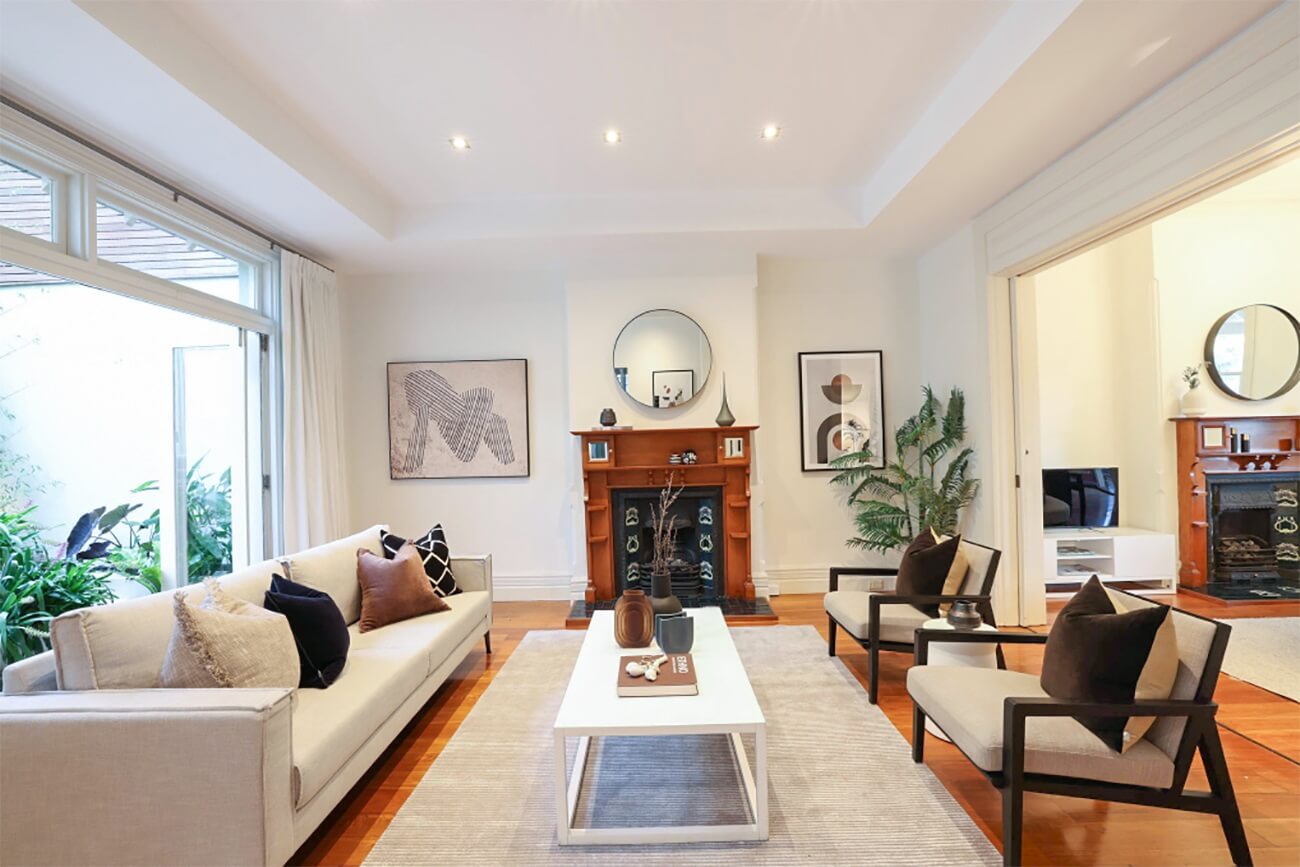
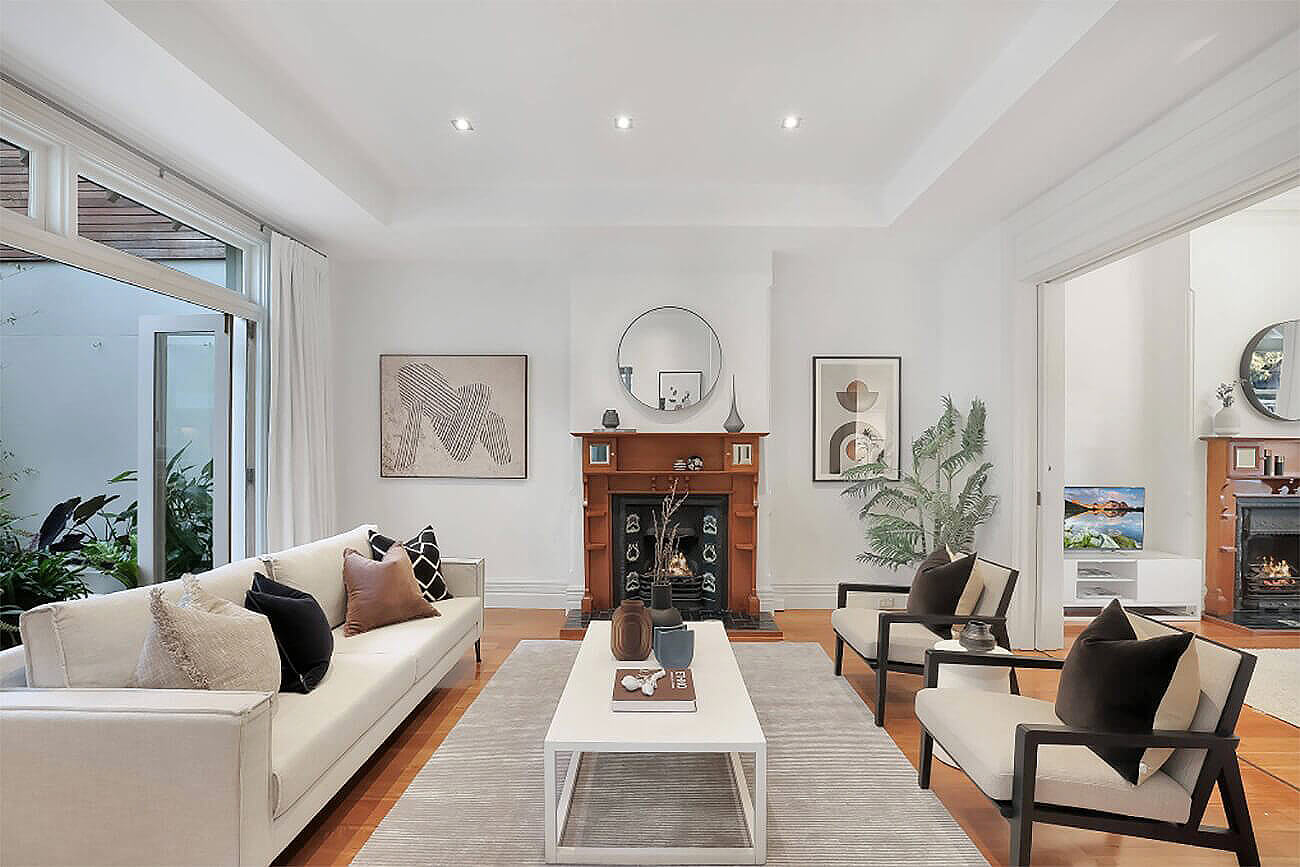
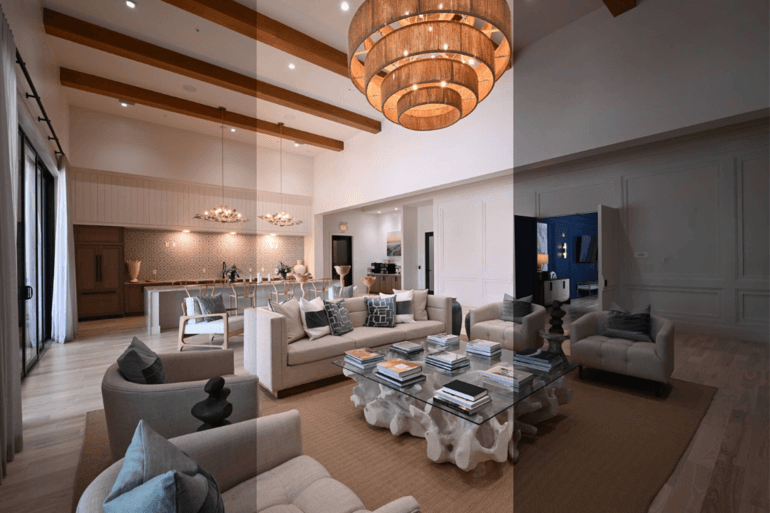
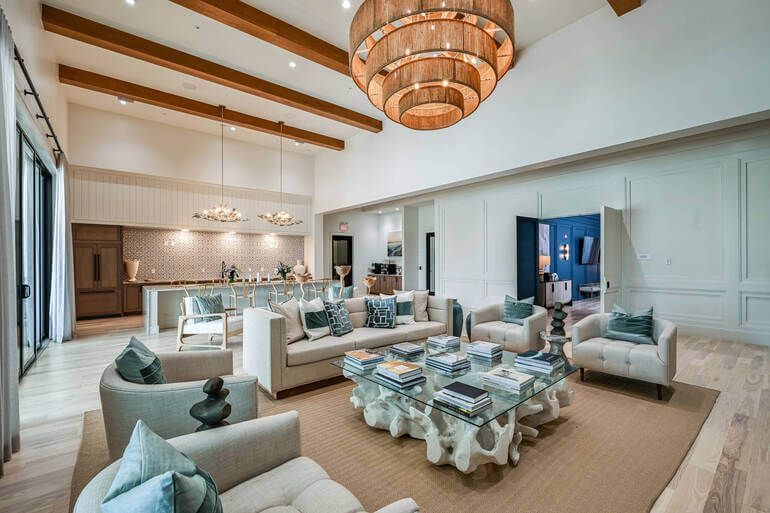
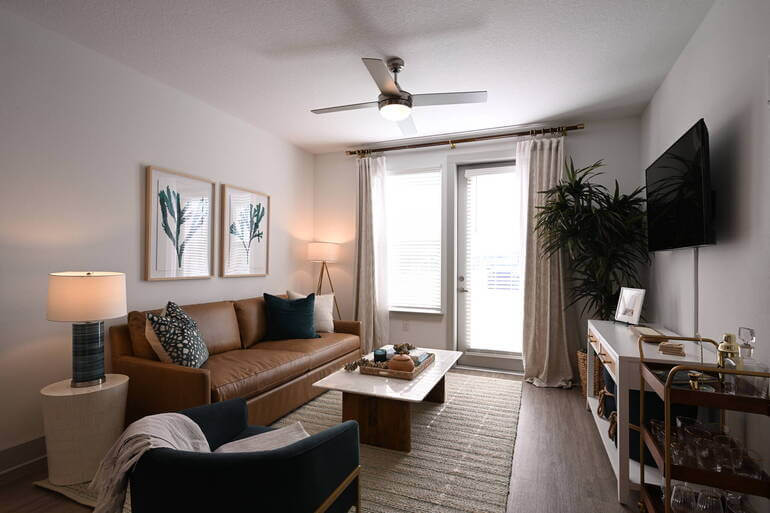
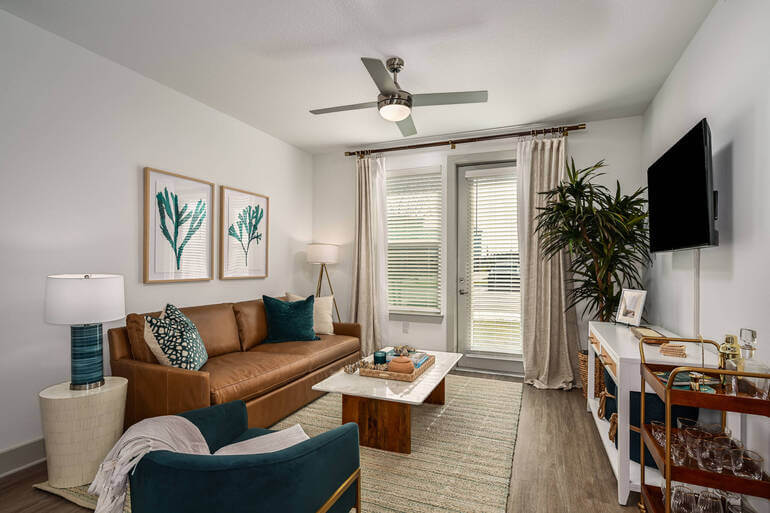
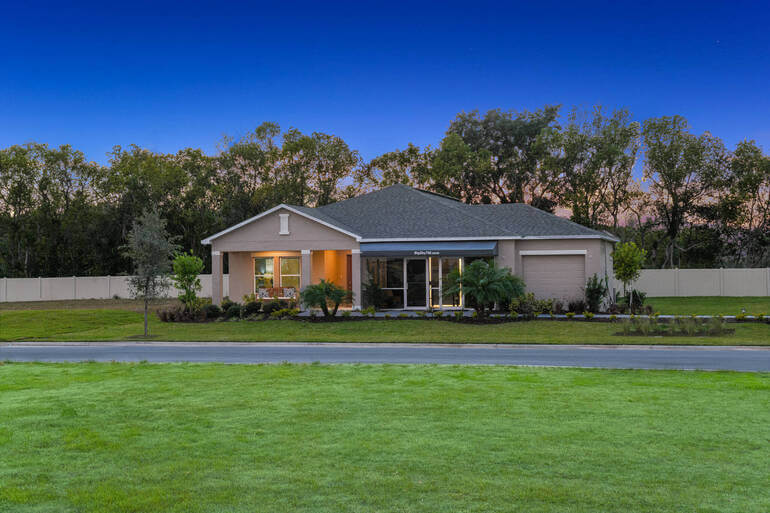
Photo editing is a crucial aspect of any real estate photography business, period. It allows you to tweak lighting, remove unflattering objects, enhance colors, align verticals, and more, so you can produce “picture-perfect” photos every single time.
In this guide, we’ll show you how to master interior photo editing to help you create bright and inviting real estate photos that will impress your clients.
Let’s begin by looking at some essential principles when editing interior photos.
Essential Principles to Consider When Editing Interior Photos
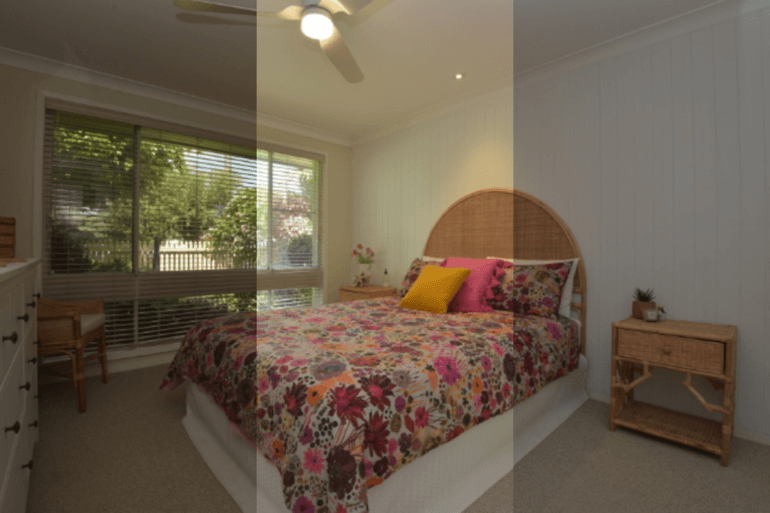
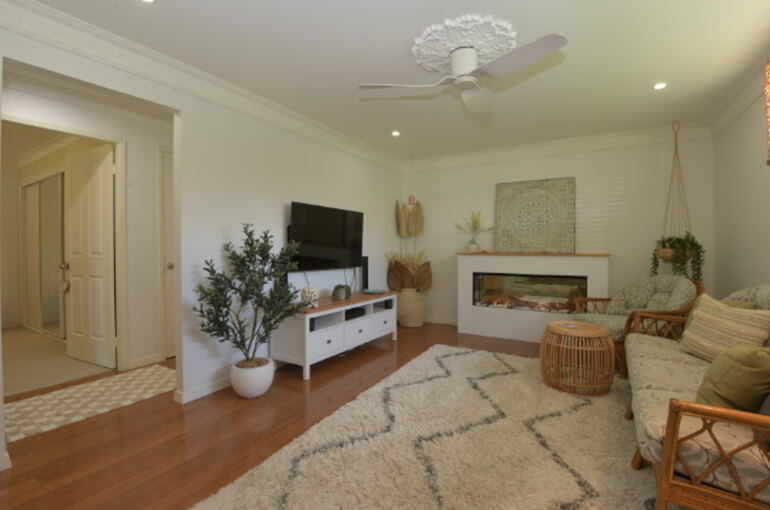
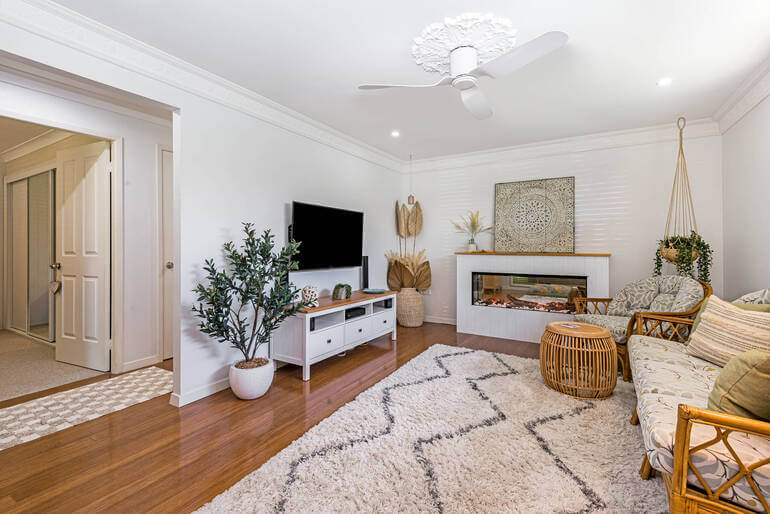
When editing interior real estate photography, achieving certain aesthetic standards is crucial to creating visually pleasing images.
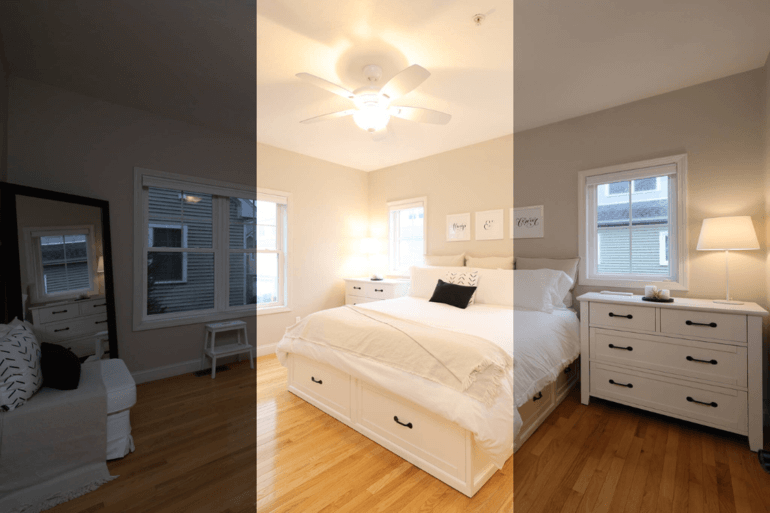
The foremost principle is to ensure that each photograph is sufficiently exposed to render a bright and welcoming ambiance. Dark, dreary images are generally unwelcome.
However, one must be careful not to overexpose the image to the point where the highlights become distracting or overbearing. Balancing light and dark areas is essential.
Contrast also plays a pivotal role. Optimal contrast ensures that darker elements remain deep and impactful, while lighter parts of the image, such as walls, don’t become overwhelmed by shadow.
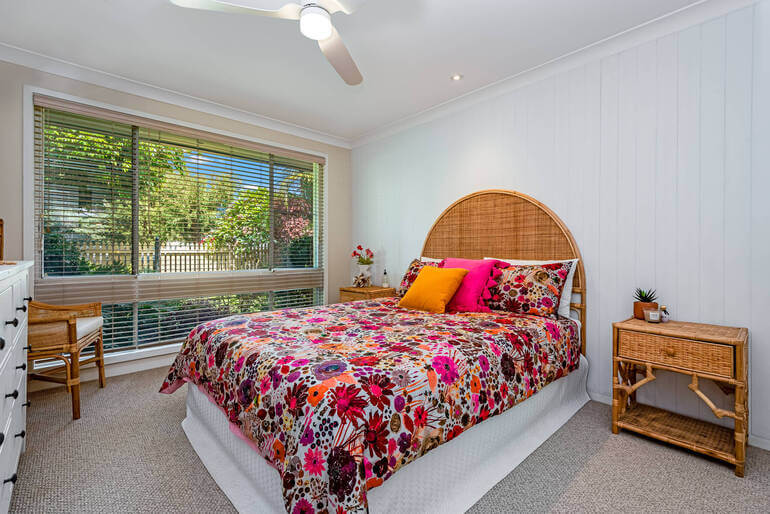
Remember to Highlight Window Views and Reflect True Hues
Additionally, window views within the frame deserve special attention—they should appear vibrant with high contrast. Landscapes or nature scenes through the window benefit from being prominently displayed.
White balance and color temperature consistency across the photo are fundamental for authenticity. The home’s architecture, furniture, and fixtures must reflect their true hues.
Don’t forget to manage and mitigate color cast, whether it’s from artificial lighting or natural sunlight intruding through windows, which is key to maintaining the integrity of the colors.
Furthermore, any colorful components within the shot—from wood flooring to expansive, colorful furniture pieces—should express vibrancy and warmth, emphasizing the liveliness of the space.
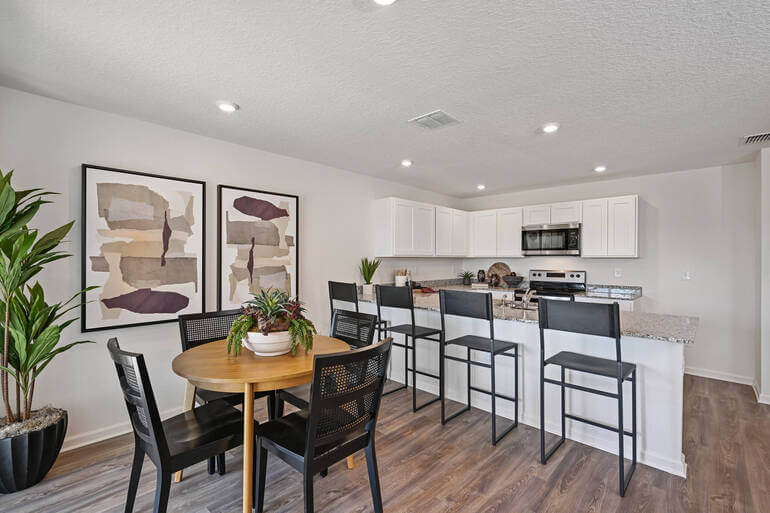
Overall, the most vital criterion for interior photography is realism. Above all, photos must evoke a sense of believability and trust, resonating with the viewer as genuine slices of life.
With this in mind, let’s take a look at how to edit interior photos in Photoshop and Lightroom.
How to Edit Interior Photos (Step-by-Step Tutorial)
Well-lit, warm and inviting real estate photography is crucial for selling homes. According to recent studies, 68% of potential buyers say that great photos made them want to visit the home.
No matter how good of a real estate photographer you are, you always need to edit your images to make the final touches.
Luckily, some quick and easy edits can make your dark images look bright and shiny.
1. Brightness and Exposure
In learning how to master interior photo editing, we will start by looking at brightness and exposure correction.
Nobody likes looking at dark, dull photos, so your photos should naturally be nice and bright. However, it’s important to avoid blown-out highlights or deep, dark shadows.
Relying on your light meter settings can go a long way in preventing exposure issues. But even with lots of care and planning, photos can still come out improperly exposed in situations like:
- Glaring windows on sunny days
- Fabrics and textures that soak up light
- Mirrors and reflective surfaces
- Or unbalanced or mixed lighting situations
To quickly and easily change the exposure of your real estate photos in Photoshop, you can click on the Adjustments tab and Create a new Exposure adjustment layer by clicking on the Plus-Minus icon.
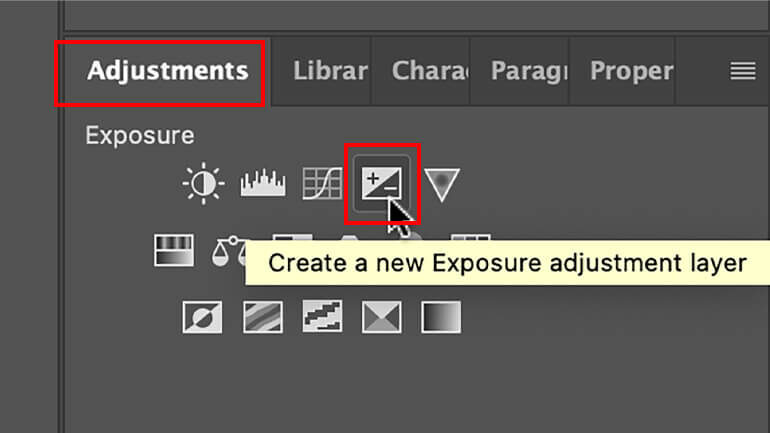
Or you can simply click on the Create new fill or adjustment layer icon in the bottom menu and choose Exposure.
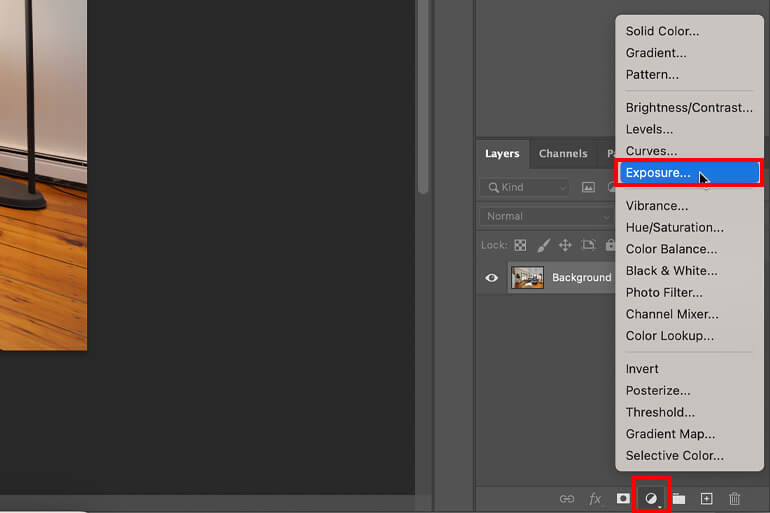
The Exposure window will now pop up, and you can use the Exposure slider and drag it to the left or right to adjust the exposure.
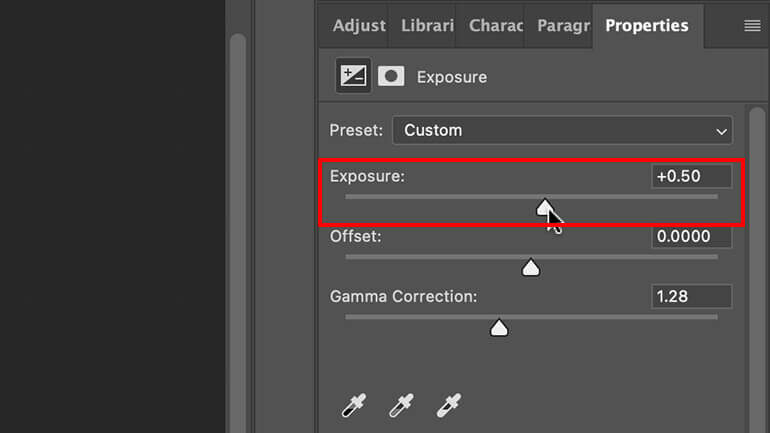
Watch out for not making your images over or under-exposed using this method though.
For example, adjusting the exposure too high will create blown-out details and if under-exposed, the image will look too dark. Use your judgment, and you’ll find the right balance.
For more details and two additional ways to change the exposure and brightness, you can check out our blog post on how to change exposure in Photoshop (3 simple ways).
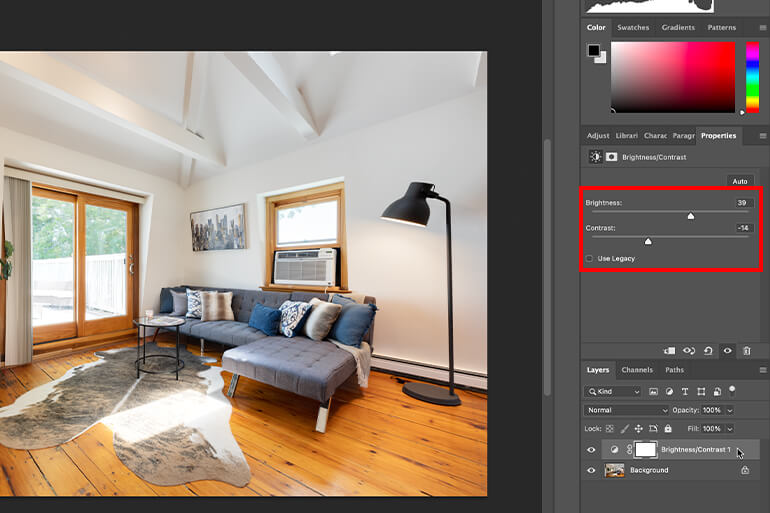
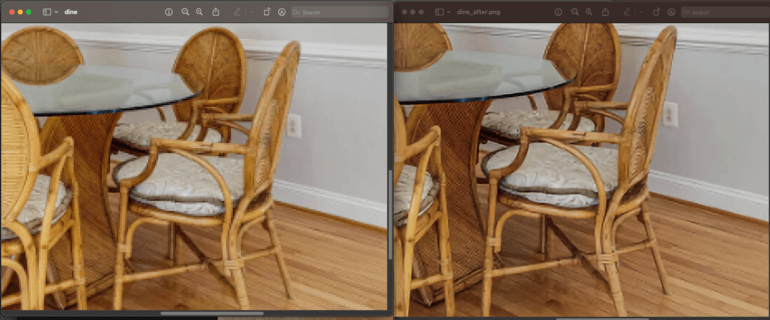
2. Adjusting the Contrast
Achieving the right balance of contrast is crucial for your image. Aim for deeper tones to remain robust, while simultaneously ensuring that the walls and lighter areas of the photograph are adequately illuminated.
Additionally, any colorful components within the picture should pop with vividness and exhibit the appropriate warmth or coolness.
The easiest way to adjust the contrast and brightness of a photo in Photoshop is to create a new Brightness/Contrast adjustment layer in the Adjustments tab.
Or just like when adjusting the exposure, you can go to Layer and then click on New Adjustment Layer > Brightness/Contrast. Or you can simply click on the Create new fill or adjustment layer icon in the bottom menu and then click Brightness/Contrast.
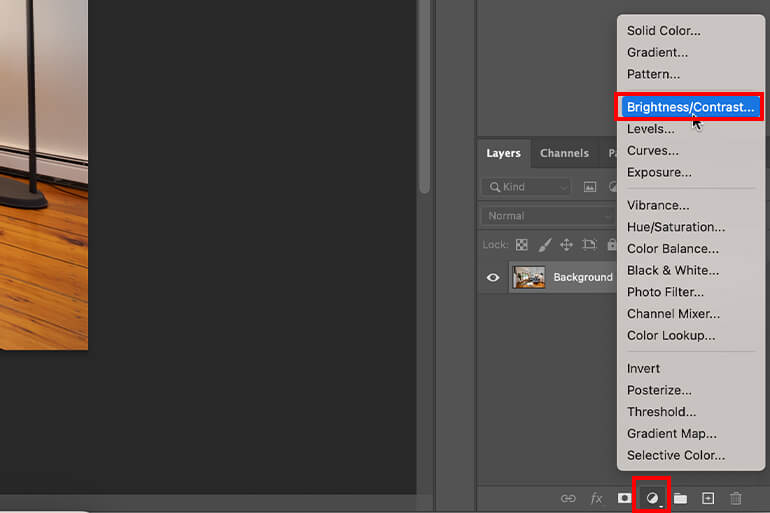
And in the Brightness/Contrast window, you can now adjust the brightness slider left or right to darken or lighten the photo.
3. Adjusting the White Balance
Poor white balance ranks as a prevalent pitfall that diminishes the allure of real estate photography.
Imbalance in white balance can cast a drab layer of yellow, blue, or green hues over your photos. Such tinting can be off-putting to prospective buyers, deterring the visual impact of your showcase.
The objective is to recalibrate until you capture the ambiance accurately, emanating a natural and inviting atmosphere through your images.
Fine-tuning this element not only revives the vibrancy of the property but also encapsulates an aesthetic that resonates with viewers.
In this video tutorial, we’ll show you 2 simple techniques on how to adjust white balance in Photoshop:
4. Perspective Correction
Many interior photos are ruined by distorted linear lines. For example, these would be uneven or bent lines of:
- Ceiling and corners
- Cabinet edges
- Windows and their framing and treatments
- Larger furniture or decorative objects
- Possibly also the fireplace
But fret not, well-done photo editing can straighten things after the shoot using cropping overlays and vertical/horizontal transform tools.
To learn more, watch our video tutorial on how to straighten verticals in Photoshop:
Have You Ever Thought To
Outsource Photo Editing?
Try it today with 10 free edits from three professional photo editors.

5. Removing Color Cast


Nobody wants to see color casts in photographs, especially not in the competitive world of real estate. Color cast is a tint of an unwanted color that detracts from the overall quality of an image.
There’s a range of lighting conditions that can be responsible for creating color cast in a photo, including:
- When fluorescent bulbs are used and can produce a bluish hue
- Or when dark window tint film makes a beige-colored wall look something like a watered-down fruit smoothie
- Plus, gray skies outside can also put a damper on an otherwise bright-looking interior wall
Even the best cameras can sometimes alter the natural color of a scene, but worry not! Simple editing techniques exist to restore the original quality of the photo.
To see how this is done, check out our video tutorial on how to easily remove color cast from real estate images in Photoshop:
6. HDR Editing
Wondering what HDR (High Dynamic Range) is exactly?
It’s a technique in which multiple images are taken at different exposures and blended together suitable to create a greater dynamic range of luminosity.
And you know what’s cool about it?
All you have to do is merge 3 or more photos to create a magnificent image that brings out every little detail present in the scene.
For more details, see our video tutorial on how to edit HDR photos in Lightroom:
7. Fixing Flash Shadows
When it comes to real estate photography and learning how to master interior photo editing, shadows, and uneven lighting are common obstacles.
While they can add a nice contrast to the image, they can also create distractions, making it appear unprofessional.
Did you know you can easily fix this by adjusting the shadows and highlights, whites, and blacks in Photoshop?
You can say goodbye to flash shadows and hello to a stunningly professional picture with this simple edit:
8. Window Masking
Unmanageable sunlight streaming through a room’s windows can wreak havoc on photo quality, casting excessive glare, blurring fine details, and washing out colors.
Even spotless windows can become an unintended focal point when blinds impose their patterns or obscure the view. These commonplace scenarios can mar the picture-perfect appeal vital for real estate imagery.
Enter the realm of window masking, a savvy photo-editing solution that real estate photographers can harness to overcome such obstacles.
This technique not only rectifies issues with light but also offers the creative liberty to modify or enhance the exterior landscape as viewed through the windows.
Consider it an editing wand that gives you complete control over how natural light and outdoor perspectives are portrayed in your property images.
To learn how to do window masking, check out this video tutorial on how to mask windows for real estate photography in Photoshop:
9. Image Sharpening
You can bring your visuals to life by experimenting with image sharpening in Photoshop—add dimension, depth, and contrast along the edges of any object.
Sharpening enhances the definition of edges in an image. Whether your images come from a digital camera or a scanner, most images will benefit from sharpening.
Enhancing definition in edges by using editing software like Photoshop can bring out details that you didn’t even know were there.
To learn how to perform this editing technique, watch our tutorial video on how to sharpen an image in Photoshop:
10. Image Decluttering/Object Removal
Unsightly objects in your interior photos can overshadow the true allure of the home. Often, these distractions require a keen eye and a swift removal to realize a pristine and appealing image.
For example, a nest of cords and wires hanging down from TV screens and lamps can make your images look messy. The same goes for pet and kid toys scattered around the living room floor.
The “Clone Stamp Tool” in Photoshop is the magic wand you seek. Engaging with this tool is straightforward.
To learn how to use the Clone Stamp Tool to declutter your images, watch this tutorial video on how to remove cords in Photoshop:
And that’s it!
With these 10 techniques in your toolbox, you’ll be able to edit your interior photos to perfection!
Last but not least, make sure your photos look real and convincing. Bright, vibrant, and contrasted are great but don’t over-color, overexpose, or oversaturate them.
Have You Ever Thought To
Outsource Photo Editing?
Try it today with 10 free edits from three professional photo editors.
Outsource Your Real Estate Photo Editing to PhotoUp!
As a real estate photographer, you know how much time editing photos takes away from other high-impact tasks that can help you grow your business.
Luckily, there’s an easy solution that can help you save a lot of time and money – outsourcing your editing needs to PhotoUp!
With PhotoUp, you gain a partner eager to assist you in producing high-quality, natural-looking real estate photos, saving you time and enabling you to engage more clients.
Based in the US and with additional offices in the Philippines, we offer a full range of services to cater to all your photo editing needs, including:
- Brightness and color correction
- Vertical lines adjustments
- Advanced object removal
- Day-to-dusk conversion and Twilight editing
- Lawn greening and sky replacements
- HDR editing
- Manual blending
- Flambient editing
- And much more!
PhotoUp’s team of editors can handle any editing job — big or small, complex, or simple.
Browse Top Dedicated
Real Estate Photo Editors
Ready-to-hire editors for real estate photo editing, and more.
Plus, our pricing is also affordable, with most photo editing services starting at only $1.10 per image depending on your subscription.
A Complete Real Estate Marketing Service
Apart from the standard real estate photo editing services, we also offer marketing services such as:
- Real estate photographer websites
- Single property websites
- Virtual staging
- Virtual house tours
- Video editing
- Floor plans
- House portraits
- And Virtual Assistants
We have everything you need for your real estate marketing needs under one roof!
How to Get Started
To get started with PhotoUp is super easy!
All you need to do is sign up for a free PhotoUp account. This will give you access to our user-friendly photo management system where you can upload photos, provide instructions and feedback, and lastly download your beautifully edited images.
PhotoUp Real Estate Photo Editing Uploader Demo
For more details, have a look at our real estate photo editing uploader demo:
As simple as that! So, don’t wait!
Sign up for a free PhotoUp account, and let our expert real estate photo editors make every one of your interior photos look specular. Best of all, you’ll get 10 free credits you can use for any of our services when you sign up for an account!
We hope this blog post helped you learn how to edit interior photos to create well-lit and captivating real estate photography. If you found this post helpful, you may want to check out the following resources as well:

