First impressions truly last. When it comes to marketing real estate, beautiful images can sway prospective homebuyers in your favor. Because 97% of home searches start online, it’s crucial that your real estate photos are of top-notch quality to impress would-be buyers.
In this post, we’ll share some effective real estate photography tips, and in this case, 10 items you need to remove from your property photos to ensure stunning images.
Let’s dive in!
Real Estate Photography Tips – 10 Items You Need to Remove!
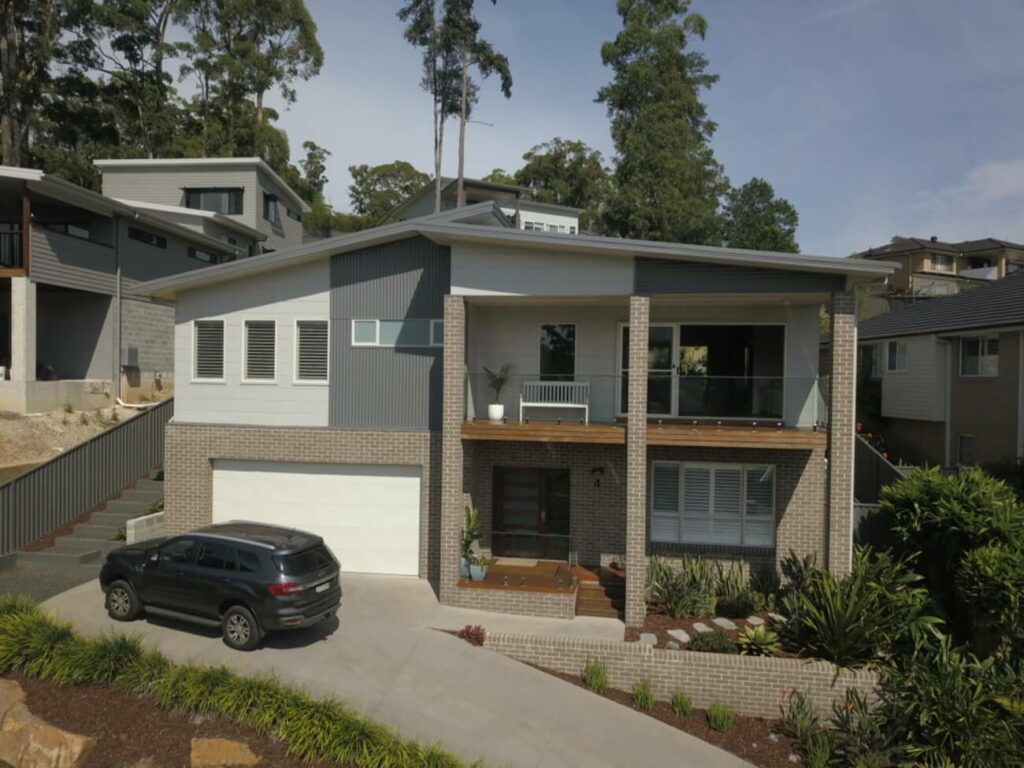
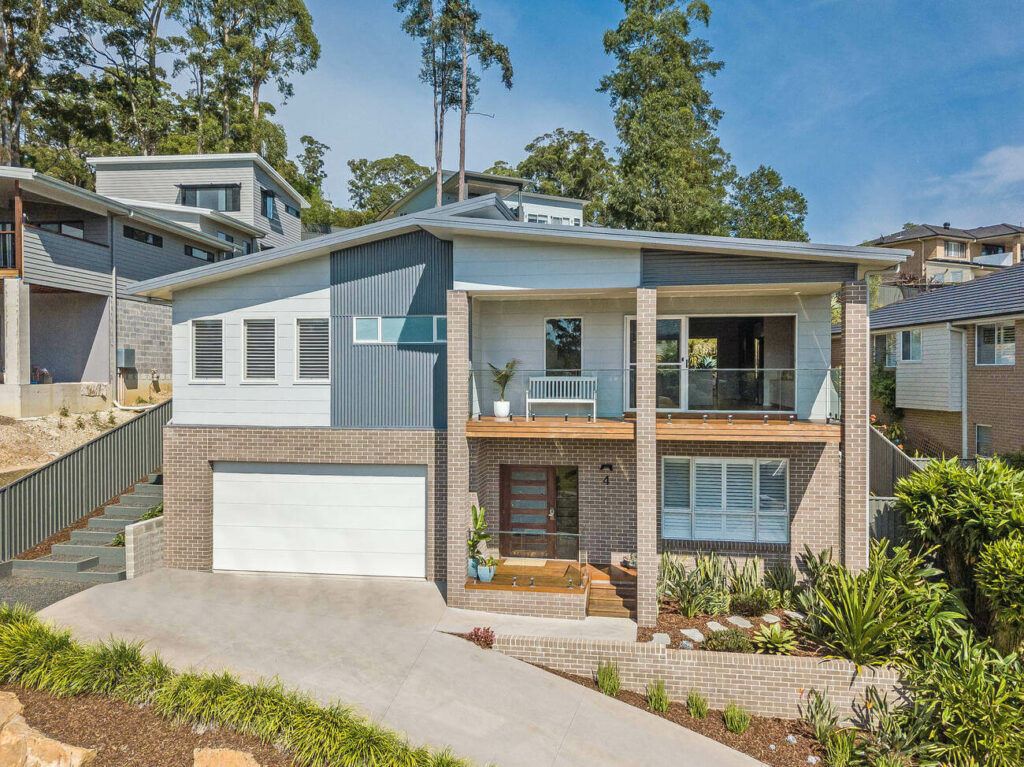
Before you capture a property in all its glory, there are 10 items you should remove to make sure your real estate photos will look fabulous.
From decluttering your shot to making custom color edits to remove bold colors on the walls, these simple real estate photography tips will take any home from drab to fab.
So grab that camera and get ready!
1. Unnecessary Clutter
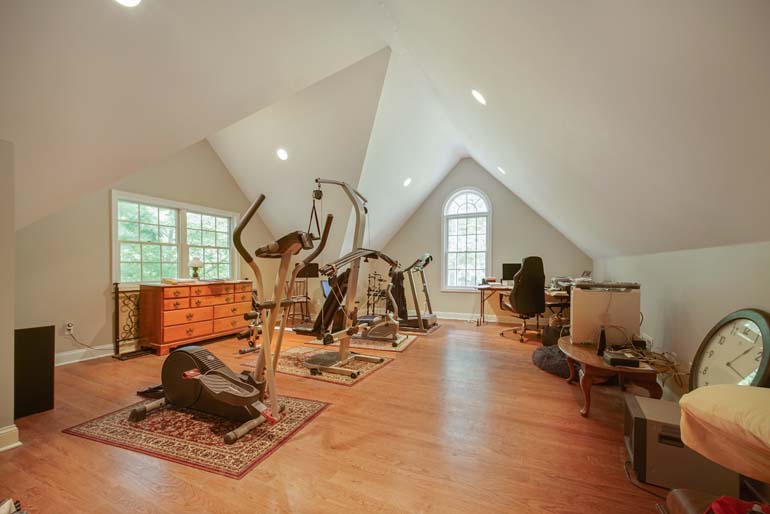
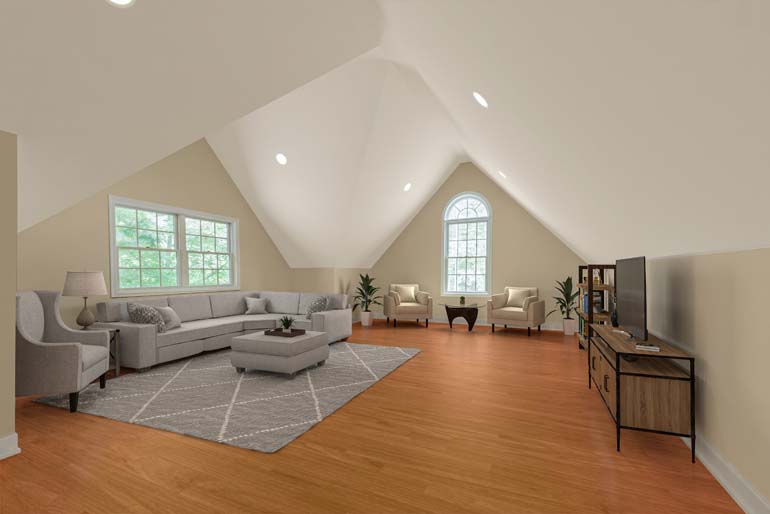
When shooting a home, less is definitely more. Clear the space of any non-essential items to create an inviting blank canvas.
No one wants piles of books or time-sensitive mail distracting them from picturing themselves living in the home.
Before your photoshoot, wipe down surfaces and make sure the countertops are sparkling clean.
Also, don’t forget small details like cords and wires, remote controls, and fridge magnets when sprucing up your shot. After all, it’s these small touches that will really show off a home in its best possible light.
But don’t beat yourself up if you miss anything, this can easily be edited in post-processing.
2. Personal Items
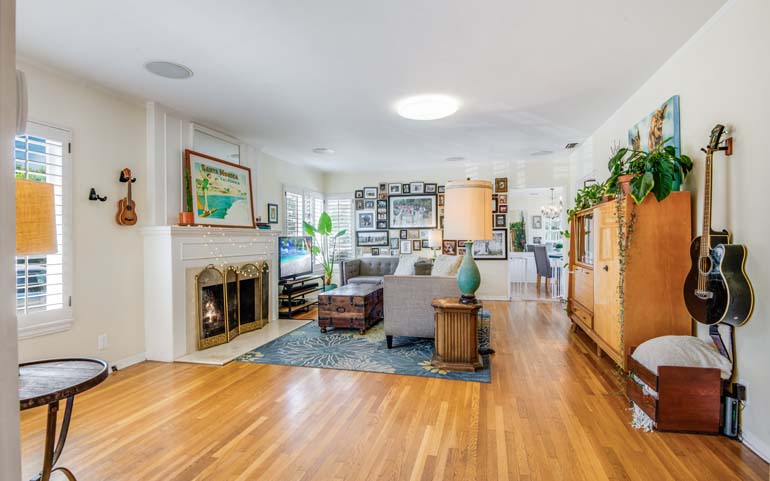
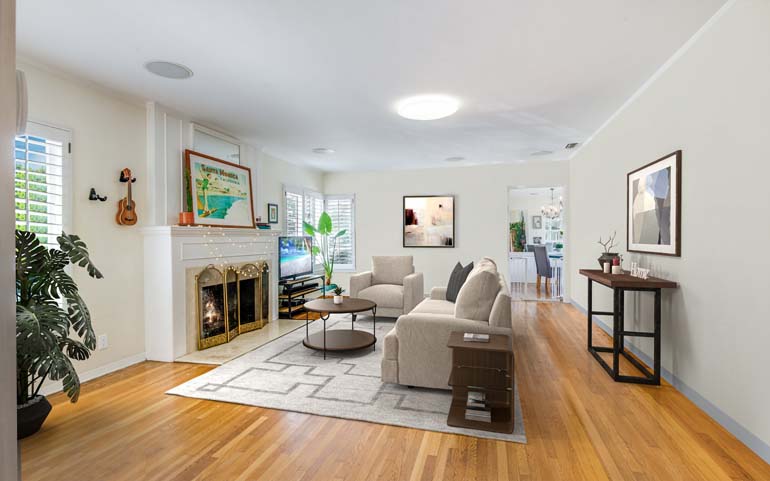
When taking listing photos, keep in mind that potential buyers want to see a blank slate, not personal items like family photos. Instead, you can replace them with photos that feature landscapes, general objects, abstracts, and more.
Do the same with personal collections and items.
Remember to remove personal items and clutter from coffee tables, nightstands, and dressers, as well as shampoo, soap, medications, toothbrushes, and other toiletries in the bathroom.
Letting go of family photos and knick-knacks can really help allow prospective homebuyers to project themselves into the space more easily – creating an irresistible connection!
3. Pets and Pet Items
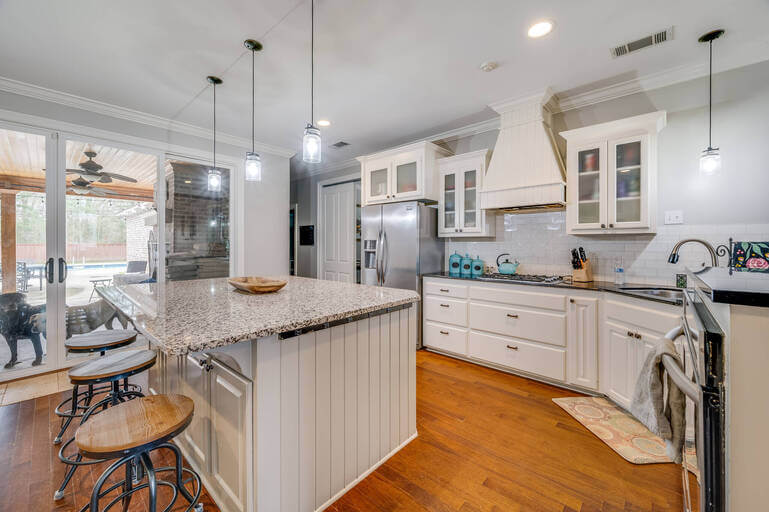
Did you know that pets and pet accessories in listing photos can start the wheels turning and raise questions about cleanliness, odors, or damages caused by your beloved pets?
Therefore, it’s better to remove all pet items from your photos such as pet beds, toys, food bowls, leashes, and litter boxes.
This will ensure that your real estate photos appeal even to those that don’t share your love for our furry, 4-legged friends.
4. Bold Colors
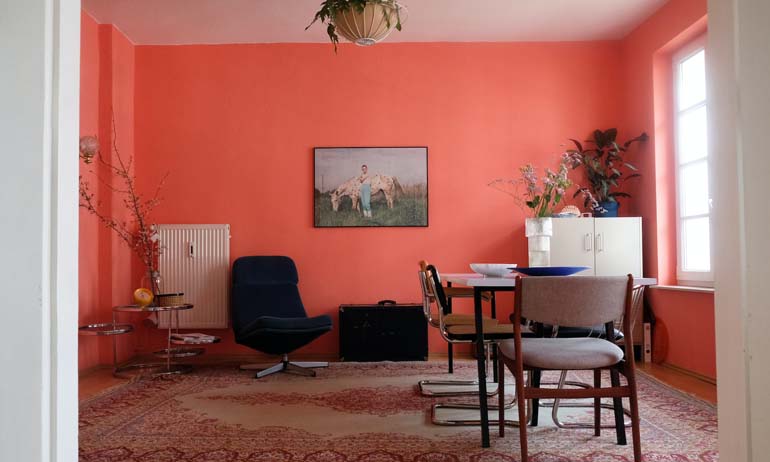
When you’re looking to show off a property in its best light, having it dressed up with bright and loud colors may not be the best way forward.
After all, these bold colors could put potential buyers off if they’re too overpowering.
They can also make a space appear smaller and more crowded, even making it look darker. To appeal to a broader audience and give rooms that tranquil feel people love, you should consider more neutral tones.
However, repainting isn’t always an option though…That’s where you can make a simple color change edit in post-processing.
With this simple real estate photo edit, you can turn those loud colors into inviting, dreamy neutrals without breaking a sweat or your bank balance.
With that said, let’s take a look at more effective real estate photography tips to ensure high-quality images.
Have You Ever Thought To
Outsource Photo Editing?
Try it today with 10 free edits from three professional photo editors.
5. Small Rugs and Mats

Don’t forget to roll up those small rugs and mats to show off the home’s flooring. Buyers are dying to get an inside look at the type, condition, and quality of your hardwood floor or tile.
This can be a deciding factor when looking for a home and some people have very distinct opinions on what type of flooring they’d like.
Plus, multiple rugs in one space can make it feel cluttered – no need for buyers to be distracted from feeling right at home with the property.
6. Unwanted Objects
Removing unwanted objects from your real estate images helps to showcase a property in its best possible light, which is important when you’re trying to sell your home.


For example, a car parked in the driveway can easily hide your home’s amazing charm and curb appeal, so removing it and other vehicles like motorcycles and bicycles will have a positive impact on your exterior photography.
This can also help to focus the viewer’s attention on the property’s special features, such as the layout and architecture, surroundings, and decor.
In addition, removing unwanted objects can make a home look more tidy and organized, which can be especially important when showcasing a property for sale or rent.
7. Garbage Cans
To wow potential buyers, make sure those unsightly garbage cans are out of frame!
A neat exterior will ensure the best first impression on listing photos and boost the curb appeal.
You don’t want to see the homeowner’s trash in the picture…


As a real estate photographer, taking that extra step to clean up outside and edit what you can’t remove during the actual shoot can really pay off in presenting your client’s home in its beautiful best light.
8. Seasonal Decor

Removing seasonal decor can help make sure your photos don’t look outdated.
For example, you may shoot the property during the holiday season and your shots are naturally filled with holiday decor. But if the listing stays on the market for a long time and winter turns into spring or summer, your photos will look outdated.
To avoid this, you can either shoot the home twice to create two different looks – summery blooms and fall foliage – or change it with the help of a professional real estate photo editing.
9. Dull, Overcast Skies
How can I remove dull and overcast skies before my shoot, you may ask? You can’t!
But the good news is that you can replace a grey and overcast sky with a sunny and bright one with the help of photo editing software like Photoshop.
Is it worth it? Well, consider this…


A sky replacement in real estate photos can:
- Make the property look more appealing
- Offer a mood booster
- Not only will buyers be much more receptive to what you are selling, but they’re also likely to spend longer looking at the image if the sky is clear, bright, and welcoming
- Provide real estate photographers more freedom when not having to worry about the weather or the time of day to do the photoshoot
Lastly, it can help your agent-client sell the property faster, which is the end goal.
10. Harsh Shadows
When shooting real estate interiors and exteriors, you may encounter problems with harsh shadows and uneven lighting.
This is something you can’t remove beforehand but is vital to fix in post-processing to make your real estate photos look professional and inviting.
While shadows can add contrast and dimension to an image, they can also be distracting and make your real estate photography look less professional.


To combat this, you can use Lightroom or Photoshop to adjust shadows. Or simply let a professional real estate photo editing service like PhotoUp help you remove flash shadows and create stunning images.
High-Quality & Consistent
Real Estate Photo Editing
Hire a dedicated editor with performance metrics from $7/hour.
Leverage Professional Real Estate Photo Editing
If you can’t fully prepare the property before your photoshoot, you can always declutter and enhance your photos in post-processing.
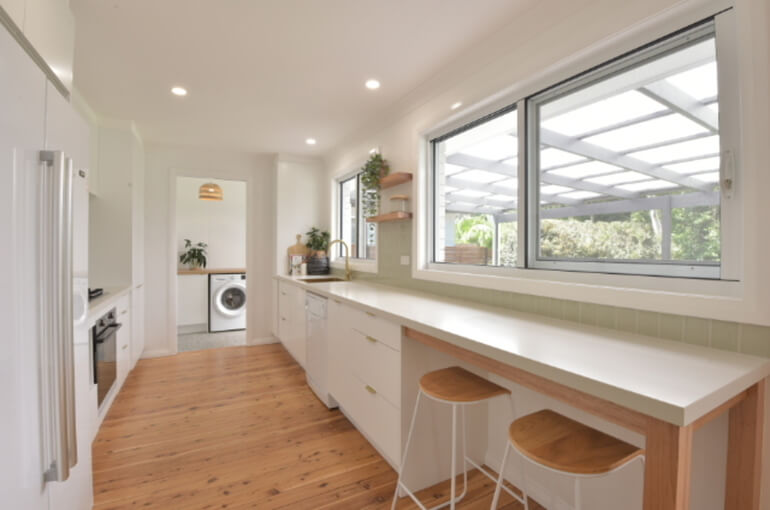

Better yet, why not let PhotoUp’s professional real estate photo editors do it for you? This will help you free up time to shoot more properties, and at the same time, ensure top-notch image quality!
With over a decade in the industry and hundreds of editors in the Philippines, PhotoUp has a team of highly talented real estate photo editors who are ready and waiting to professionally edit your photos.
Our skilled photo editors can help with the following issues:
- Improper exposure levels
- Harsh shadows, lack of light, etc.
- Blurred images that were taken without a tripod
- Images that need cropping or other effects
- Lawn greening and sky replacements
- Twilight and day-to-dusk editing
- Clutter and object removal
- Line and angle corrections
- And much more!
Browse Top Dedicated
Real Estate Photo Editors
Ready-to-hire editors for real estate photo editing, and more.
Additionally, PhotoUp is a complete one-stop shop for real estate marketing and also offers services such as:
- Virtual staging
- Virtual house tours
- Home walk-through videos
- Custom websites
- Single property websites
- Property flyers
- Floor plans
- House portraits
- Virtual assistants
- And more.
All you need to do to start using our services is sign up for a free PhotoUp account, place your first order and your photographs will be delivered back to you in less than 24 hours.
PhotoUp Real Estate Photo Editing Uploader Demo
To see how quick and easy it is to get started, check out our real estate photo editing uploader demo:
It’s really as easy as 1-2-3!
Sign up for a free account today, and let PhotoUp take the real estate photo editing off your plate. For a limited time, you’ll even get 10 free edits when signing up for an account!
We hope this blog post provided you with some easy but effective real estate photography tips. If you found this post useful, you may also want to check out the following resources:


