


Table of Contents
- Photo Stitching Is a Game Changer for Real Estate Images
- How to Take Panoramic Real Estate Photography?
- How to Stitch Photos in Lightroom (Step-by-Step Guide)
- Outsource Pano Stitching to the Professionals at PhotoUp!
Are you looking to learn how to stitch photos in Lightroom?
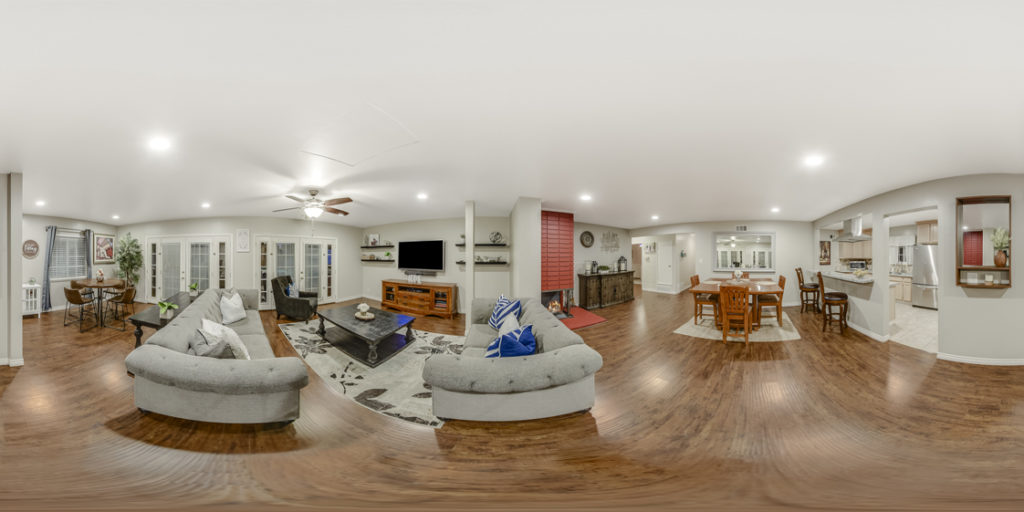
When it comes to photographing real estate, capturing a 360-degree view is often a must. This is particularly valuable in interior photography, as panoramic images offer a complete perspective.
If you’re familiar with stitching images in Lightroom, you can compose stunning panoramas by blending overlapping shots with different frames.
In this guide, we’ll walk you through step-by-step how to stitch photos in Lightroom Classic CC to help you create captivating property visuals.
Before we get into the nitty-gritty of the tutorial, let’s first take a look at how to prepare for a panoramic photo shoot.
Photo Stitching Is a Game Changer for Real Estate Images
If you want to capture the entire view of a property in a single image, knowing how to stitch photos is a game-changer.
Photo stitching is the process of merging multiple photographs to create a single high-resolution or panoramic image.
Nowadays, most digital cameras and even mobile phones offer the option to shoot panoramic photos. However, if you’re aiming for a significantly better quality, Lightroom is the way to go.
With Lightroom, you have the power to seamlessly merge multiple photos. Not only can you create stunning panoramas, but you can also take advantage of HDR panoramas for exposure bracketing.
That said, let’s take a look at how to take panoramic real estate photography.
How to Take Panoramic Real Estate Photography?

When it comes to capturing stunning images, using a professional DSLR camera is highly recommended. These cameras boast larger sensors than smartphones, resulting in sharper images with superior color reproduction.
To maximize the merging quality, don’t forget to use a tripod and set your camera to panoramic mode.
Now, here’s a pro tip: switch your camera to manual mode. This allows you to have complete control over key settings such as shutter speed, ISO, aperture, and white balance. By doing so, you can ensure consistent brightness and color in all your shots.
Another important aspect is maintaining consistent focus distance. This ensures that the subject of your photos remains in focus across the board.
To make the stitching process easier for the software, remember to overlap your photos by at least one-third.
Lastly, for seamless stitching, consider capturing your images in a vertical orientation. This will result in effortlessly blended panoramas that will leave your viewers in awe.
Have You Ever Thought To
Outsource Photo Editing?
Try it today with 5 free edits from three professional photo editors.

How to Stitch Photos in Lightroom (Step-by-Step Guide)
Adobe Lightroom offers a powerful and user-friendly way to merge multiple images into one seamless Panorama.
Let’s walk through the process step-by-step. You can either watch the video tutorial or continue reading the text below:
Import Your Images in Lightroom
Step 1. Before you begin, make sure all the images you want to stitch are imported into Lightroom.
Step 2. Now, navigate to the Develop Module. In the Develop Module, hold down the Ctrl key and click on each image you want to include in the Panorama to select them.
Merge Your Images
Step 3. With your images selected, right-click on one of the selected images and choose Photo Merge > Panorama. Alternatively, you can go to the Menu bar and select Photo > Photo Merge > Panorama.
Choose Projection Option
When it comes to creating panoramas in Lightroom, understanding the different projection options can greatly enhance your results.
Step 4. After merging your images, a new window will pop up with a Preview of your Panorama. Lightroom will automatically select a Projection option; Spherical, Cylindrical, or Perspective, but you can change this if you like.
Here’s an explanation of the different projections:
1. Spherical Projection
Considered the default projection in Lightroom, the spherical projection showcases your photos as if they are displayed on the inner side of a sphere.
This projection is perfect for wide 360-degree panoramas, as it avoids unnatural stretching of the photos.
2. Cylindrical Projection
If maintaining straight vertical lines is your priority, the cylindrical projection is ideal. This projection projects the photos as if they were laid out on the outer side of a cylinder.
Keep in mind that using cylindrical projection for landscape photos may cause distortions, especially at the edges.
3. Perspective Projection
The perspective projection uses the perspective of the middle photo to lay out the panorama. It often results in a bow-tie effect, emphasizing the middle of the final picture.
This projection is well-suited for architectural panoramas and narrower photos.
However, be cautious when using perspective projection with photos having short focal lengths, as it may stretch the edges.
Experiment with each to see which gives the best result for your images.
Step 5. Next, check the Auto Crop box to let Lightroom remove any uneven edges. If there are gaps in the Panorama, you can check the Fill Edges box to have Lightroom attempt to fill them in.
Select to Merge
Step 6. Once you’re happy with the settings, click the Merge button. Lightroom will create the Panorama and add it to your catalog.
Edit Your Panoramic Image
Step 7. Now, you can proceed and Edit your new panoramic image just like you would with any other photo.
Remember that detailed adjustments made to the individual photos before stitching won’t appear on the final merged panorama, so focus on stitching first.
Also, when you stitch images in Lightroom, the resulting stitched image will still be in a DNG or RAW format.
These formats offer the best quality when it comes to making edits and adjustments. However, if you want to share the photo, you can export it in a compressed format like JPEG.
And there you have it!
You’ve now successfully created a stunning panoramic image by stitching photos together in Lightroom
Have You Ever Thought To
Outsource Photo Editing?
Try it today with 5 free edits from three professional photo editors.
Outsource Pano Stitching to the Professionals at PhotoUp!
If you’re a real estate photographer looking to streamline your workload and deliver exceptional results, outsourcing your real estate panorama photo editing services to PhotoUp is a no-brainer.
Not only will it give you more time to focus on other aspects of your business, but you’ll also gain access to top-notch editing services and enjoy quick turnaround times, all while saving money.
With PhotoUp, you can take on more clients and boost your income, confident in the knowledge that your customers will be thrilled with the final product.
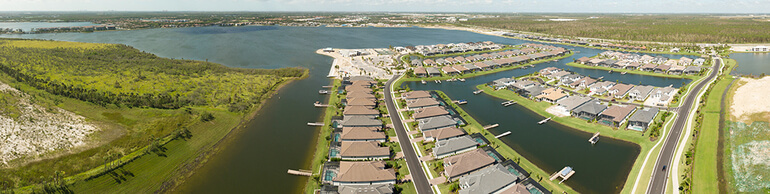
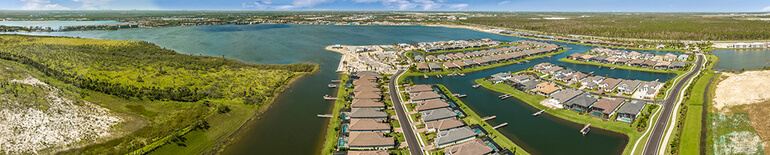
We offer pano stitching for aerial or ground panoramic image groupings. The cost of pano stitching is 5 credits per final edited image for groupings of up to 20 frames per final image.
Except for panorama stitching, PhotoUp offers regular photo editing services such as:
- Image brightness and exposure correction
- Color and tone adjustments
- Window masking and glare reduction
- Clutter and advanced object removal
- Line and angle corrections
- HDR editing
- Harsh shadows and lack of light
- Sky replacements and grass greening
- Twilight and day-to-dusk editing
- Drone editing, etc.
Browse Top Dedicated
Real Estate Photo Editors
Ready-to-hire editors for real estate photo editing, and more.
And there’s more…
A One-Stop-Shop for Real Estate Marketing


On top of that, PhotoUp is a one-stop-shop for real estate marketing and also offers other powerful marketing tools like:
To start using our photo editors or any of these powerful real estate marketing tools, all you have to do is sign up for a free PhotoUp account, and get to action!
PhotoUp Real Estate Photo Editing Uploader
Check out how easy it is to get started with PhotoUp in this real estate photo editing uploader tutorial:
It’s as easy as 1-2-3!
So, invest in a reliable photo editing service like PhotoUp and see the difference in the quality of your real estate photographs.
Sign up for a free PhotoUp account today and let PhotoUp help you create stunning, high-quality panoramic real estate photos!
Best of all, for a limited time, you’ll even get 5 free edits when you sign up for an account!
We hope this guide helped you learn how to stitch photos in Lightroom. If you found this post useful, you may also want to check out the following resources:

