


Table of Contents
- 10 Professional Real Estate Photo Editing Tips
- Why Master Photoshop for Real Estate Photo Editing?
- Save Time and Effort by Outsourcing to PhotoUp!
Are you looking to excel in real estate photo editing?
High-quality photos can make or break a sale regarding real estate. Professionally edited images help properties stand out by showcasing them in their best light. Studies reveal that 83% of buyers think pictures are very important in helping them choose which homes they will visit.
If you want to achieve the polished look of professionally edited real estate photos using Photoshop, this guide will show you 10 tips on how to replicate pro editing.
10 Professional Real Estate Photo Editing Tips
Master these steps to replicate professional real estate photo editing in Photoshop and elevate your photography game.
The time you invest in fine-tuning each image can significantly impact your success in the real estate market.
Let’s get started!
1. Start With Proper Organization

Before diving into editing, organize your images. Save your RAW files in a dedicated folder and back them up.
Next, import them into Photoshop for non-destructive editing, ensuring you can revisit the original if needed.
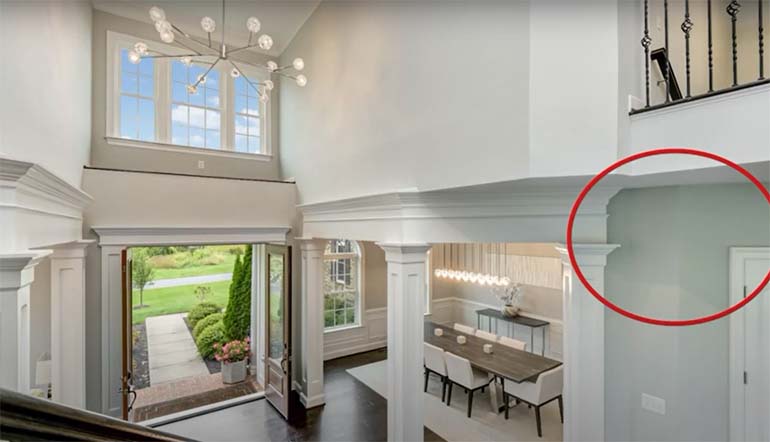
2. Correct Perspective and Straighten Lines


In real estate photography, precision is everything—and it begins with mastering your lines.
Ensuring that horizontal and vertical lines are perfectly aligned can be the difference between a captivating shot and one that falls flat.
Achieving this precision is easier said than done. Several factors contribute to distorted lines in your photos, including lens curvature, the natural shapes of rooms and furniture, and even the angle at which you hold the camera.
These elements often conspire to create the frustrating phenomenon of converging or misaligned lines.
Fortunately, there’s a solution: perspective correction. This essential post-processing technique is a game-changer for real estate photographers, effectively addressing distortions and realigning lines so they appear crisp and straight.
The result? Flawlessly aligned photos that showcase the property in its best light—natural, balanced, and professionally polished.
To see how to align verticals, you can check out our video tutorial on how to straighten verticals in Photoshop:
3. Adjust Exposure, Color, and White Balance


Brightness, exposure, color correction, and white balance form the foundation of effective photo enhancement.
Using a powerful tool like Photoshop, photographers can breathe life into their visuals, infusing them with vibrancy and precision.
While adjusting color, contrast, tone, and sharpness might seem straightforward, achieving the perfect balance requires skill and a keen eye for detail.
Subtle adjustments can transform an ordinary image into a stunning visual centerpiece, elevating its appeal and impact.
These foundational techniques are far from basic; they hold the potential to turn lackluster photos into compelling marketing assets.
By mastering these essential skills, real estate photographers can capture attention, create lasting impressions, and ultimately drive successful property sales for their clients.
In this video tutorial, we walk you through how to adjust the white balance in Photoshop:
To learn how to adjust the colors and make your real estate photos pop, check out our tutorial on how to color correct in Photoshop.
Additionally, this guide walks you through 3 ways on how to change exposure in Photoshop.
4. Remove Color Cast
Color casts can significantly undermine the visual appeal of real estate photos, where captivating images are essential.
A color cast is an unwanted tint that distorts the photo’s true colors, altering its mood and ambiance.
These casts often result from factors like fluorescent lighting creating a blue tone, tinted windows throwing off wall colors, overcast skies dulling interiors, or incorrect camera color settings.
Fortunately, color casts are easily corrected through professional photo editing. By restoring true-to-life colors, you ensure your photos highlight properties at their best—solidifying your reputation as a skilled real estate photographer.
To learn more, check out our video tutorial on how to easily remove color cast in Photoshop:
5. Replace Skies for Outdoor Shots


Bright skies amplify the vibrancy of any landscape, making properties shine in real estate photography. But when clouds roll in, even stunning homes can appear dull and uninviting.
Fortunately, sky replacement offers a simple yet powerful solution.
This editing technique can transform overcast skies into sunny, cheerful backdrops, enhancing a property’s appeal and creating a welcoming ambiance.
Mastering sky replacement not only elevates your photos but also provides flexibility, freeing you from the constraints of weather and time.
With tools like Photoshop, gray skies can become radiant canvases that capture attention and set listings apart.
To learn how to transform dull winter skies into bright and inviting ones, check out our video tutorial on how to replace a winter sky in Photoshop:
In contrast to a winter sky, here’s another tutorial video on how to replace a summer sky in Photoshop instead:
The Real Estate Photography
Business Systems You Need
PhotoUp is the ultimate real estate photographer business platform.

6. Enhance Details With Image Sharpening


You can bring your visuals to life with image sharpening in Photoshop, a powerful technique to add depth, dimension, and contrast along the edges of objects.
Sharpening refines the details in an image, enhancing the definition of edges for a crisper, more polished look.
Whether your photos come from a digital camera or scanner, nearly every image can benefit from this enhancement.
Using Photoshop’s sharpening tools, you can uncover hidden details, making your images more vibrant and impactful.
This simple yet effective technique can transform ordinary visuals into standout masterpieces.
To learn how to perform this editing technique, watch our tutorial video on how to sharpen an image in Photoshop:
7. Declutter and Remove Imperfections


Unwanted objects in real estate photos can detract from a property’s appeal, masking its true potential.
Whether it’s a car in the driveway, messy cables in a living room, or kitchen clutter on countertops, these distractions can undermine the image’s impact.
Even more challenging are structural issues like cracks or peeling wallpaper, which signal neglect.
Fortunately, tools like Photoshop’s Clone Stamp offer an easy solution, allowing you to seamlessly remove these imperfections and present a polished, inviting property.
To learn how to use the Clone Stamp Tool to declutter your images, watch this video tutorial on how to remove cords in Photoshop:
8. Perform Window Masking


Harsh sunlight streaming through windows can ruin real estate photos, creating glare, washing out colors, and blurring details.
Even clean windows can become distractions if blinds cast patterns or obscure views. Window masking is the solution.
This editing technique lets photographers manage light, correct imperfections, and even enhance the view outside.
It’s a powerful tool to ensure property images look polished and inviting, with natural light and outdoor perspectives perfectly balanced.
To learn how to do window masking, check out our video tutorial on how to mask windows for real estate photography in Photoshop:
9. Convert Daytime Shots to Romantic Twilights


A perfect property shot can make all the difference in a competitive real estate market.
The soft glow of dawn or the warm hues of twilight add elegance and emotional appeal to exterior photos, captivating potential buyers.
With post-production twilight effects, you can:
- Elevate the sophistication of your images
- Create dramatic, eye-catching visuals
- Overcome weather or timing challenges
Modern photo editing software lets you recreate twilight’s enchanting magic anytime, ensuring stunning results regardless of when the photo was taken.
To learn twilight editing, you can watch our video tutorial on how to edit a day to dusk image for real estate photo editing:
10. Make Final Touches and Export


Final touches are essential to ensure your real estate photos look polished and professional before exporting. Here are 6 steps to consider:
Step 1. Start by reviewing each image closely to check for any remaining imperfections, such as spots, unwanted objects, or minor distortions. Use tools like the Spot Healing Brush or Clone Stamp in Photoshop to clean up these details.
Step 2. Adjust the brightness, contrast, and saturation to achieve a balanced and vibrant look, ensuring the property’s features stand out without appearing over-edited.
Step 3. Also, pay special attention to white balance and ensure colors are accurate and consistent across all images, creating a cohesive presentation.
Step 4. Once the edits are complete, apply sharpening to enhance details and improve clarity. Consider adding a subtle vignette to draw attention to the subject and create a more professional finish.
Step 5. Check the aspect ratio and resolution to match the platform requirements where the images will be used, such as MLS listings, property websites, online portfolios, or social media.
Step 6. Finally, export your images in the appropriate format—JPEG or PNG for online use or TIFF for high-quality prints—ensuring they’re optimized for size without compromising quality.
These finishing touches ensure your real estate photos are ready to make a lasting impression.
Why Master Photoshop for Real Estate Photo Editing?


Photoshop gives you complete control over every element of your photos, allowing you to match the quality of professional editors.
By following these techniques, you can transform RAW images into captivating visuals that enhance the appeal of real estate listings and accelerate sales.
If you need more proof to back this up, consider these statistics:
- Homes featuring professionally edited photos receive 47% higher asking prices per square foot
- Using a twilight image as the listing’s main photo averaged 76% more views than listings without the use of twilight images
- About 32% of homes with high-quality photographs sell faster than those without visuals
- And 61.3% of brokers believe high-quality photography is ‘crucial’ for selling homes
The importance of high-quality property photos is obvious to help sell listings faster and at higher prices.
Whether you edit yourself or seek help, the key is ensuring every photo tells a compelling story of the property.
For even more editing tips, you can check out our guide – a complete real estate photo editing tutorial for beginners.
Have You Ever Thought To
Outsource Photo Editing?
Try it today with 10 free edits from three professional photo editors.
Save Time and Effort by Outsourcing to PhotoUp!
For photographers looking to save time, outsourcing to a professional service like PhotoUp offers expertly edited real estate photos with a quick turnaround of 12-24 hours.
PhotoUp is your dedicated partner in creating stunning, natural-looking real estate photos. By streamlining your workflow, we help you save time and connect with more clients effectively.
Browse Top Dedicated
Real Estate Photo Editors
Ready-to-hire editors for real estate photo editing, and more.
Operating from the US, with additional offices in the Philippines, we provide a comprehensive suite of real estate photo editing services tailored to your needs, including:
- Brightness and color adjustments
- Perspective correction
- Advanced object removal
- Day-to-dusk transformations and twilight edits
- Lawn enhancements
- Sky replacements
- HDR processing
- Manual blending
- Flambient editing
- And much more!
Our skilled editing team is equipped to handle projects of any scale or complexity.
Best of all, our services are budget-friendly, with pricing starting as low as $1.50 per image for on-demand editing. Dedicated editing can go as low as $0.50 per image depending on the editing batch.
How to Get Started
Our user-friendly platform lets you upload, review, and approve edits seamlessly, giving you more control over the final product while saving time and money.
Getting started is super easy – this is what to do:
Step 1. Sign up for a free PhotoUp account.
Step 2. Upload your photos to our easy-to-use software.
Step 3. Choose the level of editing that you need and provide instructions (optional).
Step 4. Wait for PhotoUp professional editors to edit and return the photos in less than 24 hours (48 hours for virtual staging).
Step 5. Download and start using your beautifully edited photos.
PhotoUp Real Estate Photo Editing Uploader Demo
To see how easy it is to get started with PhotoUp, check out our real estate photo editing uploader demo:
As simple as that!
Full-Service Real Estate Marketing Partner

In addition to photo editing, PhotoUp is a full-service real estate marketing partner and also offers powerful marketing tools such as:
- Virtual staging
- Virtual house tours
- Single property websites
- Real estate photographer websites
- Property flyers
- Floor plans
- Video editing
- Virtual Assistants
- And house portraits
So, take the next step, and grow your photography business with us!
Sign up for a free PhotoUp account today, and give PhotoUp’s professional real estate photo editing service a try!
For a limited time, we even offer 10 free credits you can use on any of our services when you sign up for an account.
We hope this blog post helped you learn how to replicate professional real estate photo editing to enhance your photos. If you found this guide useful, you may also want to check out some related resources:

