


Table of Contents
- What Is a Lens Flare?
- How to Avoid Lens Flares in Real Estate Photography
- How to Remove Lens Flare With the Clone Stamp Tool
- How to Remove Lens Flare in Photoshop With Content-Aware
- Leave the Time-Consuming Editing to PhotoUp!
Do you want to learn how to remove lens flare in Photoshop using two simple techniques?
Capturing the perfect shot is a blissful moment for any photographer. However, the sudden appearance of lens flare can quickly tarnish that immaculate image. Particularly for real estate photographers, where clarity and optimal lighting are essential, a lens flare is an unwelcome guest.
In this guide, we’ll explore what lens flare is, preventative measures, and detailed steps on how to remove lens flare using Photoshop’s tools like the Clone Stamp and Content-Aware feature.
What Is a Lens Flare?

Before we roll up our sleeves and dig into the removal process, it’s vital to understand what we’re combating.
A lens flare occurs when sunlight or another light source enters the lens and scatters, creating bright spots, streaks, or hazy light across the photo.
While sometimes used for artistic effect, it’s often a distraction, especially in real estate photography, where clear visuals are paramount to show the property in its best light.
How to Avoid Lens Flares in Real Estate Photography

The best offense is a good defense. Whenever possible, aim to avoid lens flare during your shoots. These are some neat tricks:
- Utilize lens hoods to prevent unwanted light
- Adjust the angle or position of your camera
- Shield the lens with your hand or an object (without appearing in the frame)
- Time your shoots during parts of the day when the sun is less intense, like during the golden hour right before sunrise or sunset
These steps are quick fixes that can save you time before heading to the digital drawing board.
Have You Ever Thought To
Outsource Photo Editing?
Try it today with 10 free edits from three professional photo editors.

How to Remove Lens Flare With the Clone Stamp Tool
If a lens flare happens despite taking steps to avoid it, you can luckily remove it in Photoshop.
Let’s get started by walking you through how to remove lens flare in Adobe Photoshop. You can either watch the video tutorial or continue reading the text below:
Lens flare can sometimes add a creative effect to your images, but other times, it can be distracting. Let’s dive into how we can eliminate it effectively.
Removing Small Lens Flares Using the Spot Healing Brush Tool
Step 1. Open the image with the lens flare you want to remove. You can do this by going to File > Open, and selecting your image.
Step 2. In the Layers panel, right-click on the background layer and select Duplicate Layer. This will allow us to work nondestructively.
Step 3. From the toolbar on the left, select the Spot Healing Brush Tool (shortcut J). Ensure that the brush is set to a size that’s slightly larger than the lens flare spot you want to remove.
Step 4. Click on the lens flare spots you want to remove and the Spot Healing Brush Tool will automatically blend the area with the surrounding pixels. Repeat this for all small lens flare spots in your image.
Removing Larger Lens Flares Using the Clone Stamp Tool
Step 5. For larger lens flares, select the Clone Stamp Tool from the toolbar (shortcut S). Hold down the Alt key on Windows or Option key on Mac and click on a clean area near the lens flare to sample it.
Step 6. Release the Alt key and paint over the lens flare area. Adjust the brush size and hardness as needed to blend the cloned area smoothly.
Step 7. For more complex areas, select the Patch Tool from the toolbar. It’s grouped with the Spot Healing Brush Tool.
Step 8. Next, draw a selection around the lens flare you want to remove. Then, drag the selection to a clean area that you want to use to replace the lens flare. Photoshop will blend the area automatically.
Step 9. If there are any visible seams or inconsistencies, use the Healing Brush Tool (shortcut J) to paint over them and blend the areas more naturally.
Zoom in and out using the Zoom Tool or shortcut (Z) to ensure the edited areas look natural from different perspectives.
Step 10. Once you’re satisfied with the results, save your image by going to File > Save As, and choosing your desired format.
And there you have it! By following these steps, you can effectively remove lens flare from your photos using Adobe Photoshop.
Remember to work nondestructively and take your time to blend the edited areas seamlessly.
Happy Editing!
Have You Ever Thought To
Outsource Photo Editing?
Try it today with 10 free edits from three professional photo editors.
Leave the Time-Consuming Editing to PhotoUp!
It’s crucial for photographers, especially those involved in industries like real estate, to master these post-production skills to enhance their portfolio’s quality.
With practice, these techniques will become quick and easy fixes, further perfecting your craft.


However, if you rather spend your time shooting more properties and building lasting relationships with clients, you should consider leaving the editing to PhotoUp.
PhotoUp has a team of highly talented real estate photo editors who are ready and waiting to professionally edit your images at the low cost of $1.10 per image depending on the subscription.
Our skilled photo editors can help with the following issues:
- Improper exposure levels
- Harsh shadows, lack of light, etc.
- Blurred images that were taken without a tripod
- Images that need cropping or other effects
- Lawn greening and sky replacements
- Twilight editing
- Clutter and object removal
- Line and angle corrections
- And much more!
We will handle all types of issues – from basic to complex editing!
Browse Top Dedicated
Real Estate Photo Editors
Ready-to-hire editors for real estate photo editing, and more.
With PhotoUp’s user-friendly software, you can easily upload and receive photos, send instructions and feedback, track and manage team members and clients, and deliver photos directly to your clients.
How to Get Started
Getting started with PhotoUp is a breeze!
All you need to do is sign up for a free PhotoUp account, place your first order and your photographs will be delivered back to you in less than 24 hours.
PhotoUp Real Estate Photo Editing Uploader Demo
For more details, check out our real estate photo editing uploader demo:
It’s really as easy as 1-2-3 to get beautifully edited images!
A Complete Real Estate Marketing Partner
On top of that, PhotoUp is a complete real estate marketing partner and also offers additional services such as:
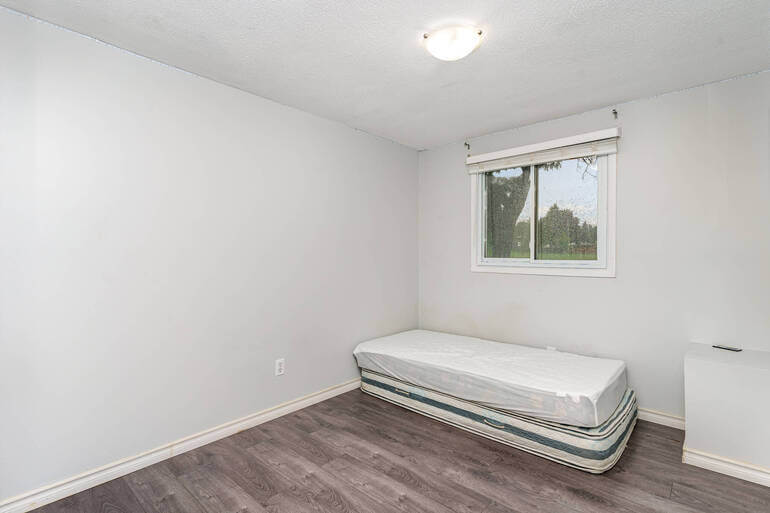
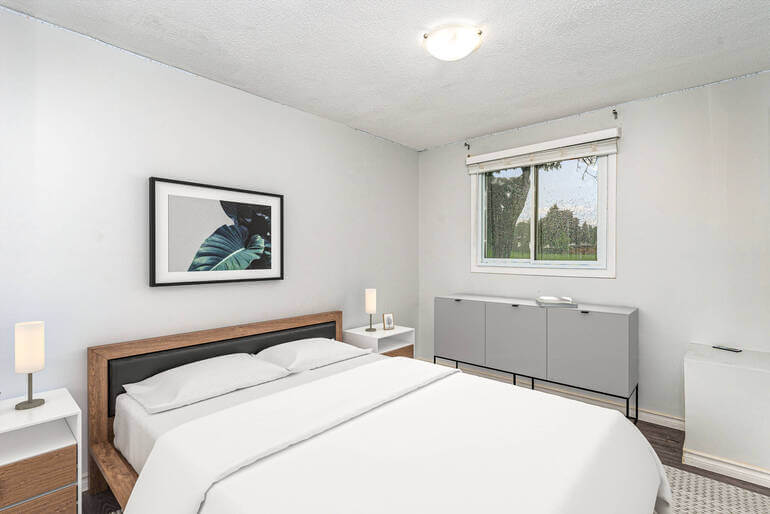
- Virtual staging
- Virtual house tours
- Home walk-through videos
- Custom websites
- Single property websites
- Property flyers
- Floor plans
- House portraits
- And Virtual Assistants
We have everything you need to enhance and market real estate photography in one user-friendly platform!
So, don’t wait!
Sign up for a free PhotoUp account today and we’ll help you remove lens flare and other imperfections in less than 24 hours.
Did we mention that you get 10 free credits when you sign up for an account that you can use for any of our services?!
We hope this blog post helped you learn how to remove lens flare in Photoshop. If you found this guide useful, you may also want to check out the following resources:

