Don’t let that stunning view outside go to waste! With a few simple steps using Adobe Lightroom and Photoshop, you can quickly show the view through the windows of your interior real estate photos through window masking.
Let’s get started!
First, there are plenty of ways to shoot real estate photography. We recommend the following:
- HDR – How to shoot HDR for Real Estate Photography
- Single Image – How to Shoot Single Images for Real Estate Photography
- Flambient – How to Shoot Flambient for Real Estate Photography
For the best window views, we suggest shooting using the HDR or Flambient methods as outlined above.
Now, to properly mask in the view through your windows:
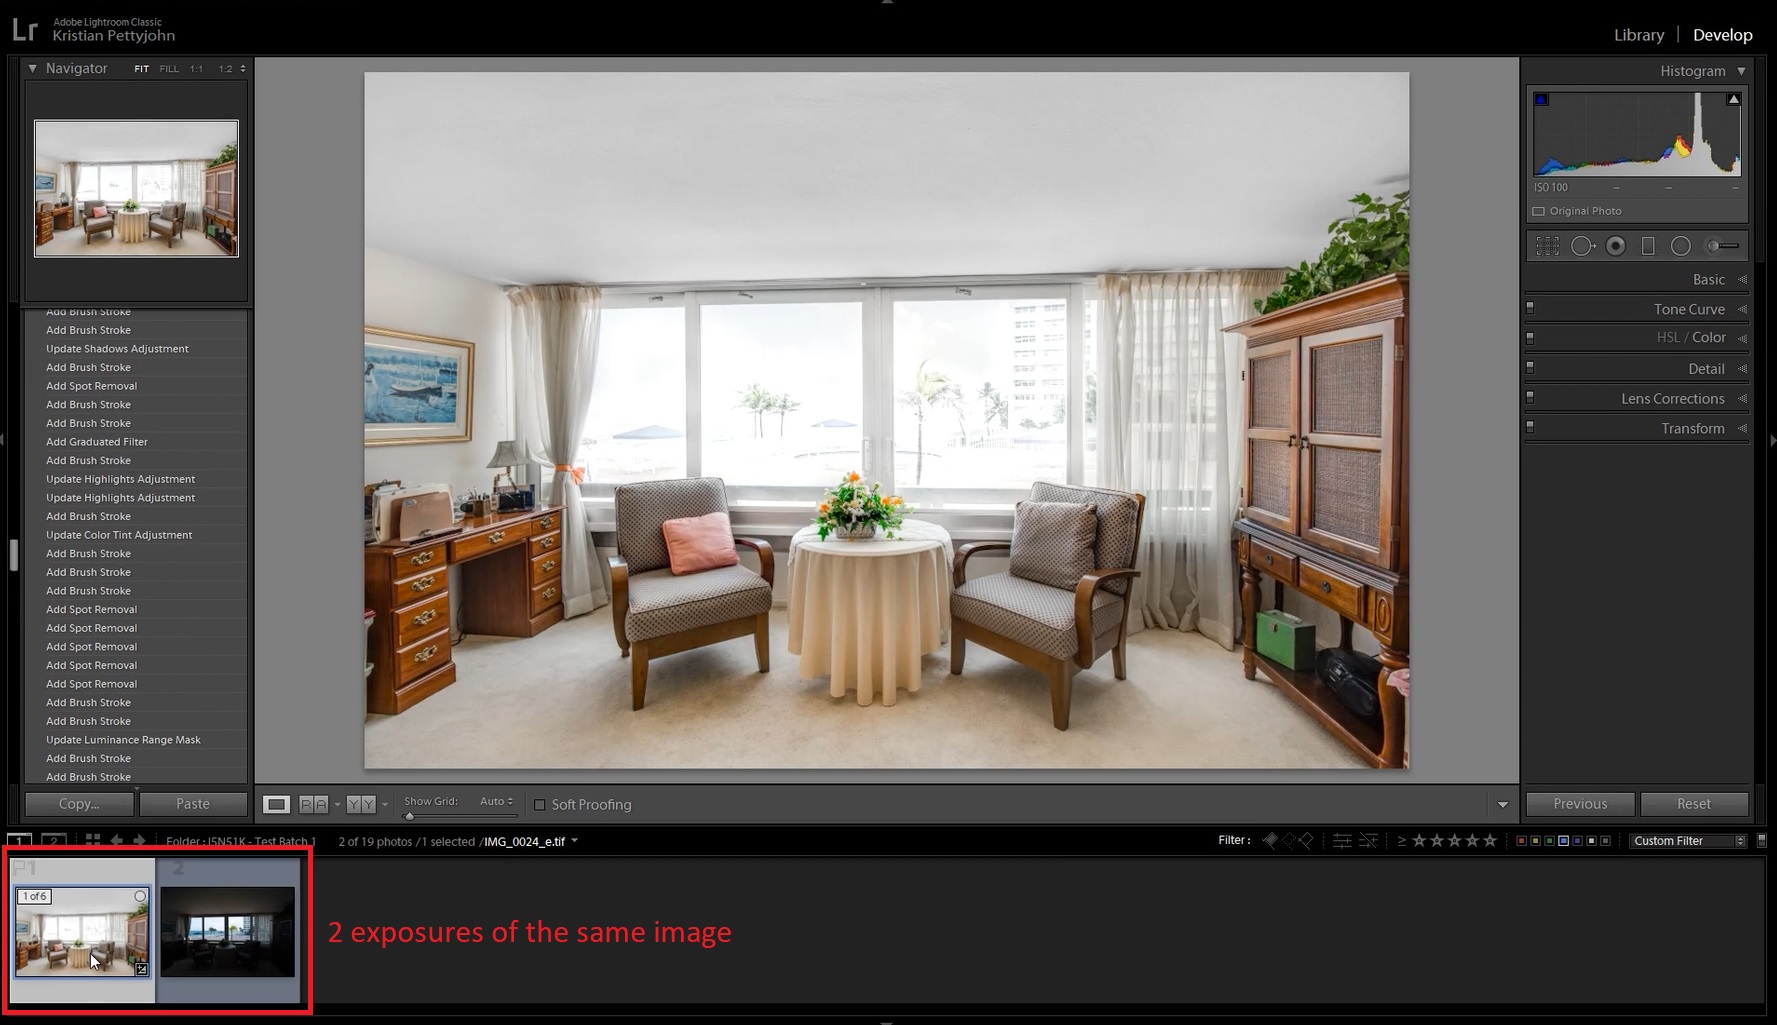
1. You’ll need (at least) two exposures of the same image. One, the base file, is for the normal exposure of the interior of the room. The second exposure is for the window view. The window view is set at the correct exposure while the room view is underexposed.
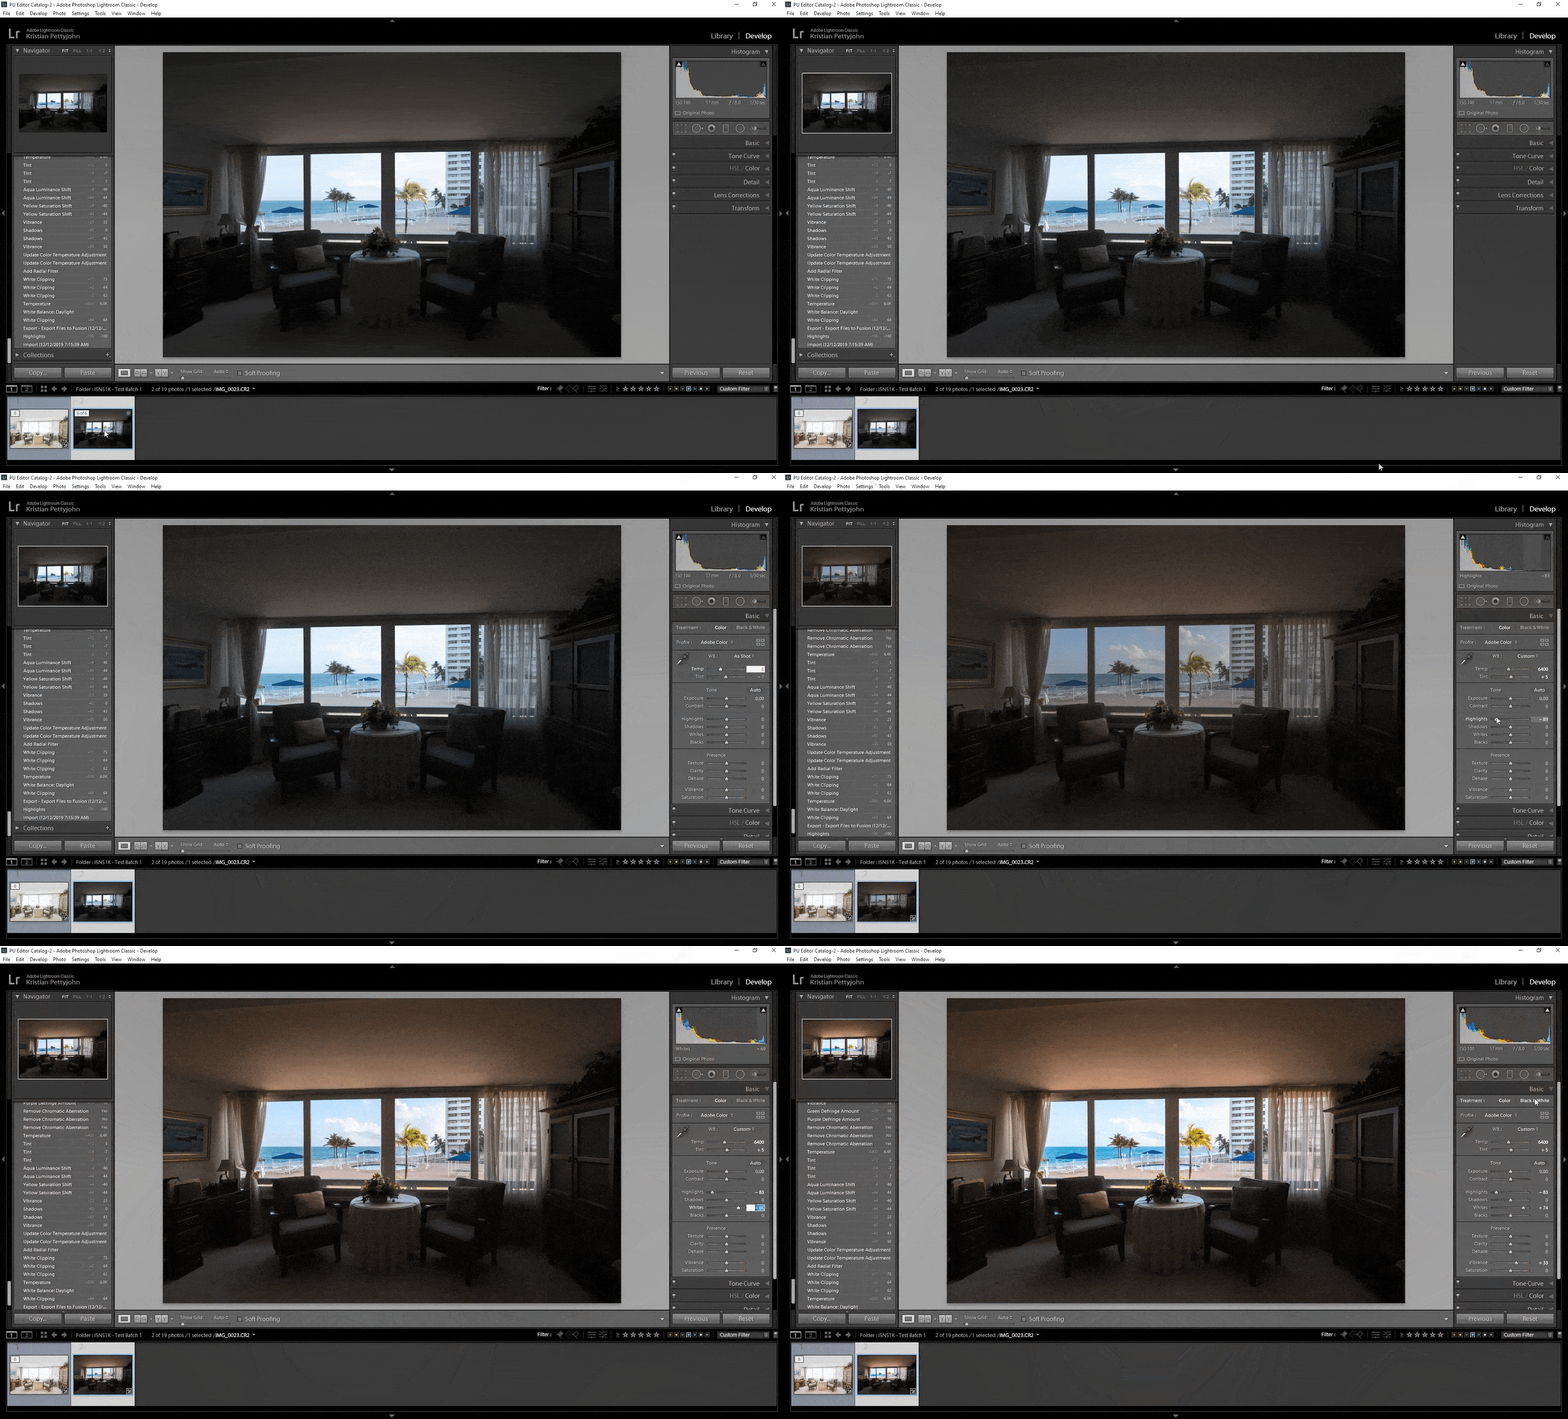
2. Using the image adjustment panel in Lightroom, make a few adjustments to enhance the window view in the window view exposure. What settings you need to change will vary from one photo to another, depending on how bright and vibrant you want the window view to be.
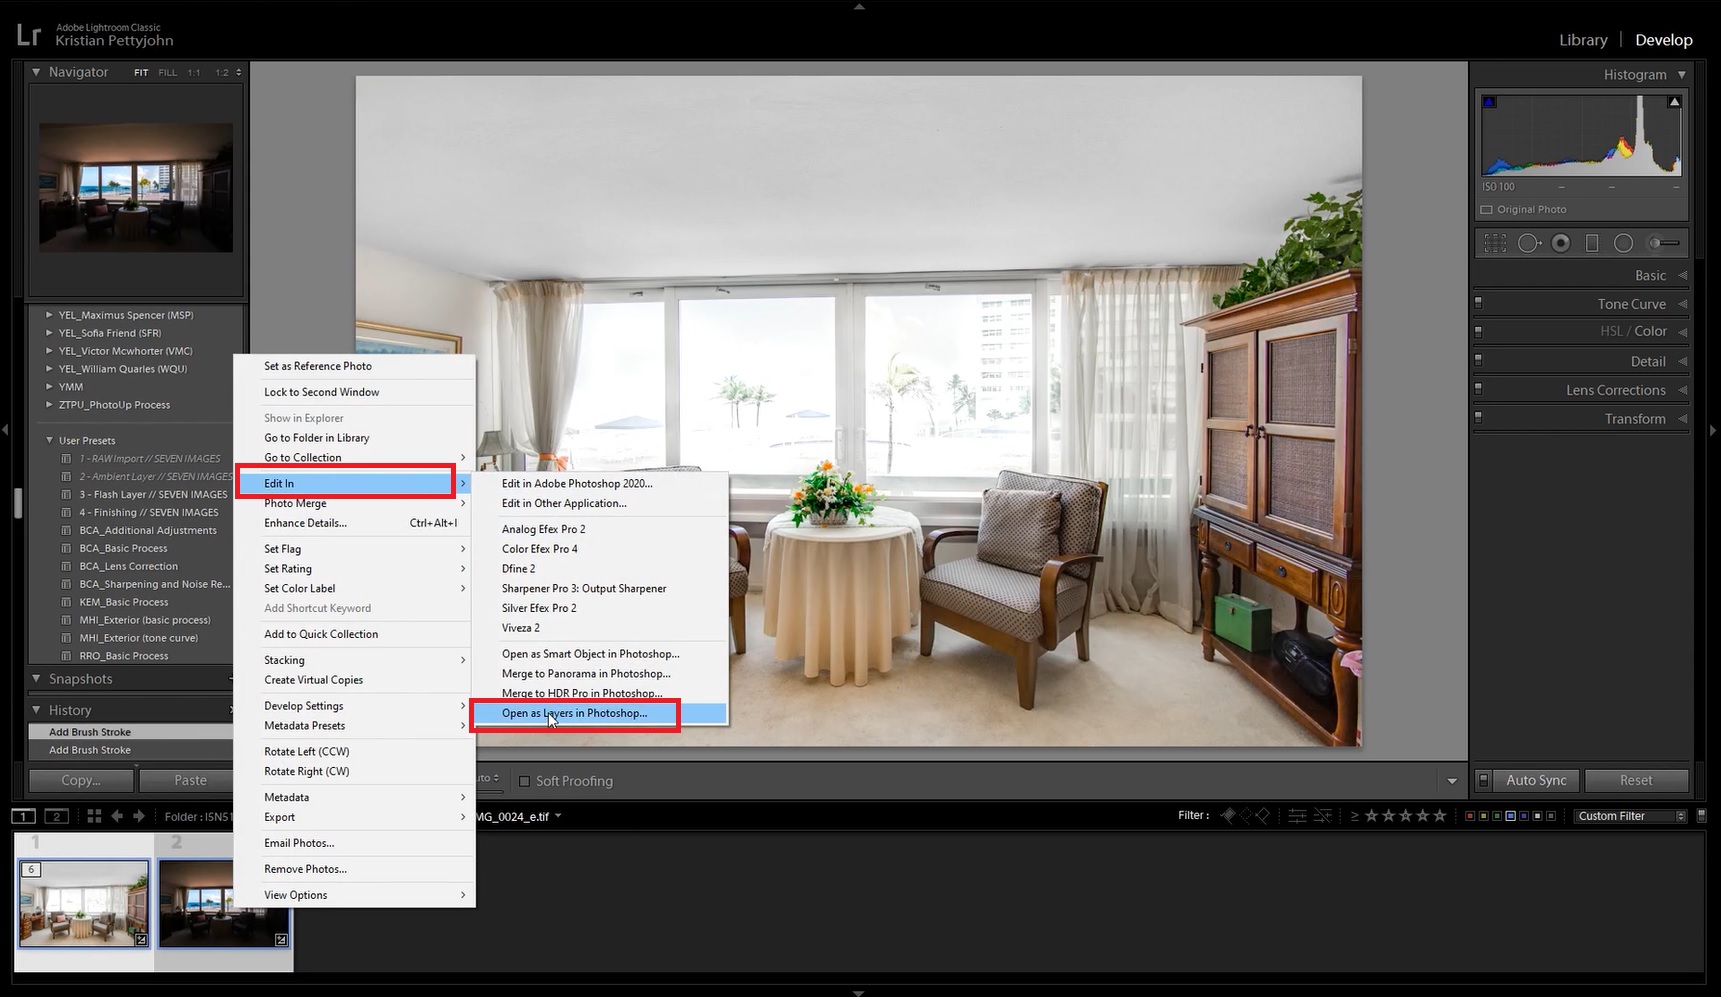
3. Select both photos. Right-click and choose “Edit In.” Scroll down and click “Open as Layers in Photoshop.”
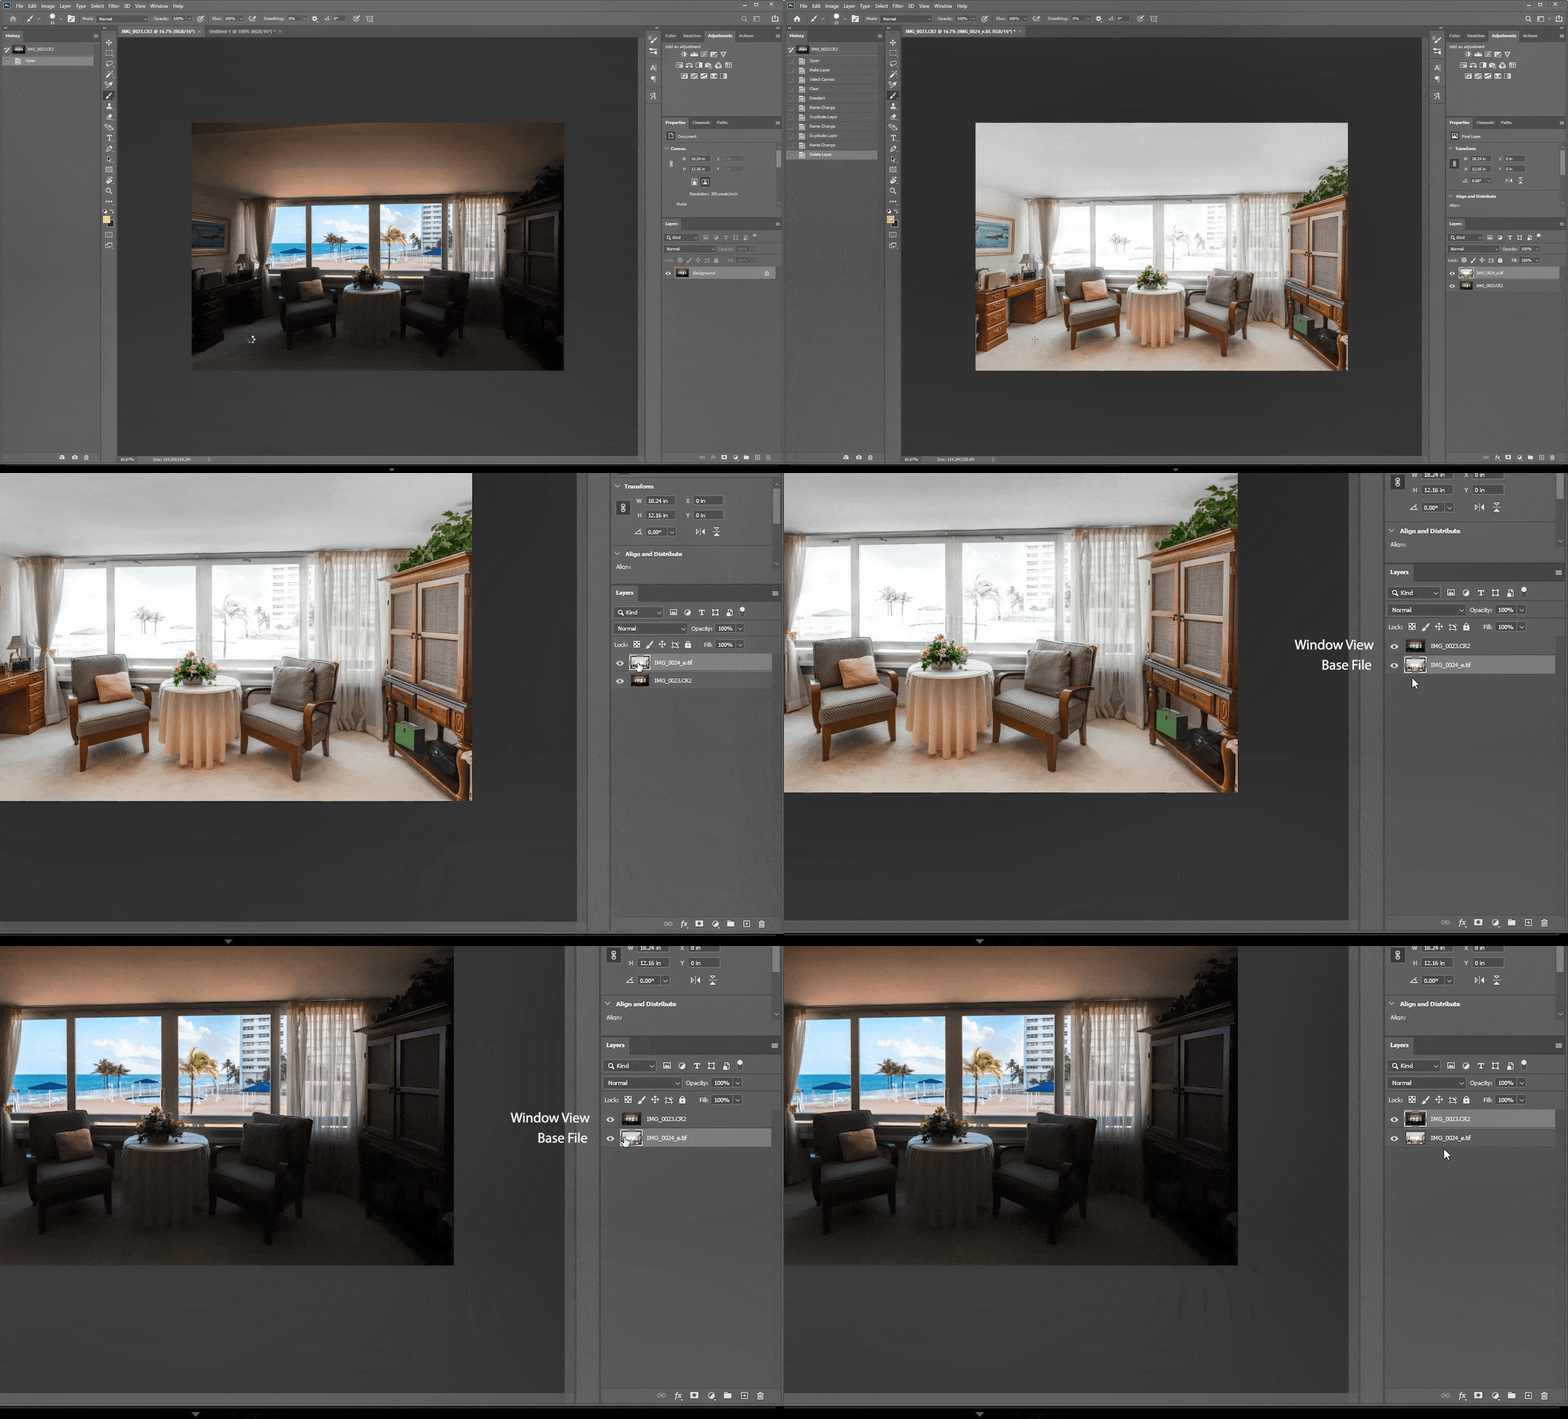
4. In Photoshop, drag and place the room-view image under the edited window-view image.
The Ultimate All-in-One
Real Estate Photographer Business Platform
Grow a successful real estate photography business with PhotoUp.
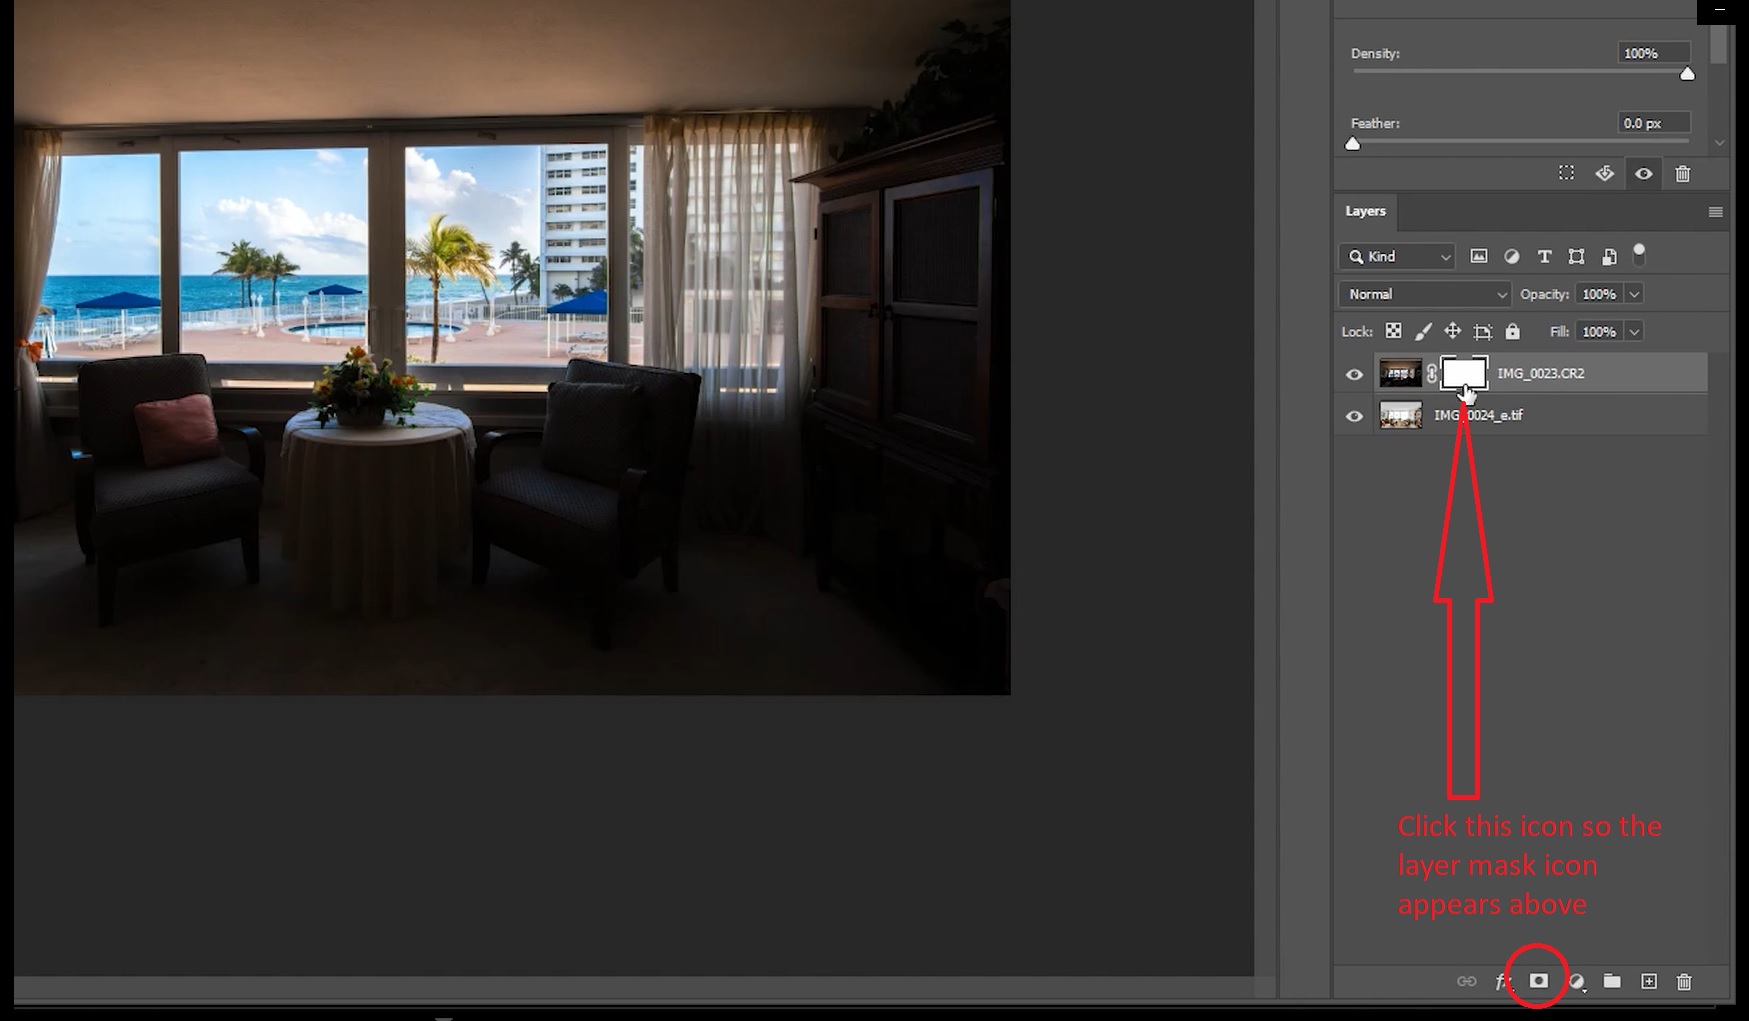
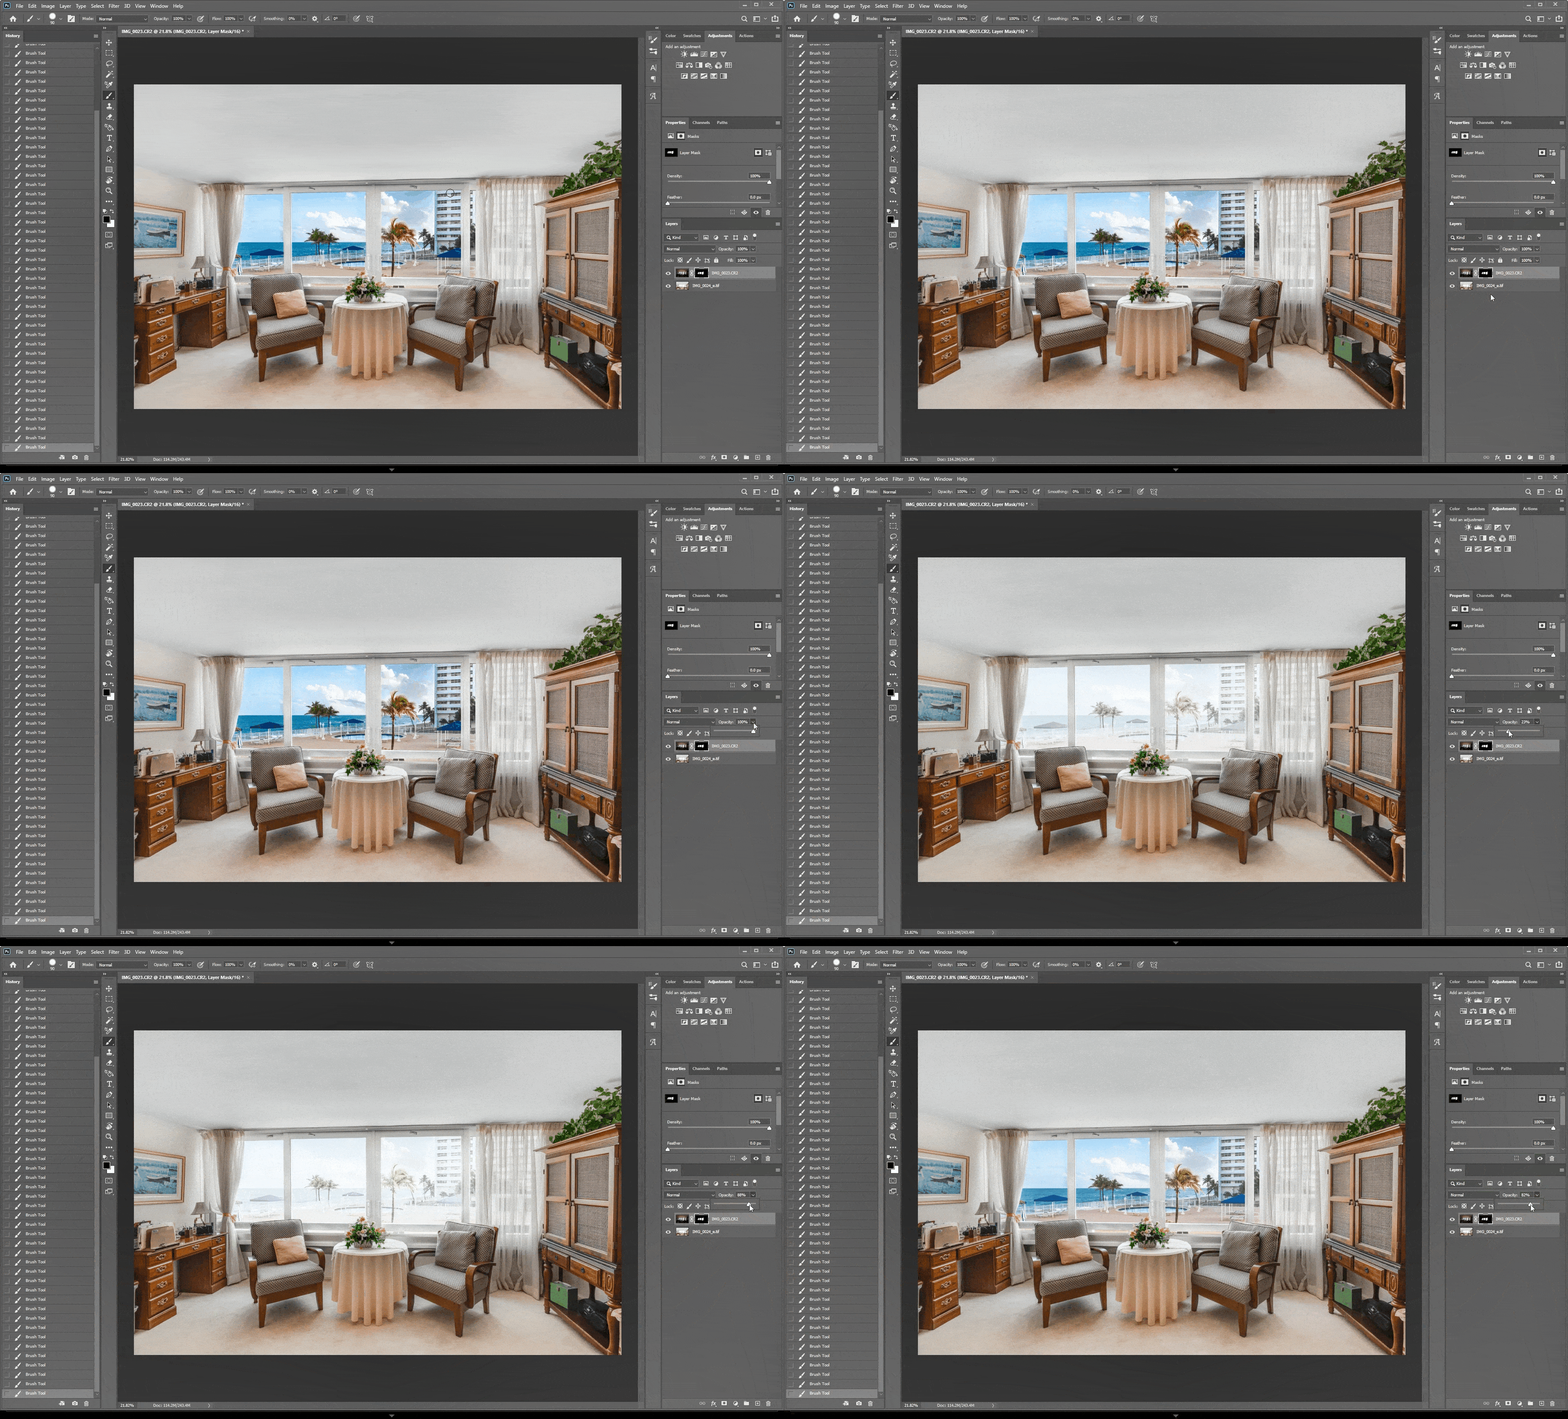
5. Select the window view layer and click the Add Layer Mask icon at the bottom.
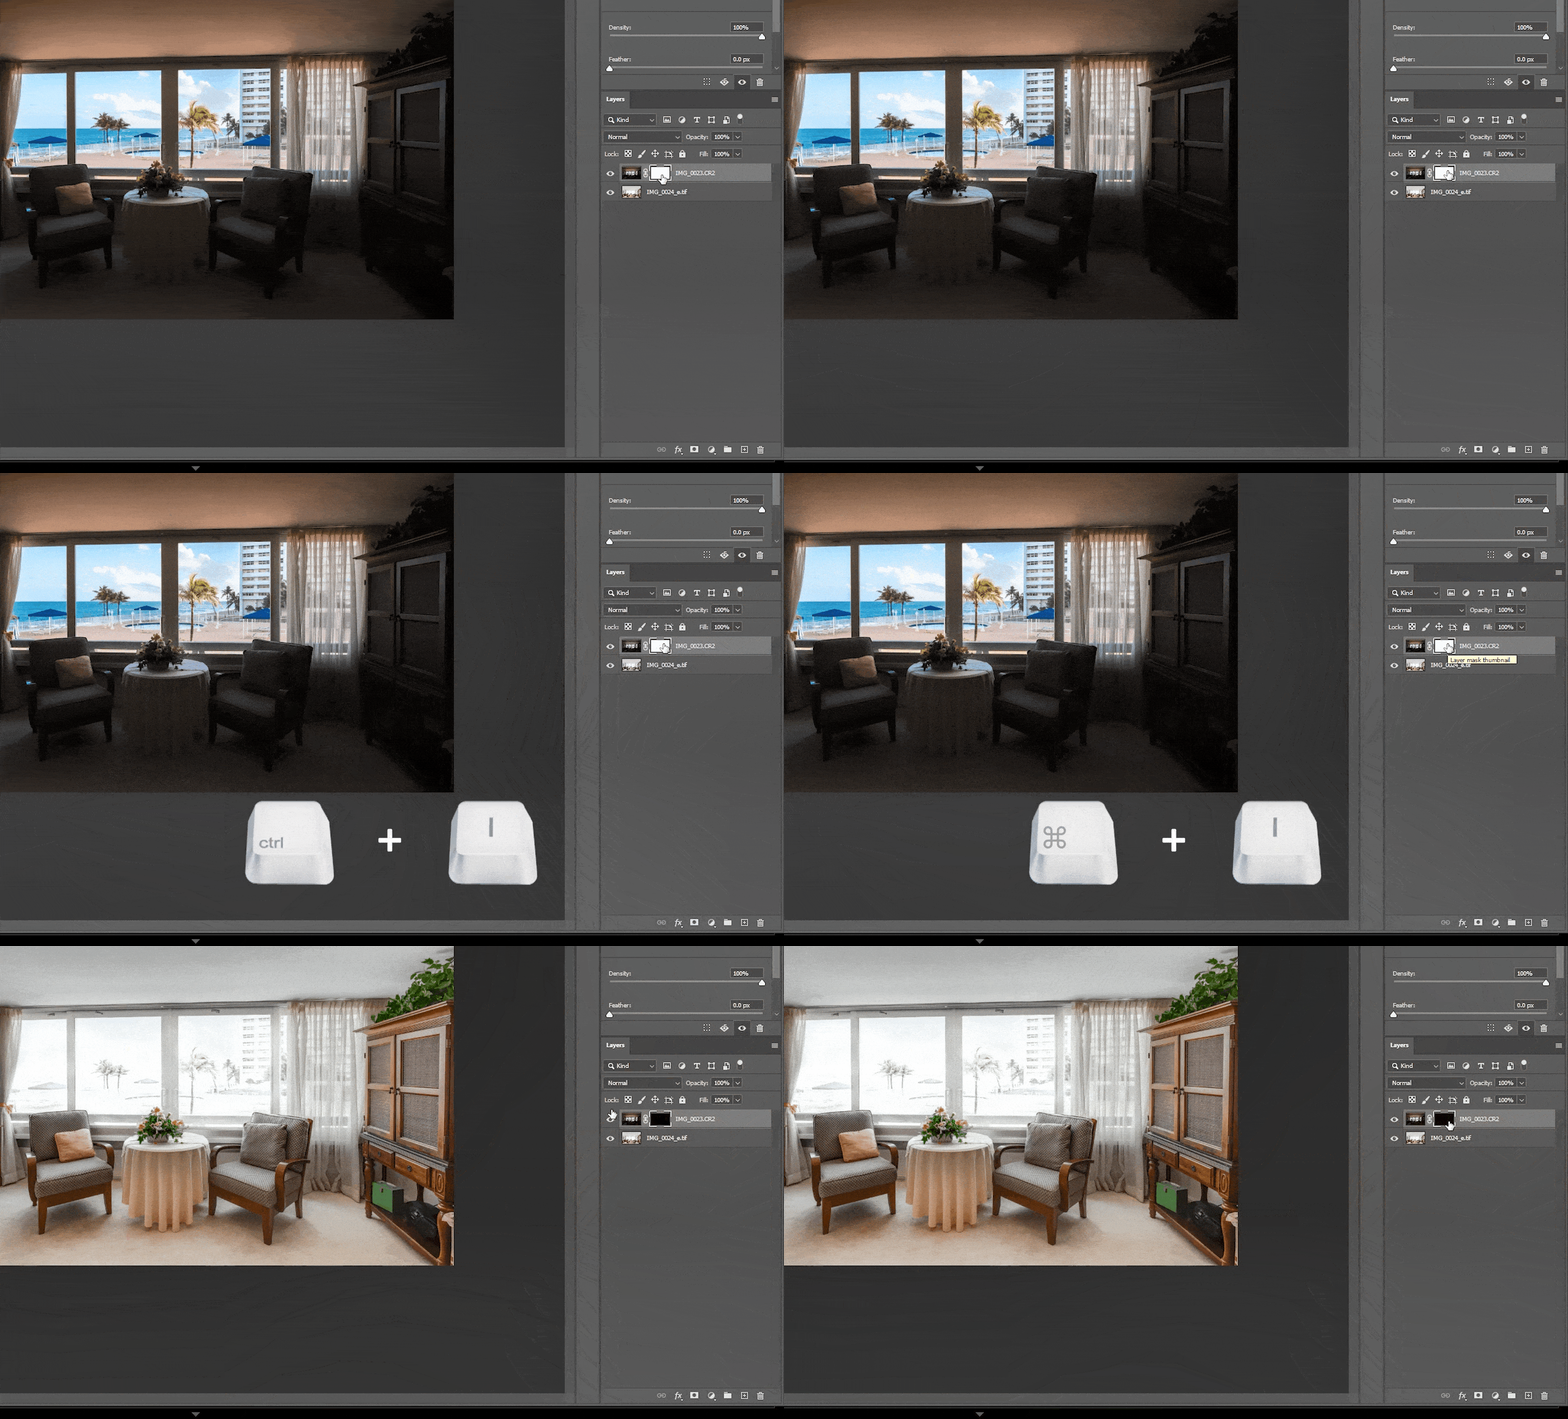
6. Invert the layer mask by clicking Ctrl and I, or Command and I on your keyboard. This hides the layer without removing it. Then select the layer mask.
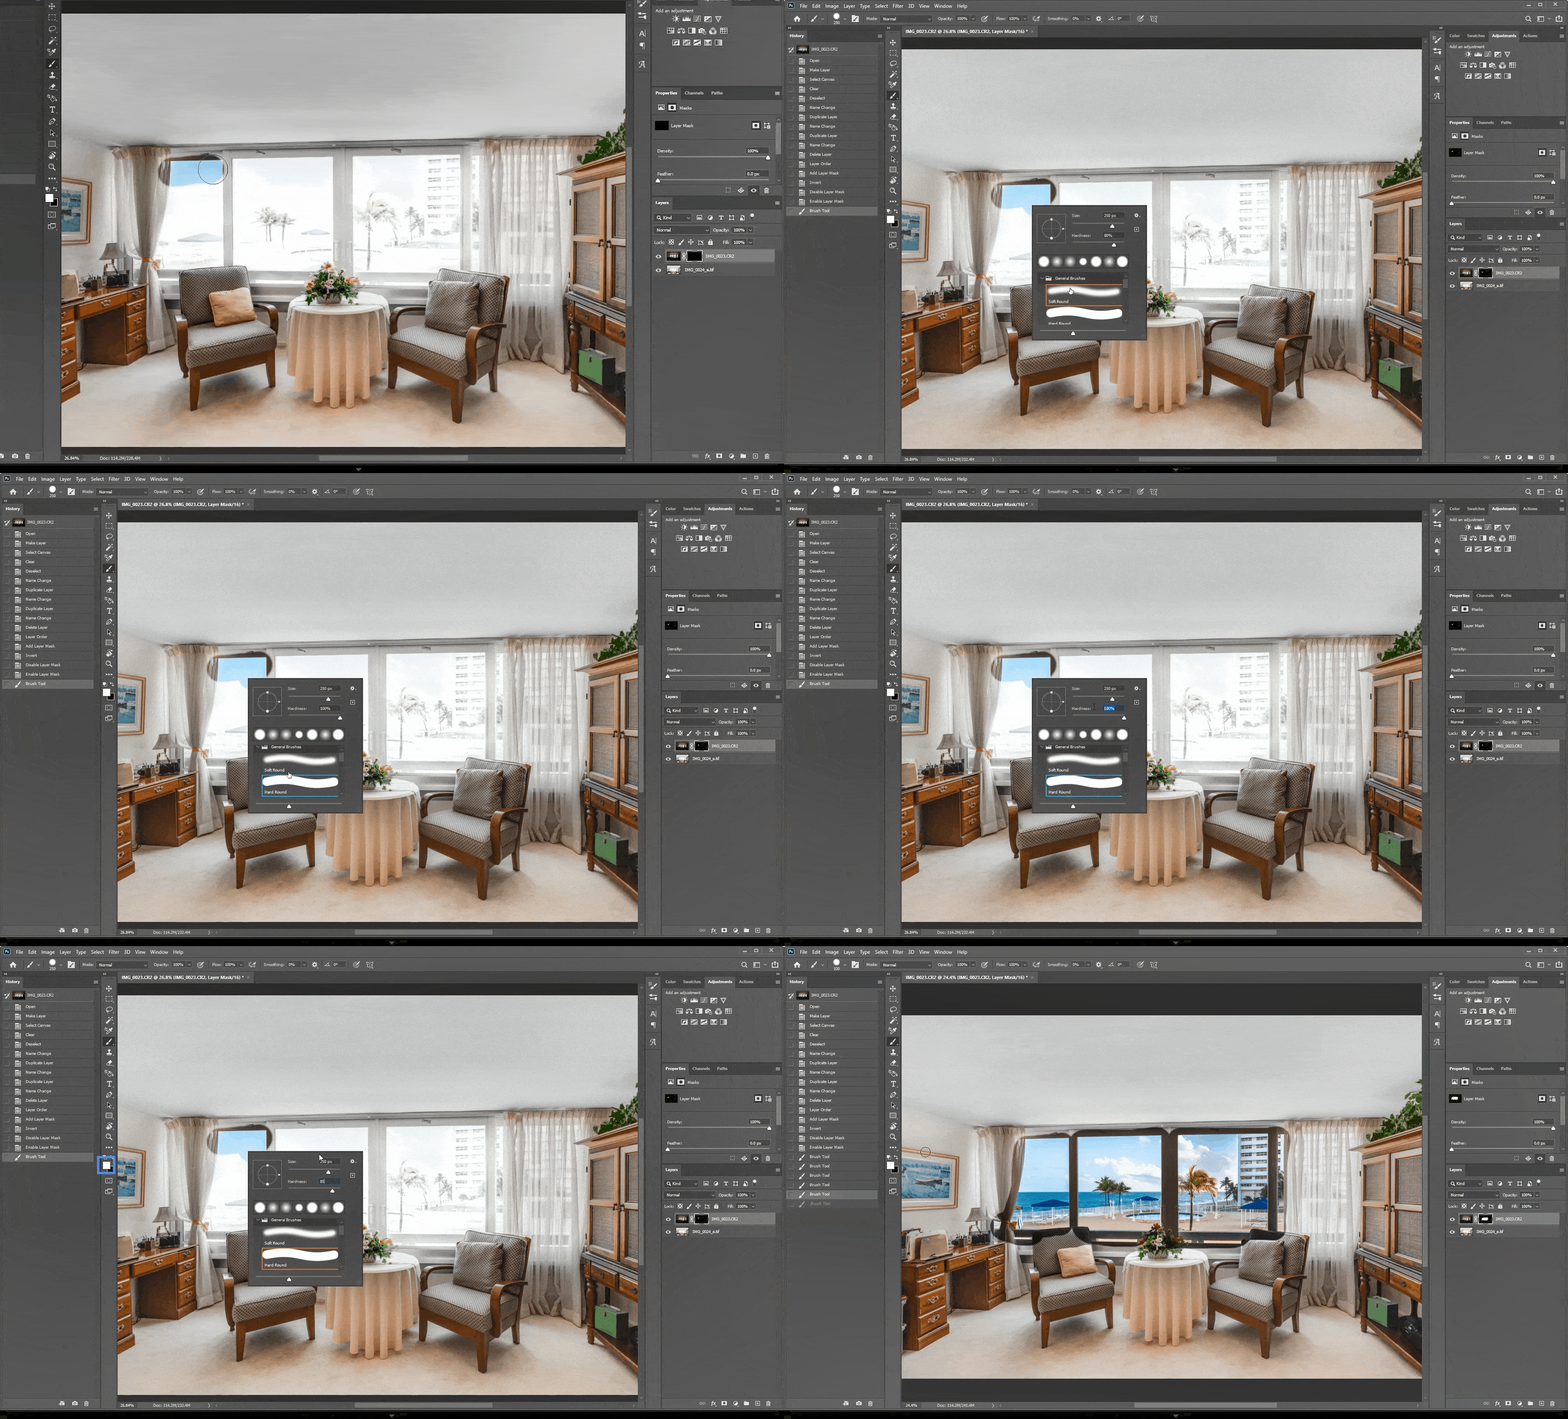
7. Start masking the window view by using the Brush Tool. Adjust the Hardness setting to around 85%, and make sure the layer color in the menu bar is white. Brush over the image of the window view to the room view.
8. Remove overlapped frames by changing the layer color to black. Brush over the overlapped parts to restore the originals. You can also do steps 7 and 8 using the pen tool and making a selection of the windows – whatever you find easiest to do.
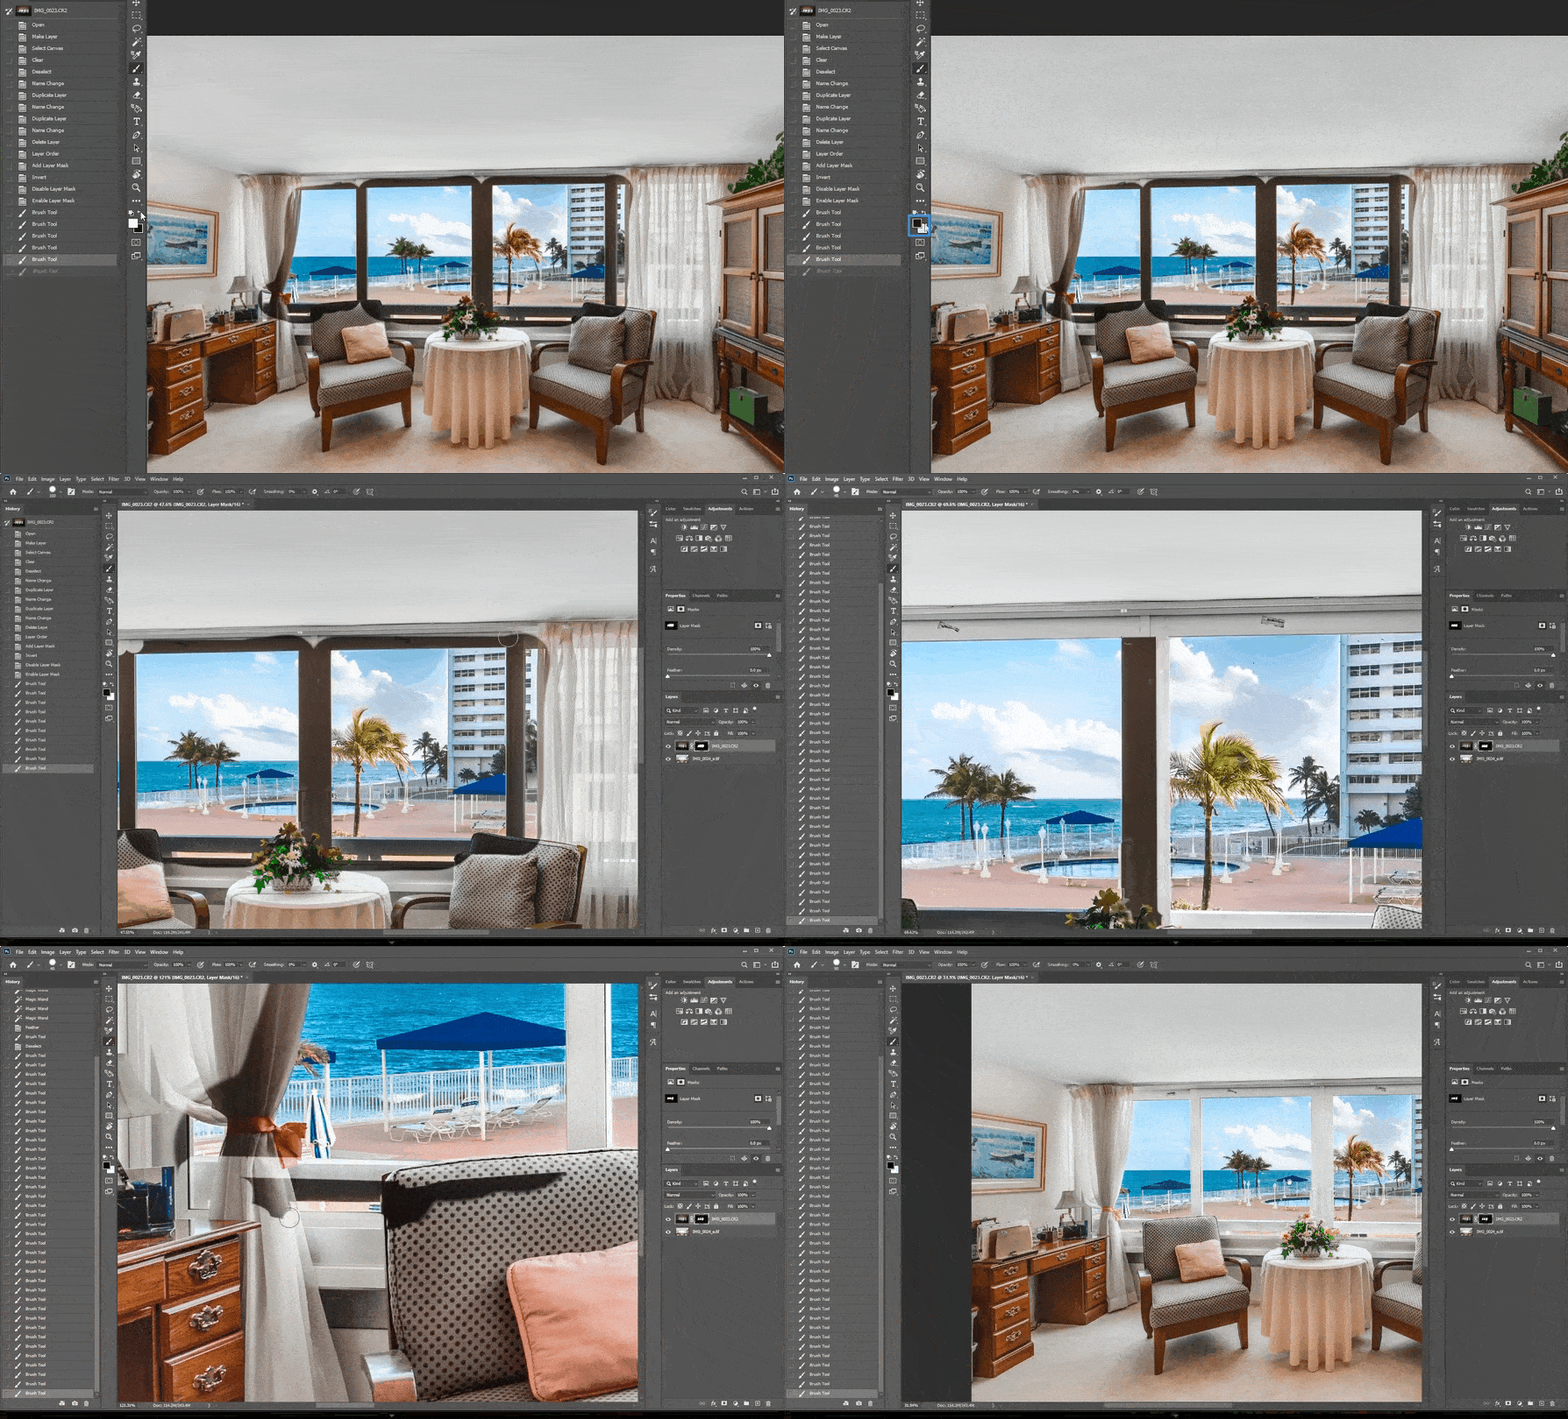
9. You can adjust the opacity if you want to brighten up the window a bit, which can help with the transition between interior and exterior and make the view appear more natural.
Is window masking still too difficult for you? Don’t want to go through the hassle of masking in all of your window views? Well, just send your photos to PhotoUp and we’ll take care of the editing for you! PhotoUp has a team of real estate photo editors who can professionally edit your real estate photos based on your preference. Window masking, removing objects, replacing skies—we take care of everything!
Browse Top Dedicated
Real Estate Photo Editors
Ready-to-hire editors for real estate photo editing, and more.
PhotoUp offers 12 to 24-hour turnaround. Upon signing an account, you’ll get your own all-in-one photo management system where you can upload and receive photos, send instructions and feedback, track and manage team members and clients, deliver photos to your clients, and more!


