


Table of Contents
- Why Create a Digital Signature?
- How to Easily Make a Signature in Photoshop
- Don’t Have Time to Learn Photoshop? Let PhotoUp Help!
Are you interested in learning how to make a signature in Photoshop?
As a real estate photographer, you know the importance of personal branding. Your signature is an essential tool for establishing your brand identity. Creating a unique, eye-catching signature can help you stand out from your competition and give your brand a professional look.
In this guide, we’ll go over the steps you can follow to create a signature in Photoshop. With these guidelines, you can create a signature that will reflect your unique style and establish a brand identity that will set you apart.
Why Create a Digital Signature?
Digital signatures are like virtual bodyguards of the digital world. Their mission? To protect against tampering and impersonation in digital communications.
By leaving their mark, digital signatures offer undeniable proof of the origin, identity, and status of electronic documents, transactions, or images.
When adding a digital signature to your images, it functions like a watermark to protect your work and prevent it from being used without permission or credit.
Additionally, creating a signature can help you brand yourself as a photographer using your unique signature and style. People will recognize your brand through your signature.
How to Easily Make a Signature in Photoshop
As mentioned, a digital signature can be useful for adding watermarks to your real estate images and protecting them from unauthorized use or just for personalized branding.
Let’s show you how to make a signature in Photoshop step-by-step. You can either watch the video tutorial or continue reading the text with screenshots below:
Creating Your Signature
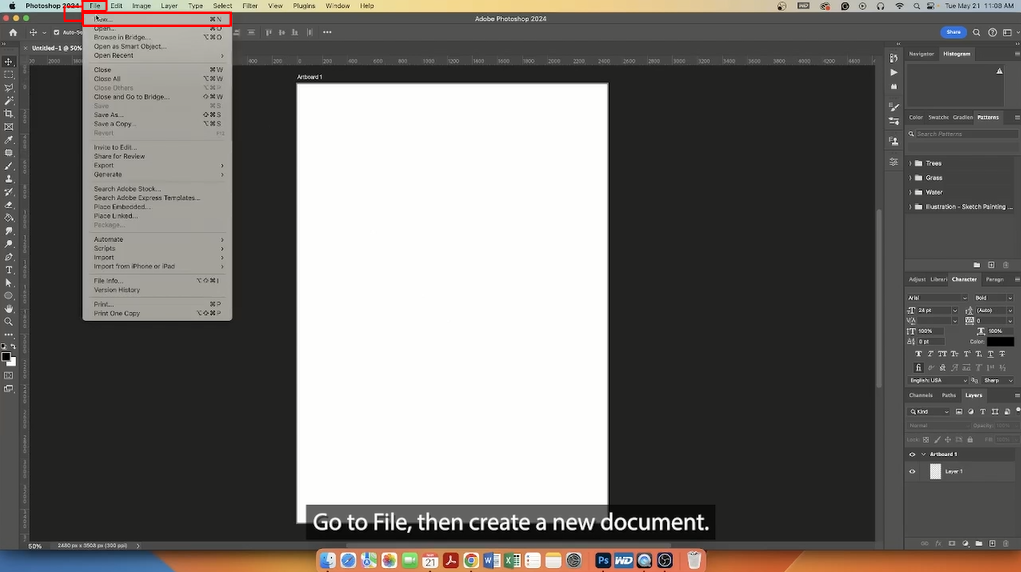
Step 1. Open Photoshop, navigate to File, and create a New Document.
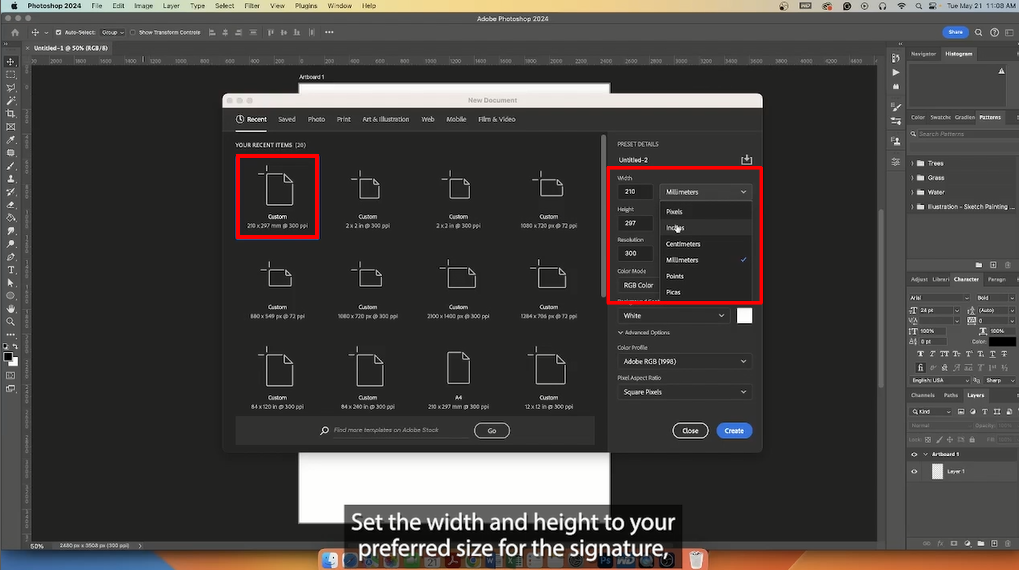
Step 2. Set the width and height to your preferred size for the signature, and set the resolution to 300 pixels for high quality.
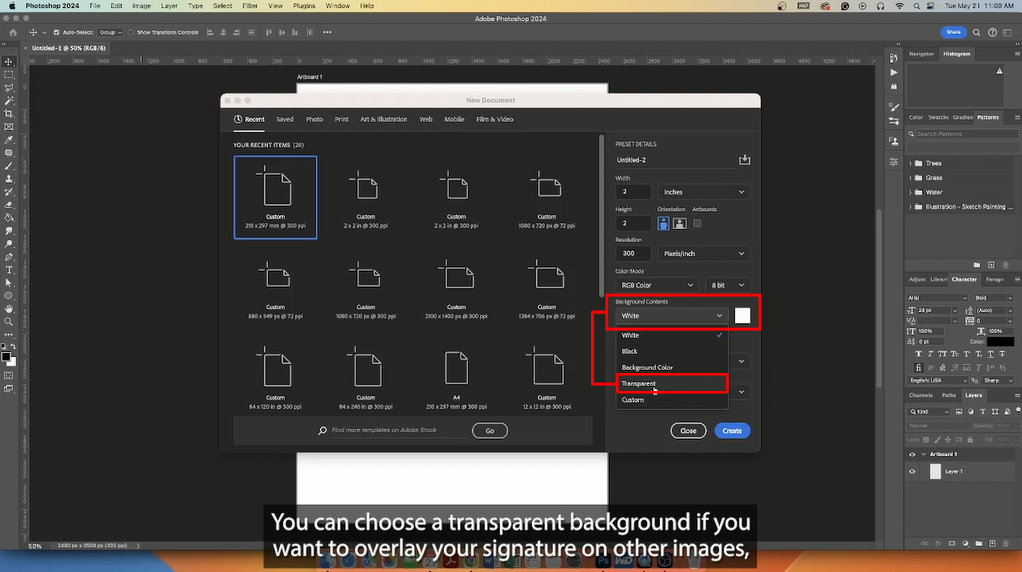
Step 3. You can choose a Transparent background if you want to overlay your signature on other images or select a White background for a classic look.
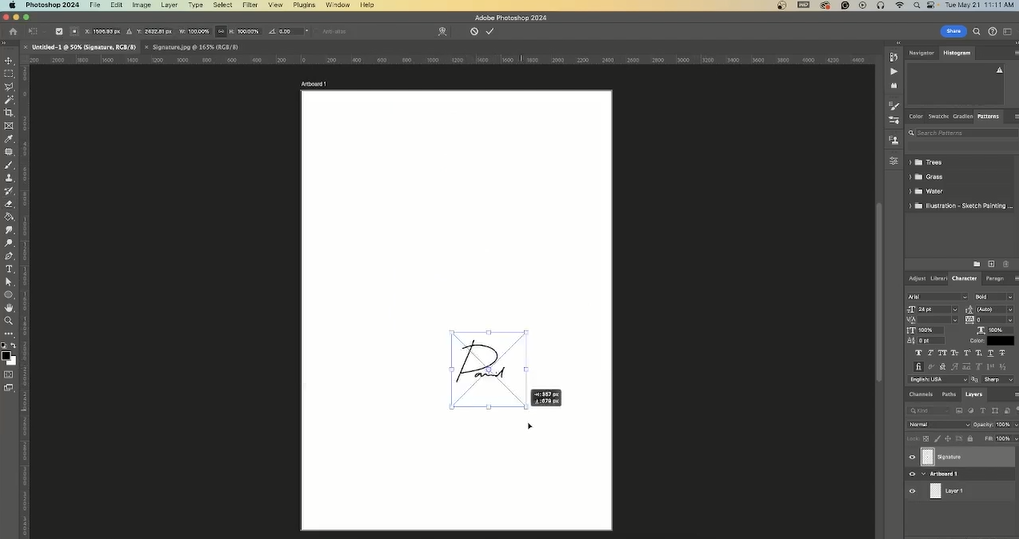
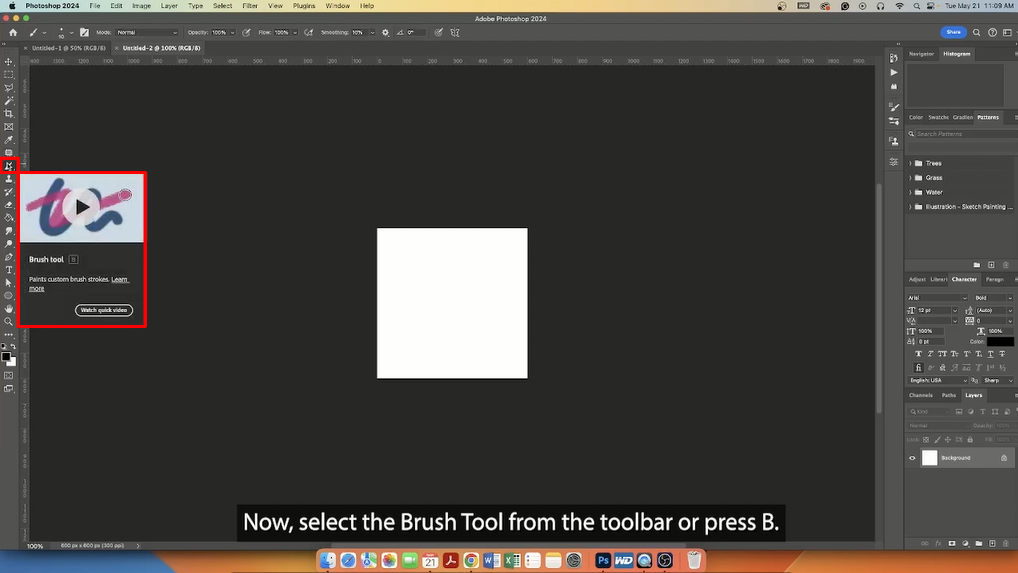
Step 4. Now, select the Brush Tool from the toolbar or press B.
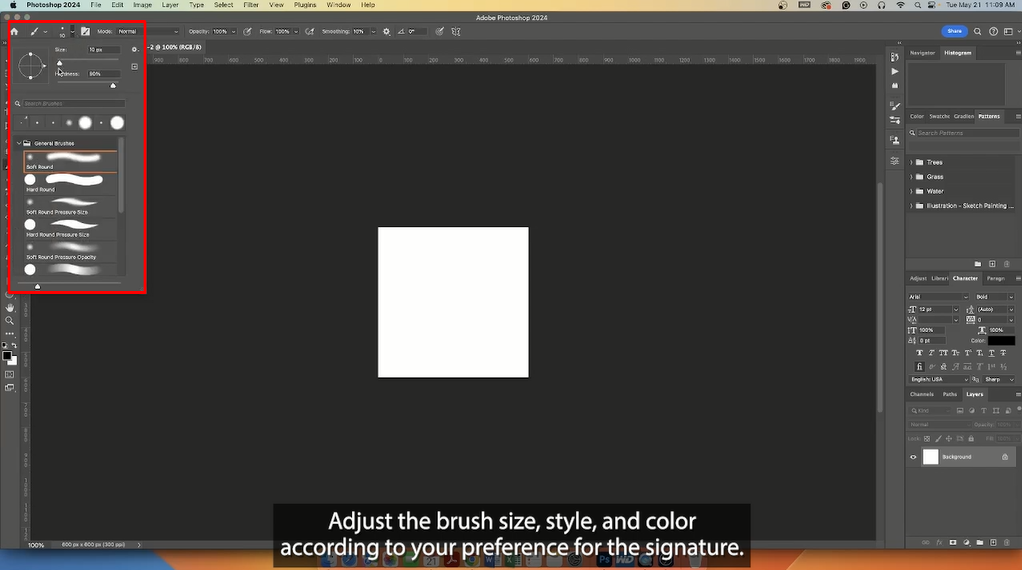
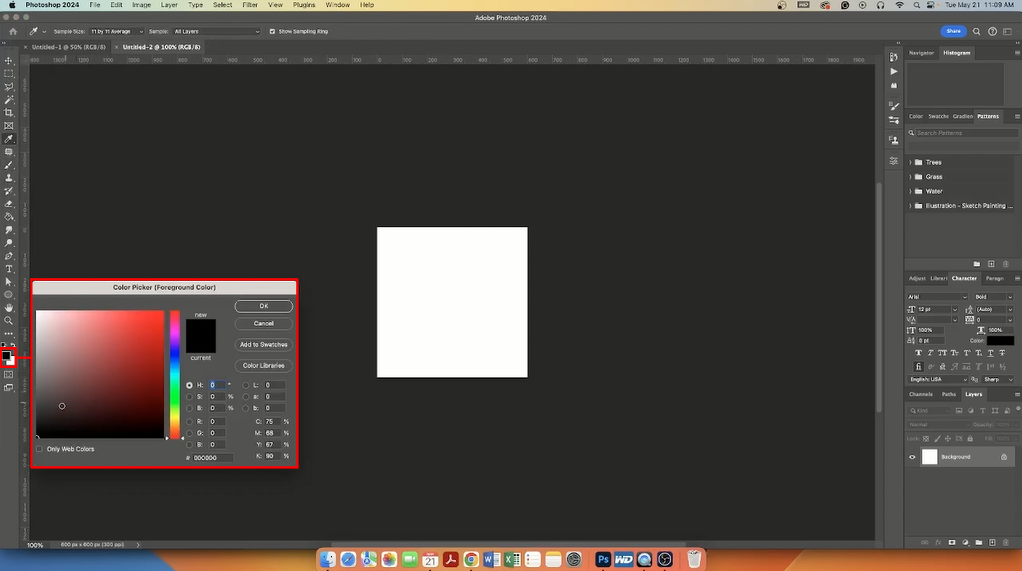
Step 5. Adjust the Brush Size, Style, and Color according to your preference for the signature.
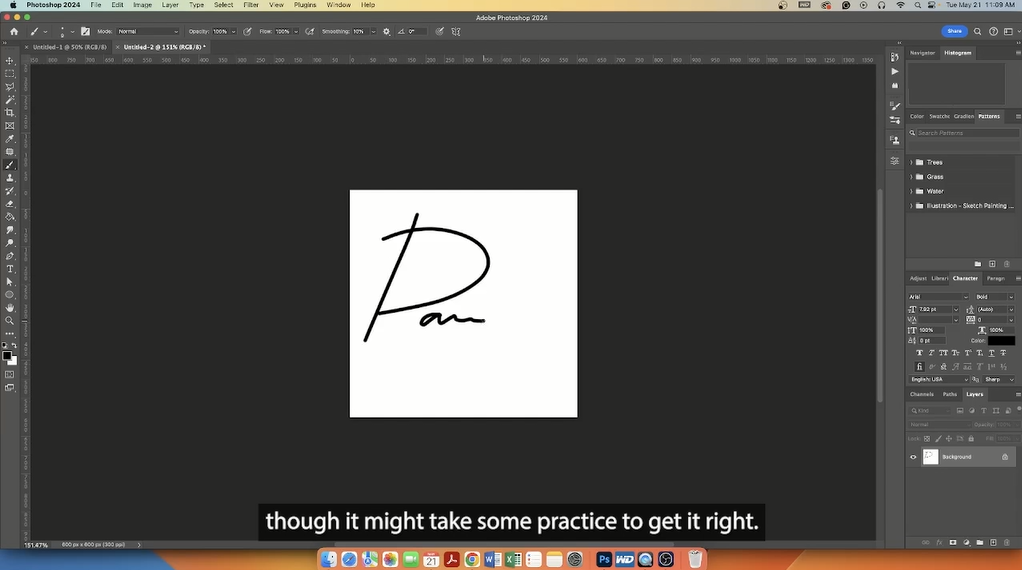
Step 6. Now, write/create your signature. Use a graphics tablet for better control. If you don’t have a tablet, you can use a mouse, though it might take some practice to get it right.
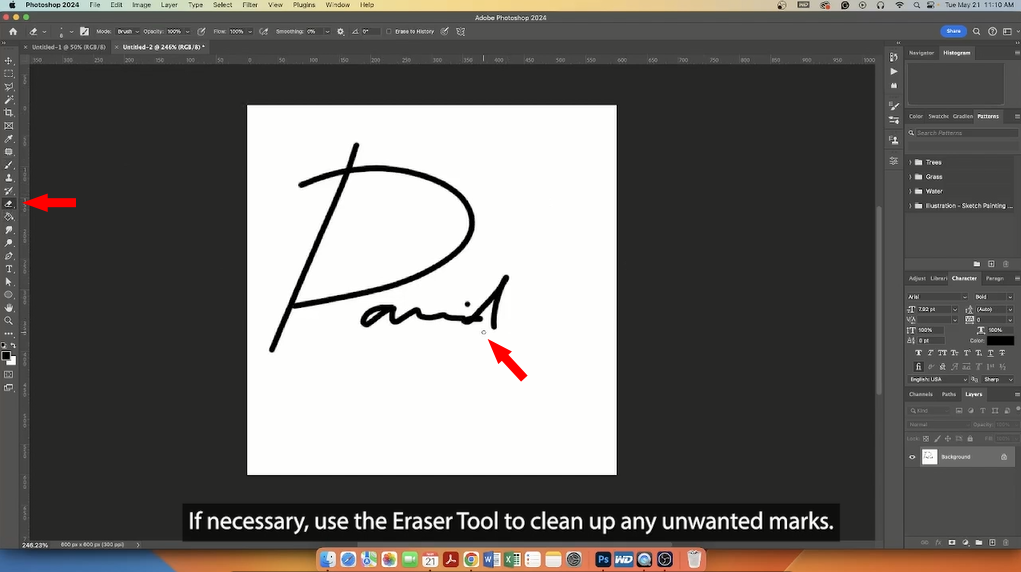
Step 7. If necessary, use the Eraser Tool to clean up any unwanted marks.
Exporting and Saving Your Signature
Step 8. Once you’re satisfied with your signature, go to File > Save As.
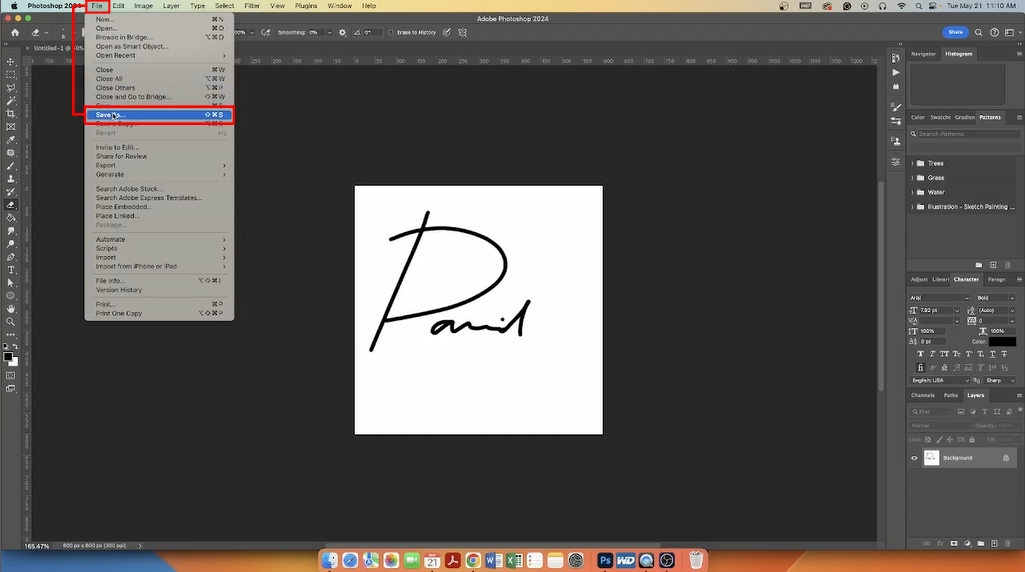
Step 9. Next, type the File Name you want to save your signature as. Remember to save your signature with a unique filename so that you can easily find it later.
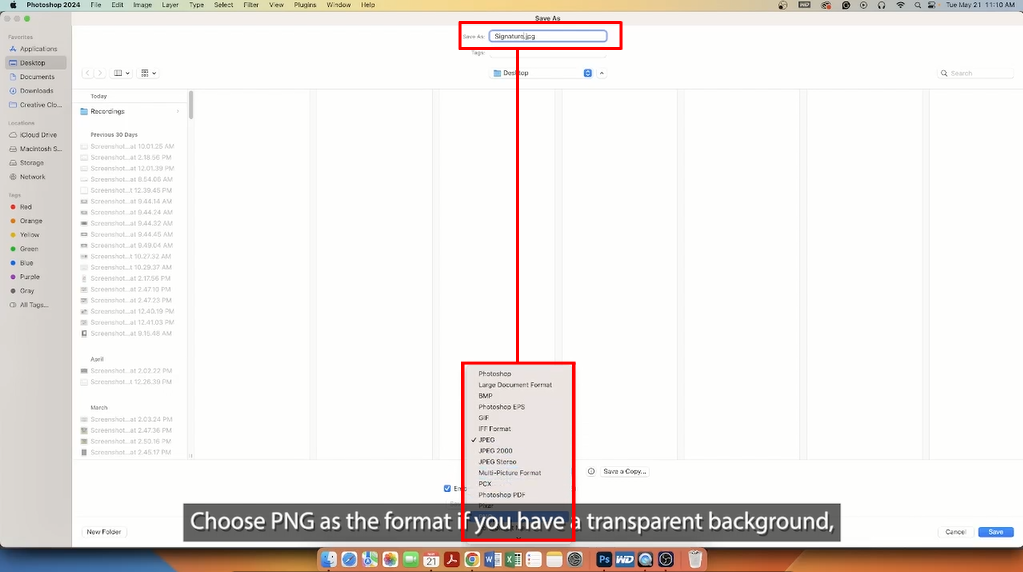
Next, choose PNG as the format if you have a transparent background, or JPEG for a white background.
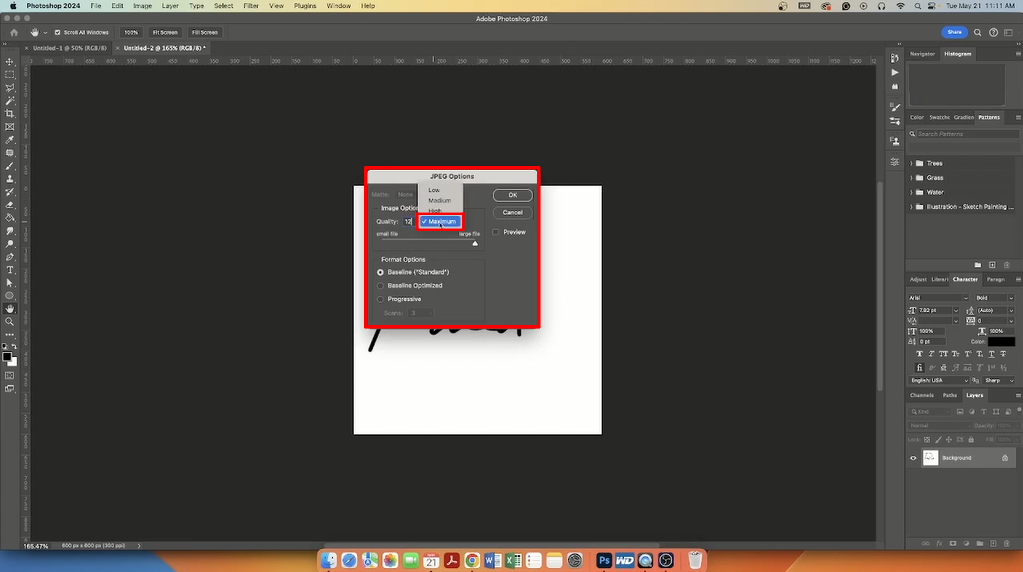
Step 10. Make sure to save your signature with a high resolution. Medium is high enough.
Applying Your Signature to Your Images
Now that you have your signature saved as a PNG file, you can apply it to your images.
Step 11. To place your signature in your document, go to File > Place Embedded.
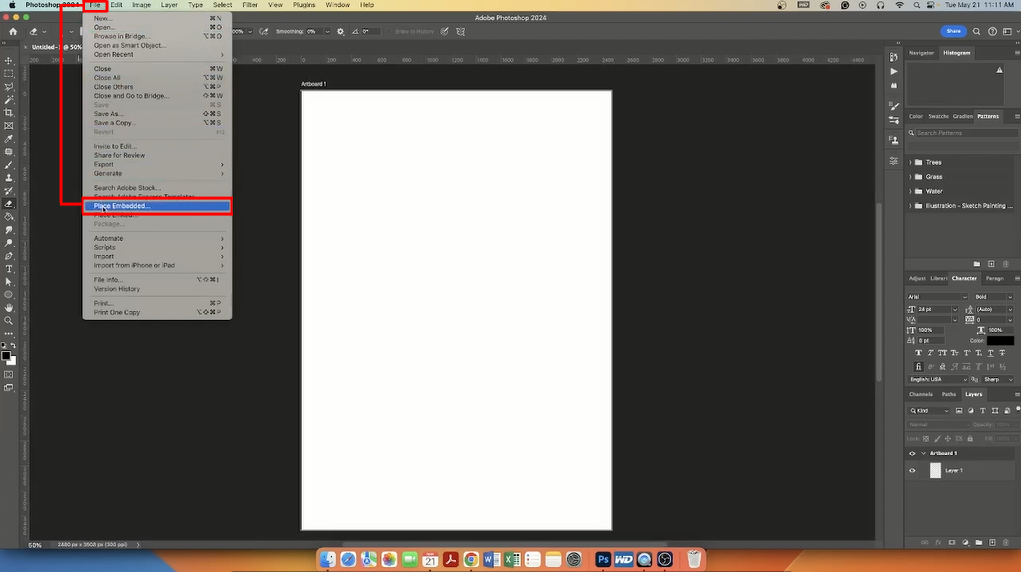
Step 12. In Files on your computer, choose your signature and click on Place.

Step 13. Lastly, resize and position it to your desired location and hit Enter to place your signature on your image or document, and that’s it!

Congratulations, you’ve now learned how to make your own digital signature in Photoshop.
Wrapping Up
In conclusion, creating a signature in Photoshop is a straightforward process that can help establish your brand identity as a real estate photographer.
Follow these steps to create a signature that will help you stand out from your competition and give your brand a professional and polished look.
Don’t be afraid to experiment with different fonts, styles, and design elements to create a unique signature that reflects your personal style.
With a little creativity and some practice, you can create a signature that will be instantly recognizable and make a lasting impression on your clients.
Don’t Have Time to Learn Photoshop? Let PhotoUp Help!

If you don’t have the time to learn Photoshop and do the photo editing yourself, don’t worry!
PhotoUp’s team of professional real estate photo editors can quickly enhance and clean up your images, making them look their best.
With our advanced photo-editing software, keen attention to detail, and artistic expertise, we’ll help you achieve stunning, high-quality images.
Our skilled photo editors can help with the following issues:
- Improper exposure levels
- Harsh shadows, lack of light, etc.
- Blurred images that were taken without a tripod
- Images that need cropping or other effects
- Lawn greening and sky replacements
- Twilight and day-to-dusk editing
- Manual blending and pano stitching
- Clutter and advanced object removal
- Line and angle corrections
- And much more!
Best yet, our real estate photo editing service is affordable, starting at the low cost of $1.10 per image depending on your subscription and complexity level.
Browse Top Dedicated
Real Estate Photo Editors
Ready-to-hire editors for real estate photo editing, and more.
How to Get Started
Getting started is simple.
All you need to do is sign up for a free PhotoUp account, upload your images, provide us with instructions, choose export settings and turnaround time, and lastly, download your beautifully edited images!
Real Estate Photo Editing Uploader Tutorial Demo
To see how easy it is to get started with PhotoUp, check out our real estate photo editing uploader demo:
It’s really that simple to get beautifully edited images returned to you in less than 24 hours!
Your Real Estate Marketing Partner

Furthermore, PhotoUp offers so much more than just real estate photo editing…
PhotoUp is a complete real estate marketing partner and also offers powerful marketing tools such as:
- Virtual staging
- Virtual house tours
- Home walk-through videos
- Custom websites
- Single property websites
- Property flyers
- House portraits
- Floor plans
- And Virtual Assistants
We have everything you need to edit photos and market real estate under one roof!
So, what are you waiting for?
Sign up for a free PhotoUp account today, and let our highly skilled team of editors help you edit your images in 12-24 hours!
This will help you free up time you can spend on other high-impact projects to grow your business. Plus, for a limited time, we even offer you 10 free edits when signing up for an account.
We hope this blog post helped you learn how to make a signature in Photoshop. If you found this tutorial useful, you may also want to check out the following resources:

