Table of Contents
- What Are Inverted Colors and Why Use Them?
- The Invert Color Tool Allows You to Be Creative
- How to Invert Colors in Photoshop (2 Simple Ways)
- Get Expert Real Estate Photo Editing Help With PhotoUp
Do you want to learn how to invert colors in Photoshop and change an image to its opposite or negative colors?
The inverting image color tool creates a “negative” of the image, which reveals the hidden objects that you cannot see in the original image like dust spots and smudges on the wall. It’s also good when you want to create a fun aesthetic.
In this post, we’ll show you 2 simple ways to invert colors in Photoshop for spotting unwanted objects in an image or to simply create a cool look. We’ll also cover what inverted colors are and why you should use them.
Let’s get started!
What Are Inverted Colors and Why Use Them?

Inverted colors show a negative version of an image. If you’ve ever seen a film photography negative, then you know what inverted colors look like.
When you, for example, edit real estate photography inverted colors are useful for making hidden details stand out. It allows you to easily remove dust spots and other unwanted objects from the image.
The Invert Color Tool is also good to shift colors into a different spectrum for colorblind users. Or, you can simply use it to create a cool look in an image.
The Invert Color Tool Allows You to Be Creative
Furthermore, the Invert Color Tool allows you to experiment with different colors and be creative in your editing.
If you invert a color image, the image will have a flipped color scheme. Photoshop will flip every color to its opposite on the RGB or CMYK color wheel.
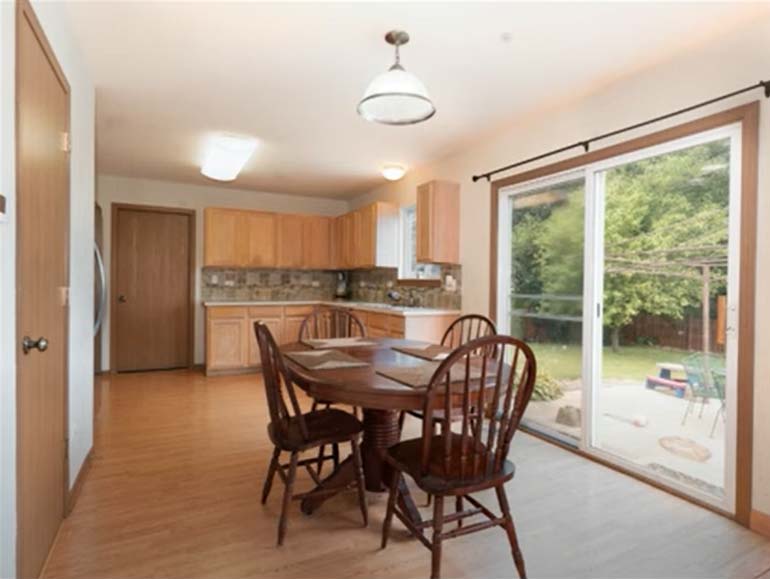
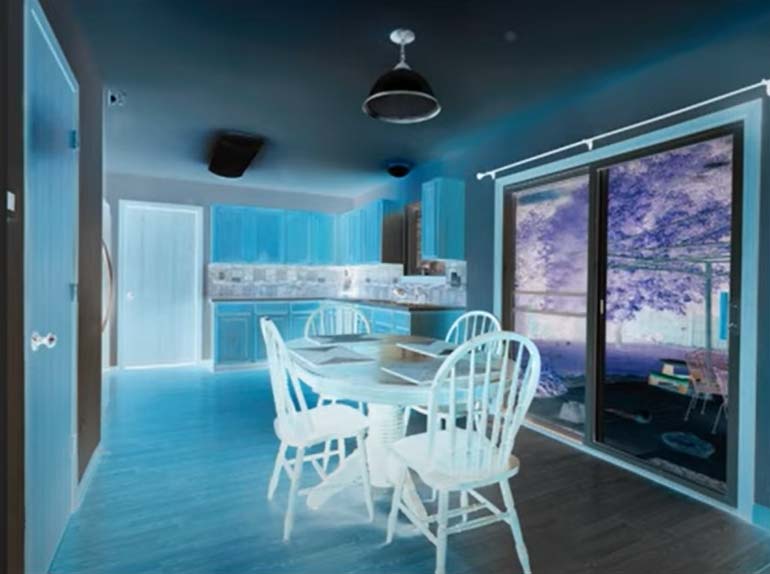
In the image examples below, the brown colors in the kitchen turn into vibrant neon blues, and the green leaves on the tree outside the window turn into a lush violet color.


Pretty cool, right?!
Additionally, if you invert a black-and-white photo, the white pixels become black pixels and vice versa. You can play around and be creative with your photos to create different looks.
To conclude, the Invert Color Tool is perfect for creating abstract photography, fine art, and photo collages. It can also help you evoke a spooky or mysterious atmosphere, making it great for Halloween aesthetics.
High-Quality & Consistent
Real Estate Photo Editing
Hire a dedicated editor with performance metrics from $7/hour.
How to Invert Colors in Photoshop (2 Simple Ways)
Now that you know what the Invert Color Tool is and how it can help you spot unwanted objects in an image or create fun aesthetics, let’s show you how to easily invert colors in Photoshop.
To get started, you can either watch the video tutorial or continue reading the text below:
There are 2 ways of inverting colors in Photoshop.
Edit 1
Step 1: The first way to invert colors is to Duplicate your original Layer, and then go to Image in the menu and locate the Adjustments option.
Step 2: Next, in the Submenu, you simply choose the Invert option, and an inverted effect will apply to the entire image.
Step 3: If you’re not happy with the results, you can click Ctrl + I to reverse it back to its original color.
Edit 2
Step 1: Another way of inverting colors in Photoshop is to go to the Adjustment Layer and choose Invert. Both options give us the same inverted effect of the entire image.
Step 2: Turn the Adjustment layer off to see the final results.
Lastly, check the Before and After of the image as we’ve easily eliminated the dust spots with the help of inverting colors in Photoshop.
And that’s it!
Have You Ever Thought To
Outsource Photo Editing?
Try it today with 10 free edits from three professional photo editors.
Get Expert Real Estate Photo Editing Help With PhotoUp

If you want to save time and focus on shooting more properties instead of spending hours on post-processing, PhotoUp’s expert real estate photo editing team can take the editing off your plate.
As a leading global real estate marketing company with over a decade in the industry, PhotoUp offers a full range of editing services such as:
- Advanced object removal
- Day-to-dusk conversion
- Lawn greening
- Sky replacements
- HDR editing
- Manual blending
- Flambient editing
- Floor plans
- And much more!
Additionally, as a complete one-stop-shop real estate marketing firm, PhotoUp also offers other services like:
- Virtual staging
- Single property websites
- Property flyers
- Custom websites
- Video editing
- Virtual assistants
- And custom house portraits
Our expert team can handle any photo editing job — big or small, complex, or simple. And our pricing is also affordable, with most photo editing services starting at $1.50 per image.
Browse Top Dedicated
Real Estate Photo Editors
Ready-to-hire editors for real estate photo editing, and more.
All you need to do is sign up for a free PhotoUp account, place your first order and your photographs will be delivered in less than 24 hours.
PhotoUp Real Estate Photo Editing Uploader Demo
Best yet, our software is super easy to use! Check out our real estate editing uploader demo to see how quick and easy it is to get started placing your first editing order:
It’s as easy as 1-2-3!
Get started with PhotoUp today, and we’ll be more than happy to take the editing task off your plate. For a limited time, you’ll even get 10 free edits when you sign up!
We hope this post helped you learn how to invert colors in Photoshop. Before you go, you may also want to check out some related resources:


