Table of Contents
- Can You Enhance the Quality of a Low-Resolution Image?
- Why Resolution Is Important in Real Estate Photography
- How to Enhance Picture Resolution in Photoshop
- How to Keep the Image’s Original Size File Intact
- Tips for Better Results When Enhancing Real Estate Photos
- Never Worry About Editing Again – Let PhotoUp Help!
Learning how to enhance picture resolution in Photoshop is a critical step in producing high-quality real estate photos. For real estate photographers, clarity and sharpness in images can distinguish between a listing that captures attention and one that gets overlooked.
While Photoshop’s tools are powerful, the key is knowing the limits and ensuring that you still start with the best possible image.
By following the steps outlined in this guide, you can improve the resolution of your real estate photos, making them more attractive to potential buyers and enhancing your professional brand.
Let’s begin by discussing whether you can really enhance the quality of a low-resolution image.
Can You Enhance the Quality of a Low-Resolution Image?
While Photoshop offers tools to improve resolution, the question often arises: Can you truly enhance the quality of a low-resolution image?
The short answer is: Yes, but with limitations.
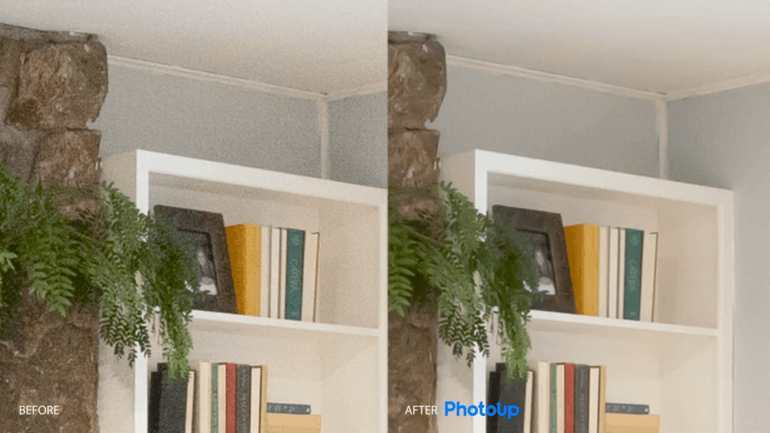
Photoshop can improve the appearance of low-resolution images, but there are constraints on how much detail can be restored.
The quality of a low-resolution image depends on the original data captured in the image file.
Photoshop uses algorithms to interpolate, or “guess,” the missing pixels when you scale up an image. This works well up to a point, but excessive enlargement can still lead to blurry or pixelated results.
In real estate photography, where details matter, the best results come from high-resolution images.
However, if you need to enhance a lower-quality image, Photoshop’s tools can help improve its appearance, which we’ll show you how to do below.
Why Resolution Is Important in Real Estate Photography
In real estate, potential buyers are attracted to sharp, clear images that showcase properties in their best light. In fact, 61.3% of brokers believe high-quality photography is ‘crucial’ for selling homes.
Low-resolution or blurry images can make rooms appear smaller or unappealing, giving an inaccurate representation of the property.
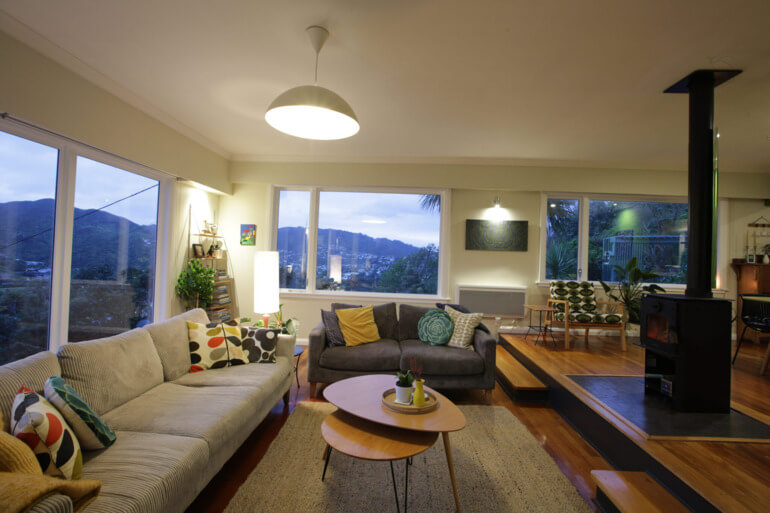
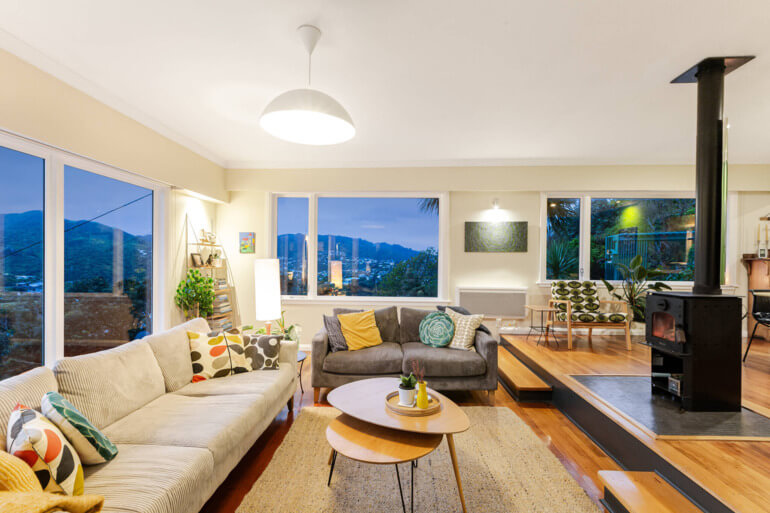
\Whether you’re working with images for online listings or printed brochures, enhancing picture resolution ensures that your photos have the clarity needed to highlight every detail of the property.
This is especially important for real estate photographers looking to deliver professional results that elevate a brand and attract buyers.
How to Enhance Picture Resolution in Photoshop
Here’s a step-by-step tutorial on how to enhance picture resolution in Photoshop, ideal for real estate photographers who want to improve the quality of their images.
You can either watch the video tutorial or continue reading the text below:
Step 1. To adjust the quality of an image in Photoshop, open the image you wish to enhance in Photoshop.
Step 2. Then, navigate to the Image menu and select Image > Image Size, and the Image Size window will pop up.
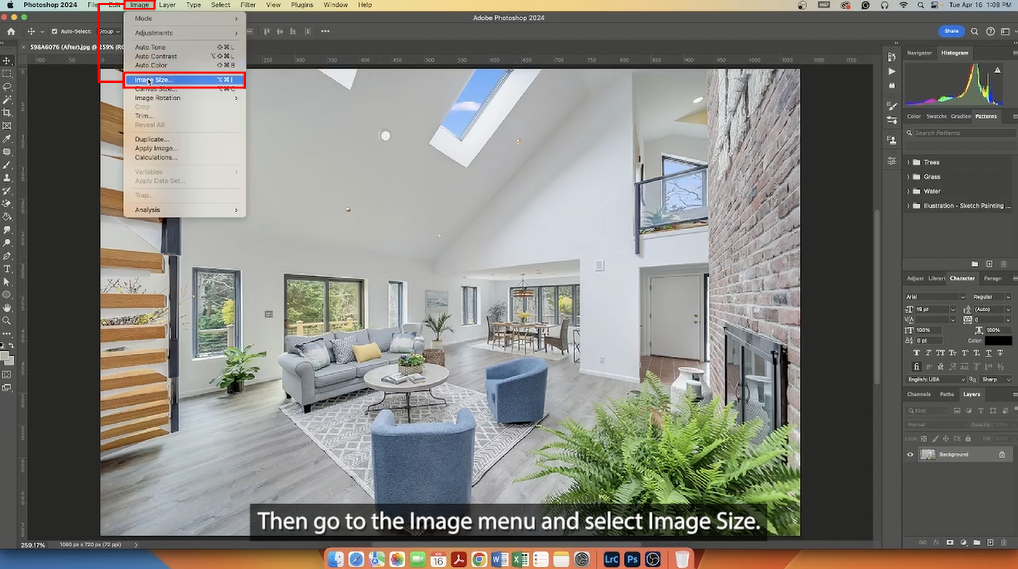
Step 3. Next, in the Image Size window, make sure to check the Resample image option.
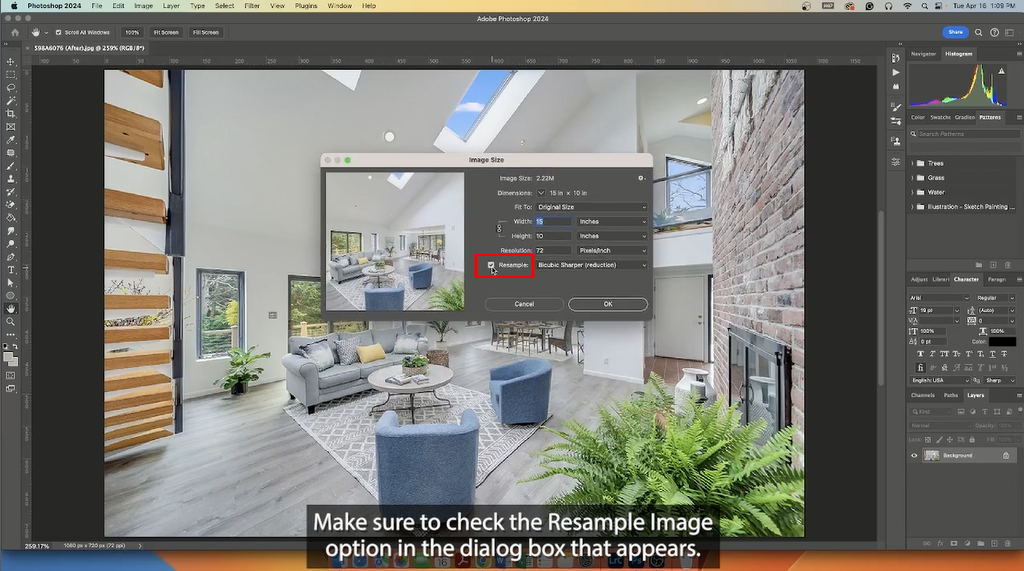
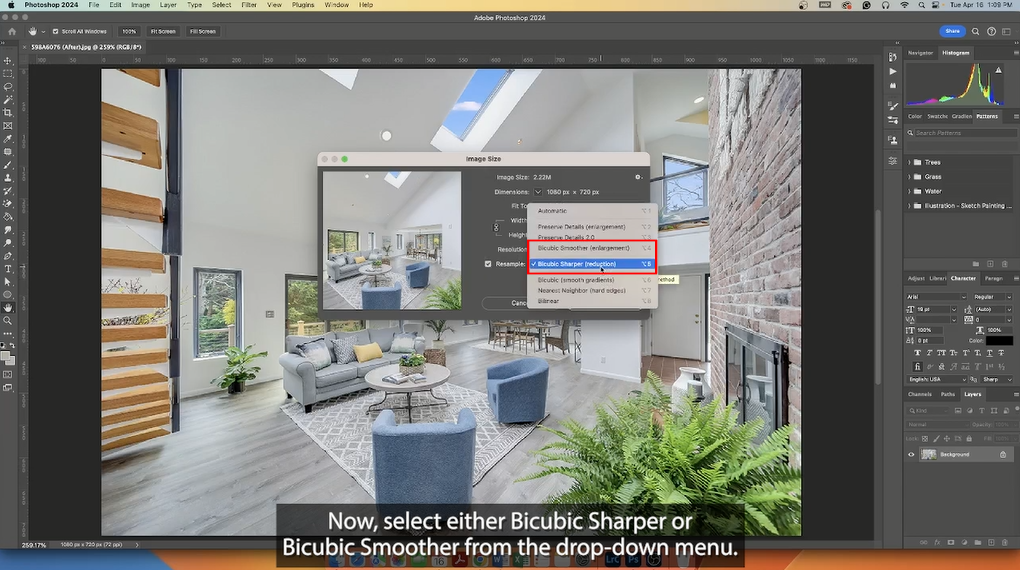
Step 4. Now, select either Bicubic Sharper or Bicubic Smoother from the drop-down menu. These methods can help retain image quality during resizing.
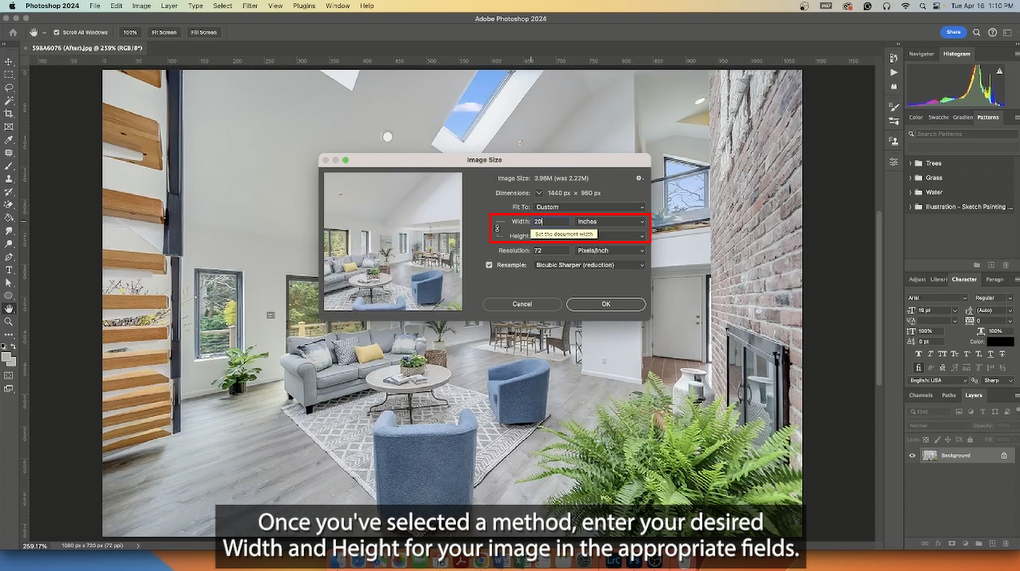
Step 5. Once you’ve selected a method, enter the desired Width and Height of your image in the appropriate fields.
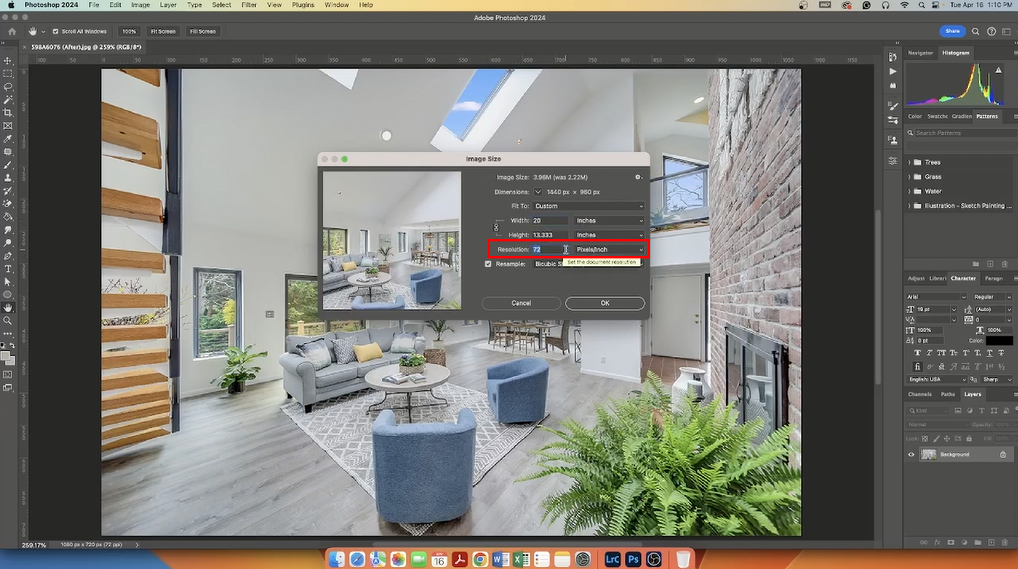
Step 6. Now, ensure that your image has the correct resolution. You can set this in the Resolution field. Aim for 300 dpi for print which is the highest resolution, and 72 dpi is ideal for web.
Step 7. Finally, click OK to apply your changes and enhance the quality of your image.
And that’s it! You’ve now learned how to enhance picture resolution in Photoshop.
How to Keep the Image’s Original Size File Intact
When working with picture resolution, it’s always a good practice to preserve the original file.
If you’d like to create a new, smaller file and keep the original size file intact, simply click File › Export As.
In addition, the Export function also lets you adjust pixels, scale down by percentage, or export as a JPEG with decreased quality.
With the power to control resolution and dimensions at your fingertips, you’re now well-equipped to ensure your photographs look perfect, no matter where they’re displayed.
Remember, practice makes perfect, so let’s take a look at some useful tips when working to improve your image quality.
Tips for Better Results When Enhancing Real Estate Photos
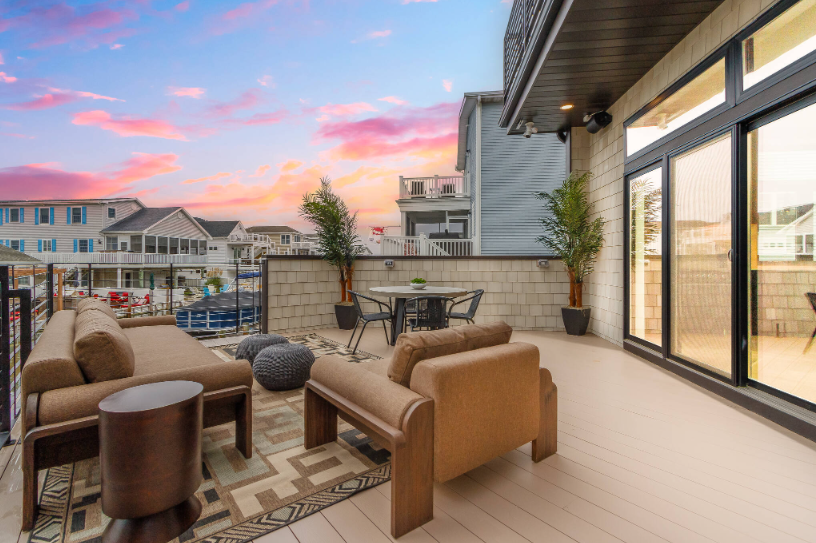
Here are some tips that will help you achieve even better results when enhancing real estate photography:
- Start with the best possible image – If you can, use the highest resolution and quality settings on your camera. It’s always easier to downsize a large, high-quality image than to upscale a low-quality one
- Avoid over-editing – When enhancing resolution, it’s tempting to go overboard with sharpening or noise reduction. This can lead to unnatural results, which may detract from the image’s appeal
- Lastly, use Photoshop’s Camera Raw Filter – For images shot in RAW format, the Camera Raw Filter in Photoshop offers powerful tools for enhancing resolution while maintaining the image’s natural look
With these tips in mind, you’ll be well on your way to enhancing the resolution of your photos and creating stunning real estate photography.
But there’s an even better solution that will help you save a lot of time and effort – leave the editing to the experts at PhotoUp.
Never Worry About Editing Again – Let PhotoUp Help!

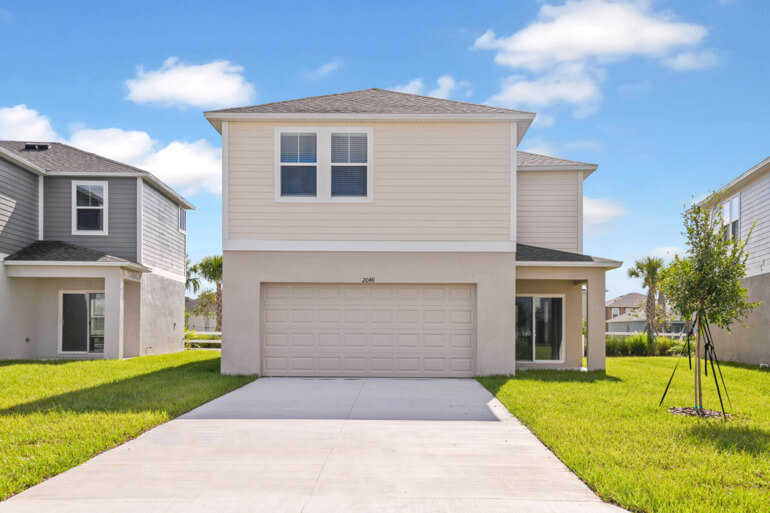
If you’re struggling to enhance the quality of low-resolution images or need to ensure that your photos are edited to the highest standards, consider outsourcing your photo editing.
Professional services like PhotoUp offer high-quality real estate photo editing with prices starting as low as $0.50 per image (for dedicated editing).
PhotoUp’s team of skilled editors is proficient in a wide range of advanced editing techniques, including:
- HDR blending
- Twilight and day-to-dusk conversions
- Advanced object removal and decluttering
- Perspective correction
- Sky replacements
- Brightness and color correction
- Noise reduction and image sharpening
- Pano stitching
- And much more!
This allows real estate photographers to enhance their portfolio and stand out in a competitive market.
User-Friendly & Intelligent Platform
With PhotoUp’s user-friendly software, you can easily upload and receive photos, send instructions, and leave feedback.
It also allows you to track and manage team members and clients, and deliver photos directly to your clients.
Here’s how to get started with PhotoUp:
Step 1. Sign up for a free PhotoUp account.
Step 2. Upload your photos to our easy-to-use software.
Step 3. Choose the level of editing that you need and provide instructions (optional).
Step 4. Wait for PhotoUp professional editors to edit and return the photos in less than 24 hours (48 hours for virtual staging).
Step 5. Download and start using your beautifully edited photos.
PhotoUp Real Estate Photo Editing Uploader Demo
Watch how easy it is to get started with PhotoUp in our real estate photo editing uploader demo:
It’s really that easy to get your photos edited and returned to you in 24 hours or less!
PhotoUp Offers More Than Just Editing
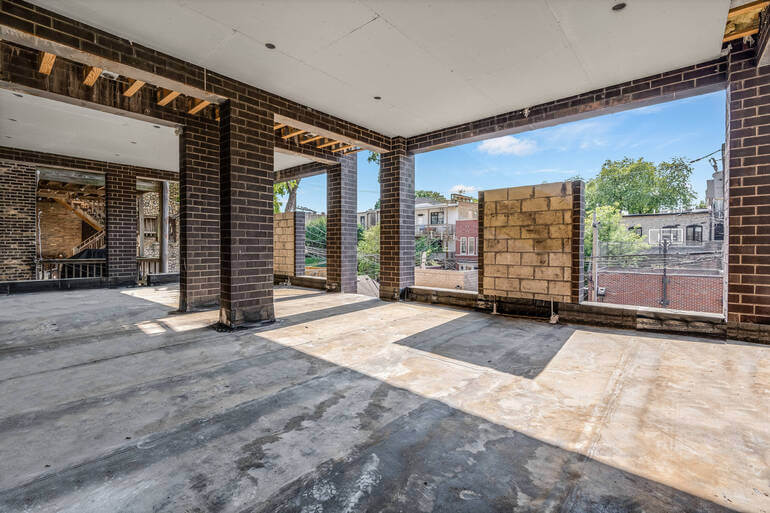
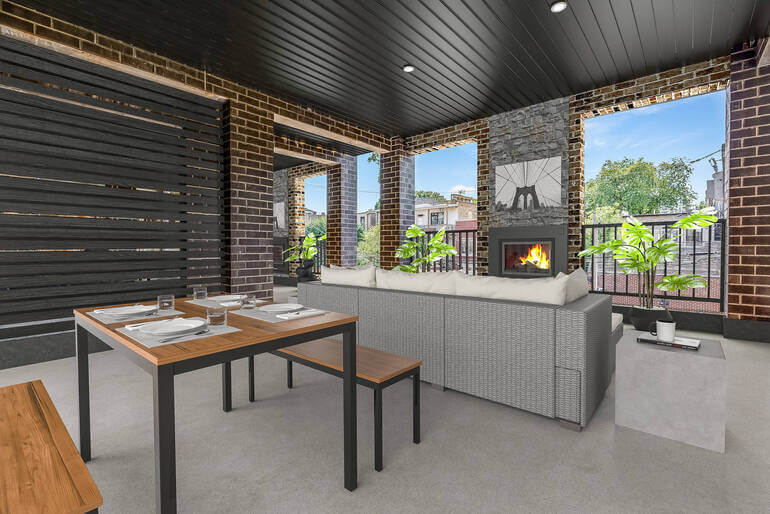
PhotoUp offers so much more than just editing! We are a complete one-stop-shop for real estate marketing services and also provide powerful tools such as:
- Virtual staging
- Virtual house tours
- Video editing
- Single property websites
- Real estate photographer websites
- Property flyers
- Floor plans
- House portraits
- And Virtual Assistants
You can find everything you need to enhance and market real estate photography in one user-friendly software.
So what are you waiting for?
Sign up for a free PhotoUp account today and let us help take editing off your plate!
Plus, when you sign up for an account, you’ll receive a bonus of 10 free credits to use however you please.
We hope this blog post helped you learn how to enhance picture resolution in Photoshop. If you found this guide useful, you may also want to check out the following resources:


