Table of Contents
- How to Edit Real Estate Photography (11 Tips & Tricks)
- Why Real Estate Photo Editing Is Crucial to Attract Buyers
- Save Time – Outsource Real Estate Photo Editing to PhotoUp!
Editing real estate photos is essential to create images that not only capture attention but also reflect the true beauty of a property. Knowing how to edit real estate photography can significantly impact a buyer’s first impression and help real estate listings stand out.
In this guide, we’ll walk you through 11 easy tips and tricks to edit real estate photos like a pro and create captivating images.
We’ll also cover why editing your real estate photography is crucial to attracting buyers and a solution that can help you edit your images in less than 24 hours.
How to Edit Real Estate Photography (11 Tips & Tricks)
Editing real estate photos may seem daunting, but with these 11 tips, you can create images that showcase properties in the best light.
Whether you’re correcting perspective, enhancing brightness, or removing distractions, each step adds value to your photos.
Let’s get started!
1. Correct the Perspective
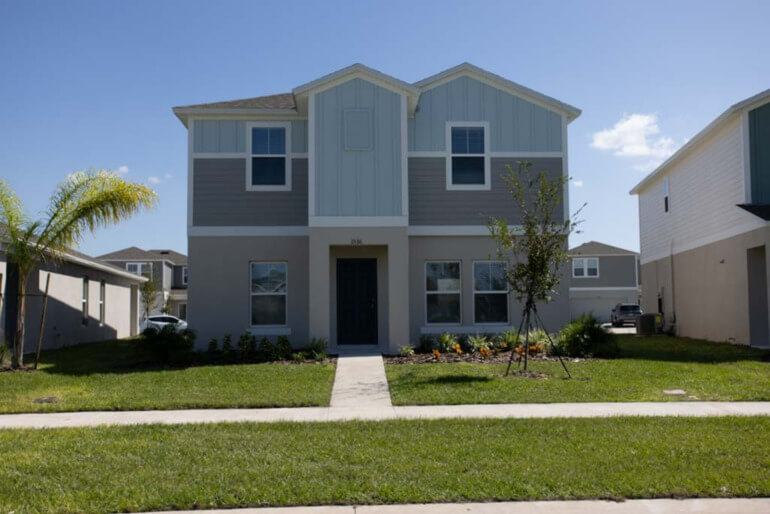
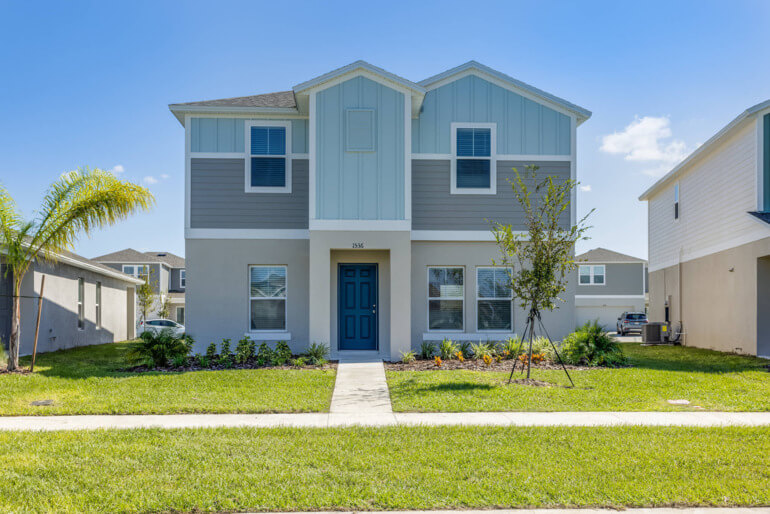
One of the most common issues in real estate photography is distorted lines caused by the camera’s angle.
Distortion can occur due to lens curvature, room shape, or camera angle, causing lines to converge. In other words, walls or architectural features may appear to lean or skew.
Luckily, you can fix this in post-processing with perspective correction, a technique that aligns the lines with the image’s frame for a more natural look.
To fix this:
- Use the Perspective Correction tool in editing software like Lightroom or Photoshop
- Align vertical and horizontal lines, especially for interior shots, to create a balanced image
Correcting perspective ensures that rooms and spaces appear as they do in reality, adding professionalism to your photos.
To see how to align verticals, you can check out our video tutorial on how to straighten verticals in Photoshop:
2. Adjust the White Balance
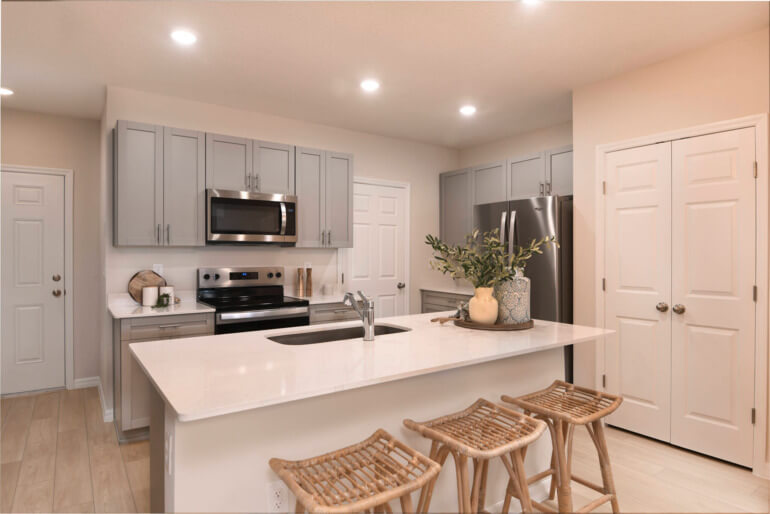
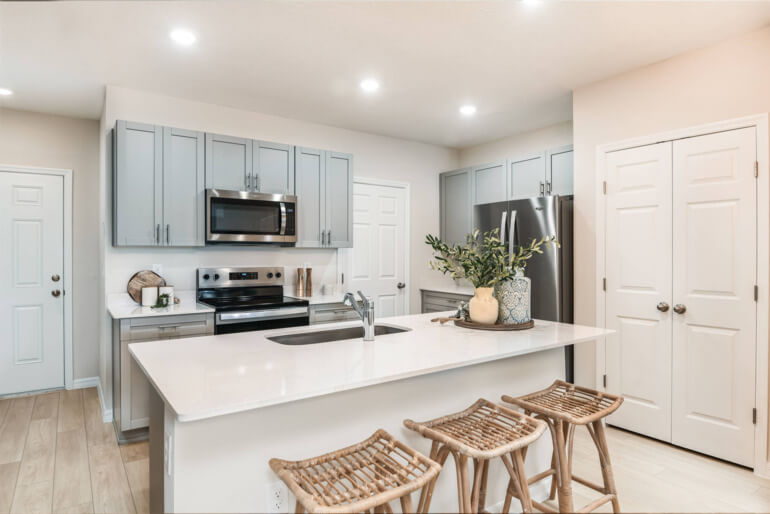
Accurate white balance is crucial in real estate photography to ensure that the colors in your images appear natural and true to life.
An incorrect white balance can cast a yellow, blue, or green tint over your images, distorting the look of the property.
Correcting this brings a sense of authenticity and enhances the overall quality of your pictures.
This is what to do:
- In Photoshop or Lightroom, adjust the Temperature and Tint sliders until you achieve a balanced, natural look
- Make sure whites appear clean, especially in interior shots where lighting may vary
To learn more, watch this video tutorial where we show you 2 simple techniques on how to adjust white balance in Photoshop:
3. Enhance Brightness & Exposure
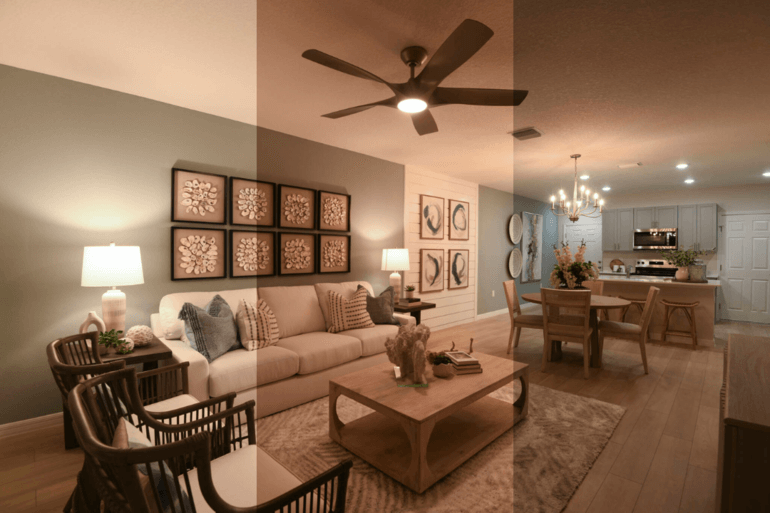
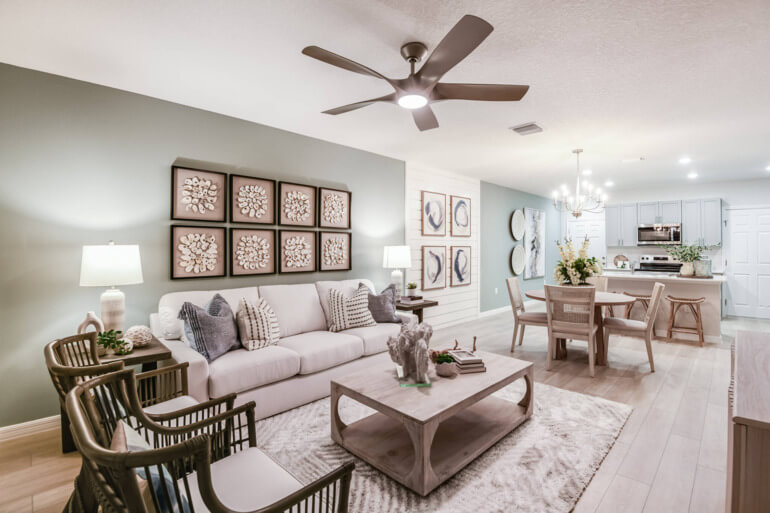
Bright and well-lit photos are more inviting, making spaces appear larger and more attractive.
However, overexposure can wash out details, while underexposure can make rooms feel cramped.
- Adjust Exposure, Shadows, and Highlights sliders in Lightroom or Photoshop to fine-tune the brightness
- Additionally, use HDR techniques if needed to blend multiple exposures for a balanced image
To get started, this video tutorial walks you through how to brighten a photo in Photoshop:
Additionally, this blog post walks you through 3 ways on how to change exposure in Photoshop.
4. Apply Sky Replacement
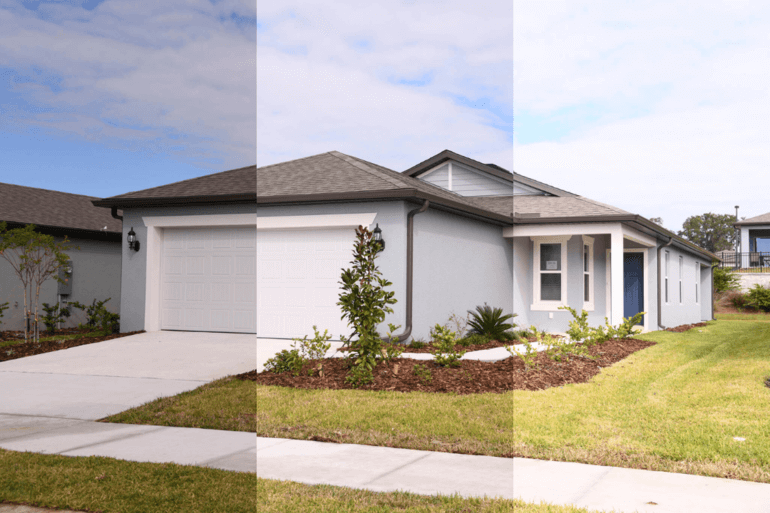
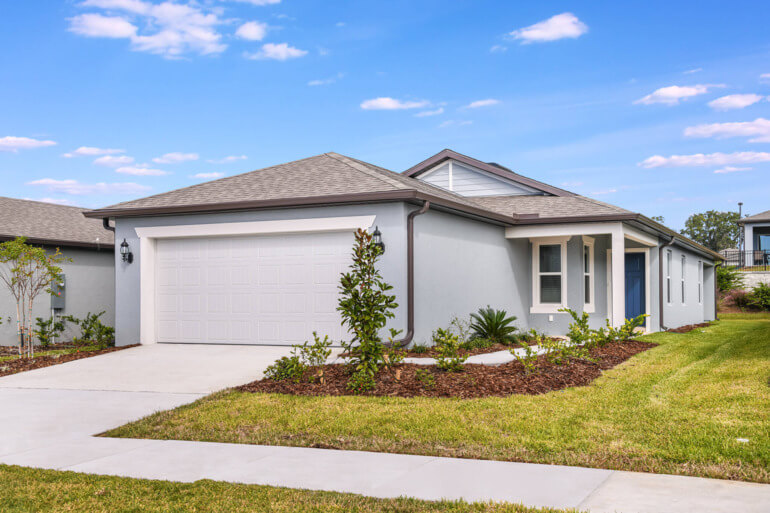
Bright, sunny days make colors pop, while gloomy skies can dull your real estate photos.
Fortunately, you can easily replace a gray sky with a vibrant one through simple editing techniques.
Why is a sky replacement so effective? A sky replacement can:
- Make the property more appealing
- Boost the mood of the image
- Give photographers flexibility by removing weather and time constraints
Many photo editing tools offer sky replacement features:
- For example, you can use Photoshop’s Sky Replacement feature to swap out a cloudy or gray sky with a vibrant blue one. As easy as this might sound, you have to ensure the lighting of the new sky matches the property’s existing lighting for a natural appearance
- For more advanced and detailed sky replacement, you can also do this manually in Photoshop, which the videos below will show you
To learn how to transform dull winter skies into bright and inviting ones, check out our video tutorial on how to do a sky replacement in Photoshop:
Here’s another tutorial video on how to replace a summer sky in Photoshop:
5. Perform HDR Blending
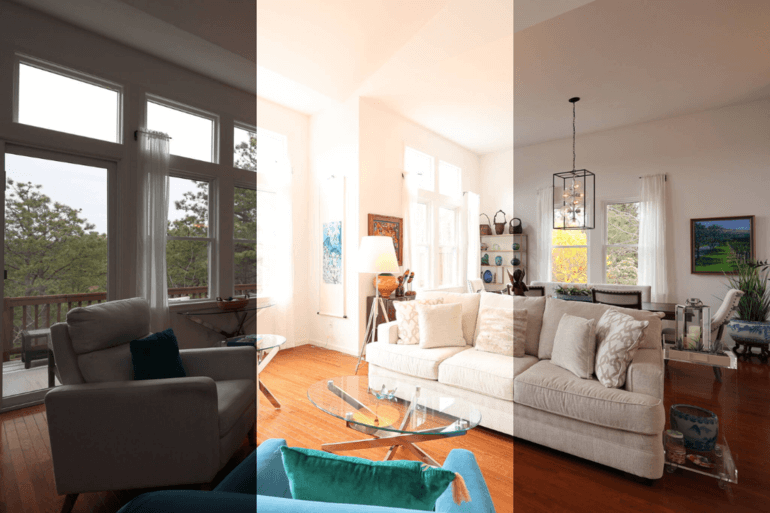
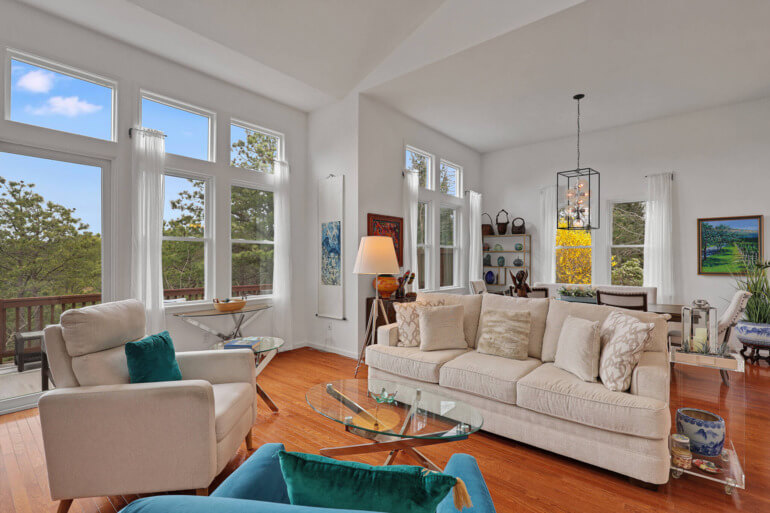
High Dynamic Range (HDR) photography involves blending multiple images at different exposures (often 3 or more exposures) to capture a broad range of details in both the shadows and highlights.
This technique is essential in real estate photography for creating balanced and detailed images.
To do this:
- Use Lightroom’s HDR Merge function or manual blending in Photoshop to combine exposures
- HDR is especially useful in rooms with both dark shadows and bright windows
For more details, see our video tutorial on how to edit HDR photos in Lightroom:
6. Remove Clutter and Unwanted Objects
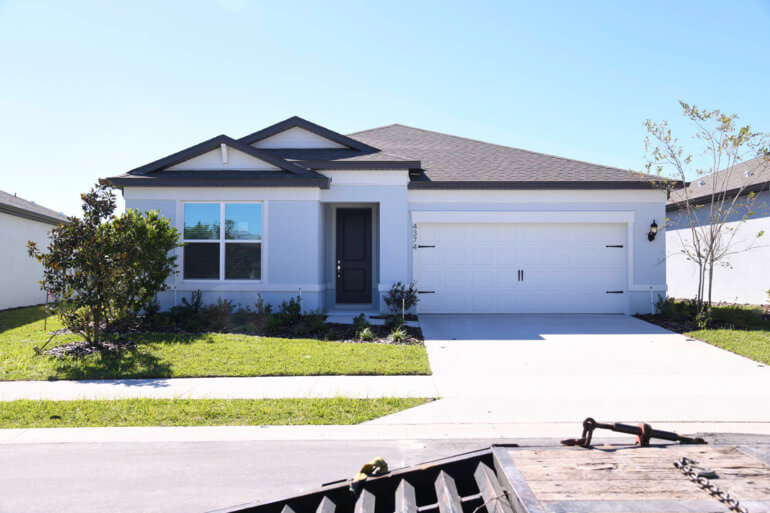
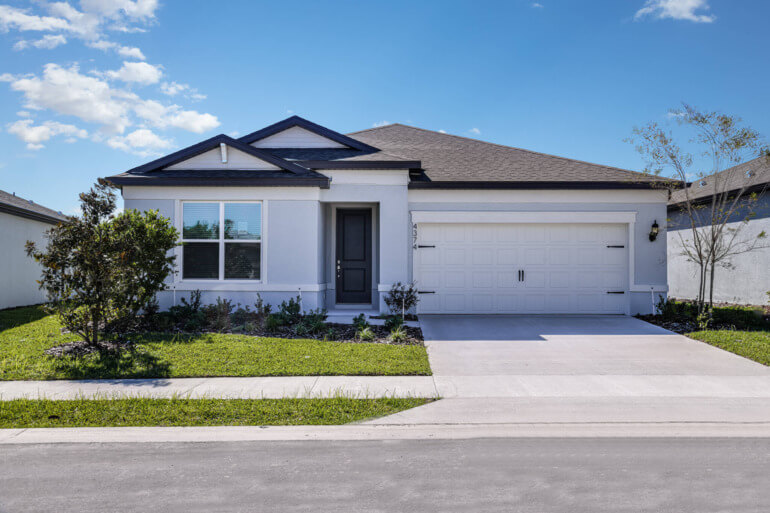
Real estate photos often feature unwanted objects that detract from the image’s appeal.
Common examples include:
- A car in the driveway blocking the garden view
- Visible TV cords cluttering the room
- An overlooked frying pan on the granite counter
- Cracks in the bathtub or peeling wallpaper
- A person passing by during the shot
Thankfully, you can easily remove these distractions using Photoshop’s Clone Stamp Tool. Just select the tool, hold “Alt” to pick a source area, and clone over the object you want to remove for a clean, polished image.
To learn how to use the Clone Stamp Tool to declutter your images, watch this tutorial video on how to remove cords in Photoshop:
For more details and expert tips, check out this video tutorial on how to remove a car from a driveway in Photoshop:
High-Quality & Consistent
Real Estate Photo Editing
Hire a dedicated editor with performance metrics from $7/hour.
7. Reduce Noise and Sharpen Details
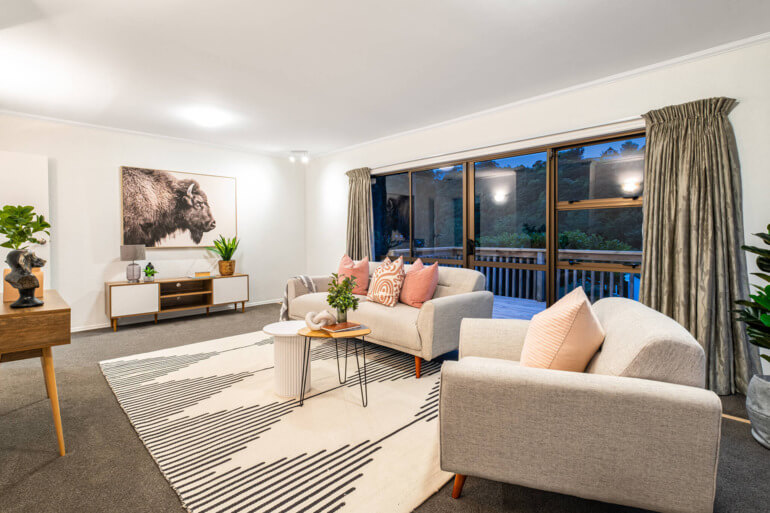
Noise can appear in images taken at high ISO settings, especially in low light conditions.
It appears as millions of hazy dots and decreases the image’s clarity and quality. Seeing that makes otherwise beautiful photos look grainy and unappealing.
Reducing noise improves clarity while sharpening enhances details.
- In Lightroom, use the Noise Reduction slider to clean up grainy areas without losing too much detail
- In Photoshop you can just click on the “Filter menu,” and choose Noise > Reduce Noise
- Apply Sharpening carefully to make details like countertops, tiles, or textures stand out
For more details, check out our video tutorial on how to reduce noise in Lightroom and Photoshop:
In addition, this video tutorial walks you through how to sharpen an image in Photoshop:
8. Perform Window Masking
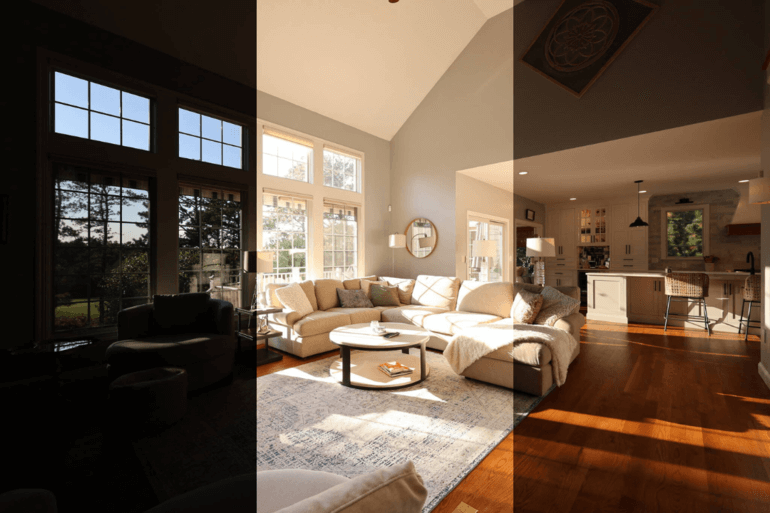
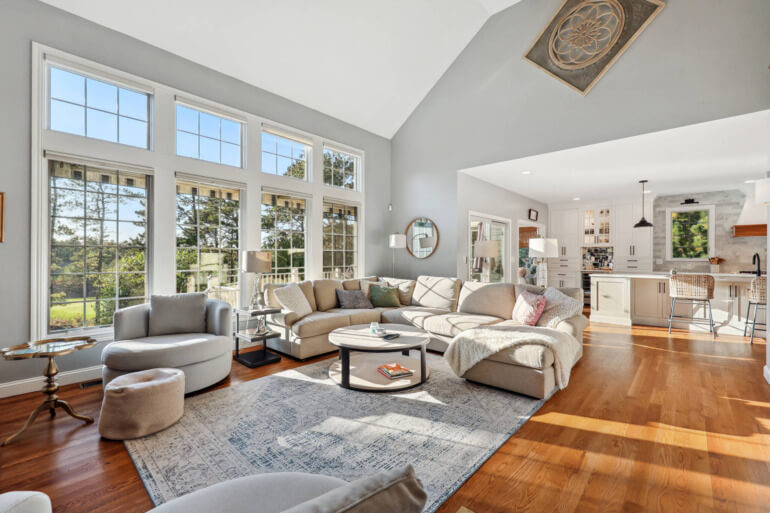
Harsh sunlight through windows can ruin real estate photos by causing glare, washing out colors, and blurring details. Even clean windows can distract when blinds cast patterns or block the view.
Window masking, a powerful editing technique, fixes these issues. It allows you to control light and even modify the outdoor scene for a perfect shot, giving you complete creative freedom over natural light and window views.
To do this:
- Use the Brush Tool in Lightroom or Photoshop to selectively darken bright windows
- Combine this with HDR techniques to keep both the interior and exterior properly exposed
For more details, check out our video tutorial on how to mask windows in Photoshop:
9. Perform Lawn Enhancement
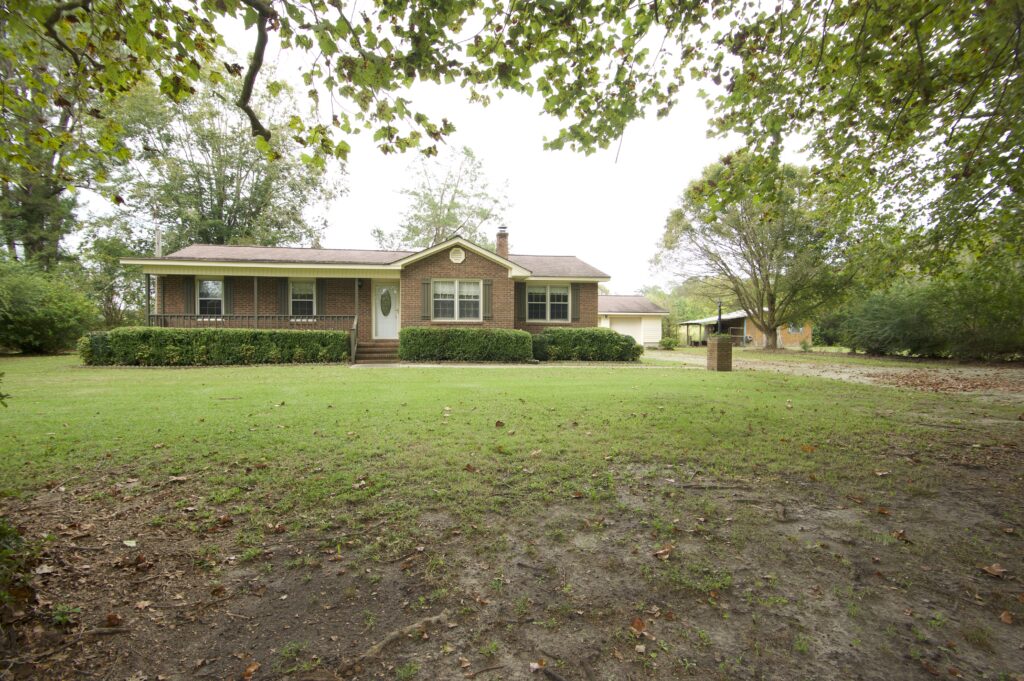
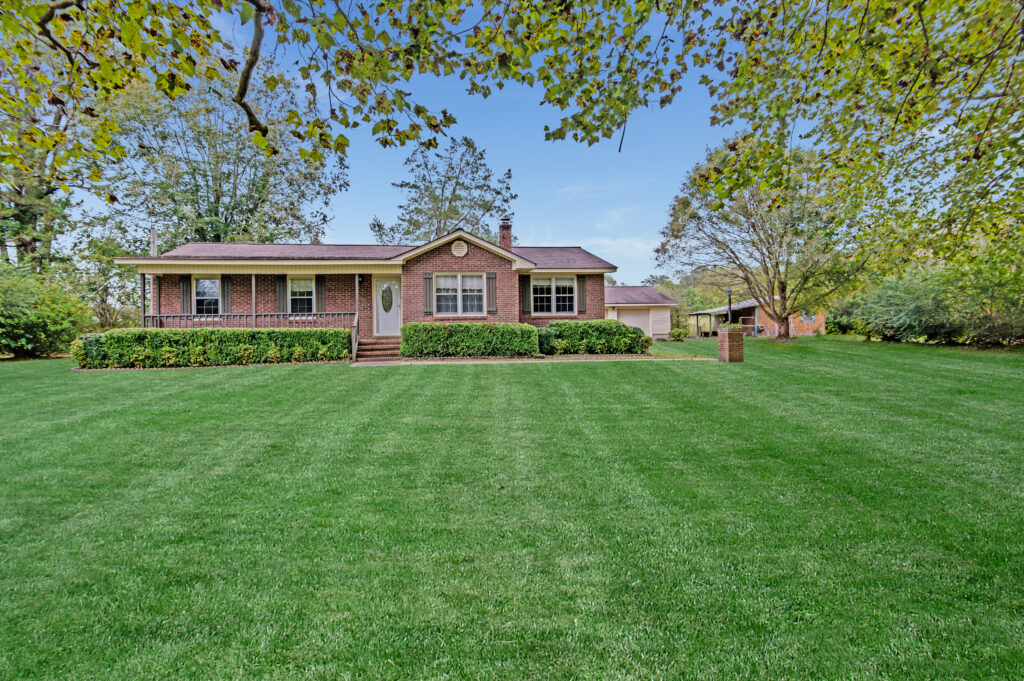
Undoubtedly, nothing is more welcoming and inviting than a full, green lawn outside of a home.
In outdoor shots, brown or patchy grass can detract from the appeal of the property. Lawn enhancement can make exteriors look pristine and well-maintained.
Here’s what you can do:
- Use Photoshop’s Clone Stamp Tool to enhance the grass by filling in brown spots
- For a quicker option, some editing services like PhotoUp offer virtual lawn enhancements to instantly revive dead or dry patches
For more detailed instructions, check out our video tutorial on how to make grass green in Photoshop:
10. Perform Day-to-Dusk Conversions
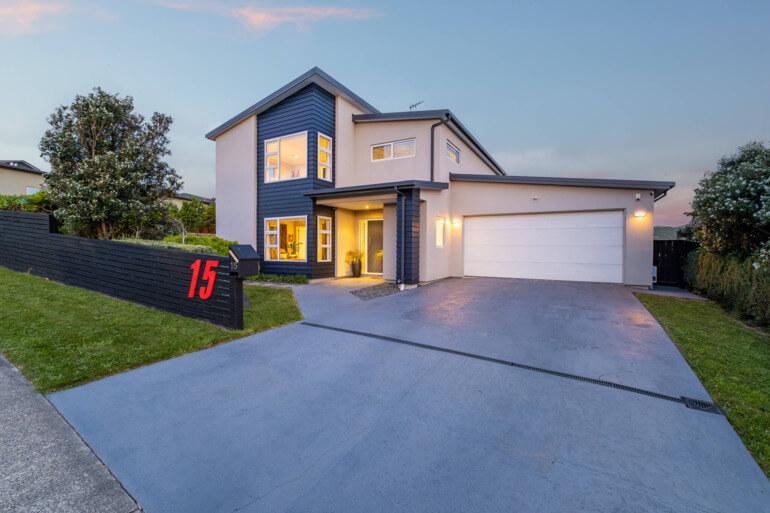
Transform day shots into dusk by darkening the sky, turning on interior and exterior lights, and adding warm tones.
This technique showcases a property’s lighting and creates an inviting atmosphere that draws viewers in.
In fact, using a twilight image as the listing’s main photo averaged 76% more views than listings without the use of twilight images.
While many focus on changing the sky, it’s equally important to highlight the home’s lighting to keep it as the focal point.
A stunning sky shouldn’t overshadow the property—your goal is to enhance the house, not distract from it. The lighting should only complement the scene, ensuring the home remains the star of the image.
To learn how to do this effectively, check out our video tutorial on how to edit a day to dusk image:
11. Removing Distracting Shadows

When shooting real estate interiors and exteriors, you may encounter problems with shadows and uneven lighting.
While shadows can add contrast and dimension to an image, they can also be distracting and make your real estate photography look less professional.
- You can use either Lightroom or Photoshop to adjust shadows, highlights, whites, and blacks
To see how this is done, check out our video tutorial on how to remove shadows in Lightroom:
Additionally, flash shadows are also a common issue when shooting interiors with artificial lighting.
To learn how to combat this, you can check out our short video tutorial on how to remove flash shadows in Photoshop:
And that’s it! You’ve now learned 11 editing techniques that can help you take your real estate photography from dull to amazing.
Why Real Estate Photo Editing Is Crucial to Attract Buyers
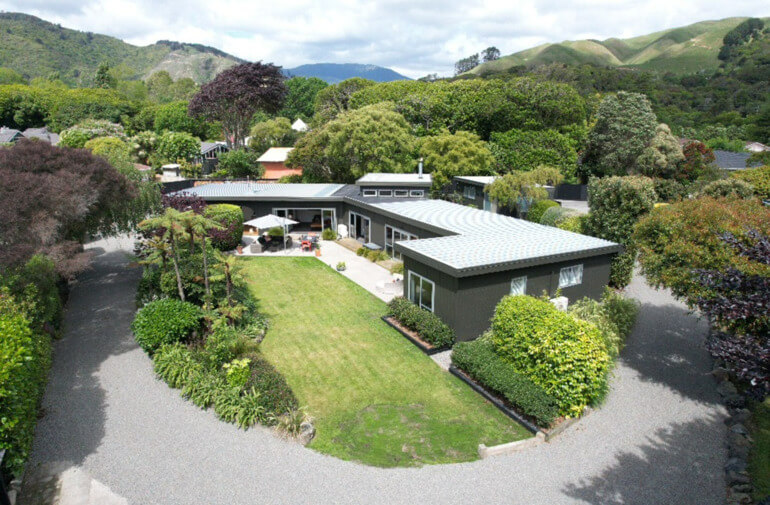
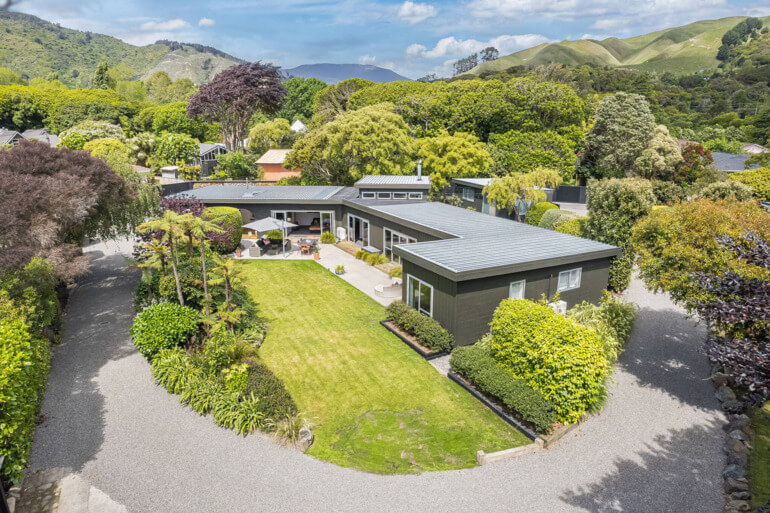
In today’s competitive real estate market, high-quality images are essential to attract potential buyers. Even the best photos can benefit from professional editing.
Consider these stats:
- 83% of buyers say photos are crucial in deciding which homes to visit
- 61.3% of brokers believe high-quality photography is essential for selling homes
- Homes featuring professionally edited photos receive 47% higher asking prices per square foot
- 99% of homebuyers use the Internet to find homes
Real estate photo editing can turn good images into stunning visuals that drive interest and boost sales.
Besides, consistently delivering polished, professional images sets you apart, builds client trust, and positions you as a top photographer for high-end listings.
However, editing your photos can take a lot of time and effort, so let’s take a look at a solution that can help you get your time back.
Have You Ever Thought To
Outsource Photo Editing?
Try it today with 10 free edits from three professional photo editors.
Save Time – Outsource Real Estate Photo Editing to PhotoUp!
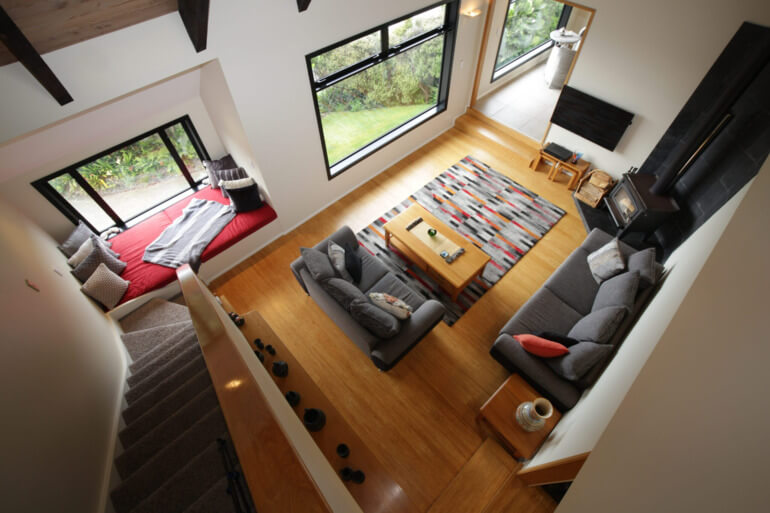
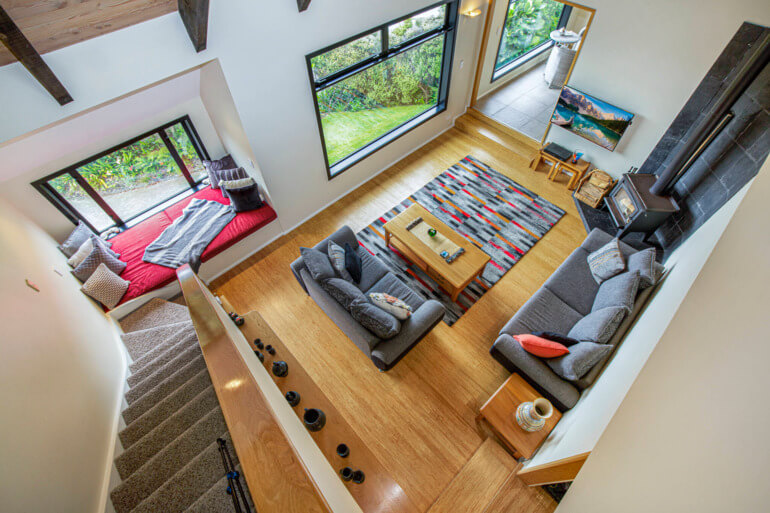
For real estate photographers and agents looking to save time or streamline their workflow, outsourcing photo editing to services like PhotoUp can also be a great option.
PhotoUp is a trusted brand featured on some of the most well-respected real estate photography blogs/podcasts like the PFRE and Shooting Spaces.
We have a team of highly talented real estate photo editors who are ready and eagerly waiting to enhance your photos, starting at the low cost of $1.50 per image for on-demand editing.
Our editors can help with all editing techniques included in this guide, as well as more advanced techniques such as:
- Panorama stitching
- Drone photo editing
- 2D & 3D floor plans
- Virtual staging
- 360 tours
- Video editing
- And much more!
No editing job is too big, small, or complex for us to handle.
Browse Top Dedicated
Real Estate Photo Editors
Ready-to-hire editors for real estate photo editing, and more.
How to Get Started
Here’s a step-by-step guide to using PhotoUp:
Step 1. Sign up for a free PhotoUp account.
Step 2. Upload your photos to our easy-to-use software.
Step 3. Choose the level of editing that you need and provide instructions (optional).
Step 4. Wait for PhotoUp professional editors to edit and return the photos in less than 24 hours (48 hours for virtual staging).
Step 5. Download and start using your beautifully edited photos.
PhotoUp Real Estate Photo Editing Uploader Demo
Watch how easy it is to get started with PhotoUp in our real estate photo editing uploader demo:
As simple as that!
A Complete Real Estate Marketing Partner
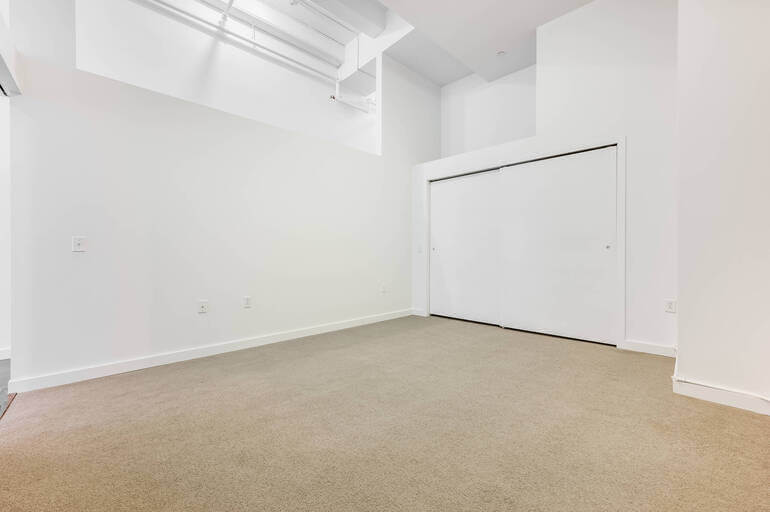
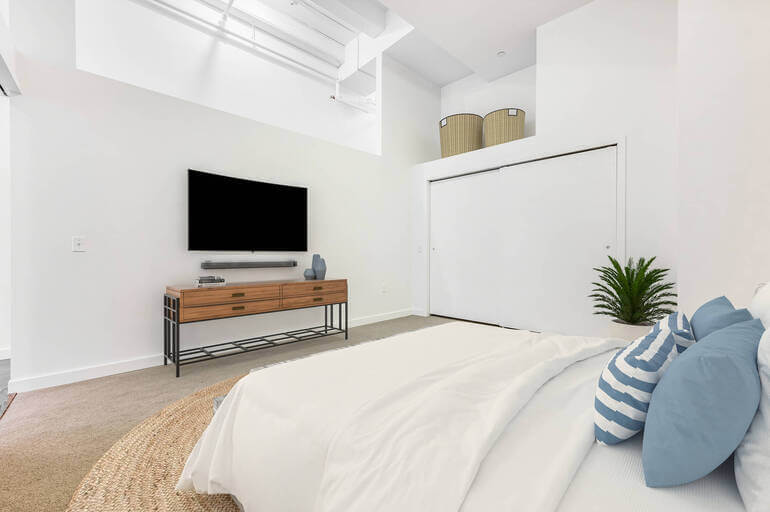
PhotoUp does so much more than just photo editing! We are a complete real estate marketing partner and also offer other powerful services like:
- Virtual staging
- Virtual house tours
- Video editing
- Real Estate Photographer Websites
- Single property websites
- House portraits
- Property flyers
- Floor plans
- And Virtual Assistants
As you can see, we have everything you need to enhance and market real estate photography in one user-friendly software!
So what are you waiting for? Sign up for a free PhotoUp account today and take your real estate photography to the next level.
For a limited time, you even get 10 free credits you can use on any of our services when you sign up for an account.
We hope this guide helped you learn how to edit real estate photography with the help of a few easy tips and tricks. Before you go, you may also want to check out the following resources:


