Table of Contents
- Why Should You Resize Images in Photoshop?
- How to Resize an Image in Photoshop
- How to Create a Smaller File Size Without Losing Quality
- How to Compress the Image File Size Using Online Tools
- Let PhotoUp Help You Edit Your Real Estate Photos!
Knowing how to resize an image in Photoshop is a key skill for maintaining high-quality visuals while optimizing them for various platforms.
Whether you’re working on real estate photos that need to be tailored for online listings or simply want to reduce file sizes without compromising on detail, knowing how to efficiently resize and export images is essential.
In this guide, we’ll show you how to easily resize images in Photoshop while preserving quality, and ensuring your original files remain intact.
Why Should You Resize Images in Photoshop?
Resizing images is crucial in real estate photography because it ensures photos are optimized for various platforms without sacrificing quality.


High-resolution images can be large in file size, which may slow down website loading times or exceed email attachment limits.
By resizing, photographers can tailor their images to fit specific dimensions required for online listings, social media, or print materials, enhancing their usability across different mediums.
Additionally, resizing helps maintain the visual integrity of images. It ensures that property details are clearly showcased, which is essential for attracting potential buyers and making a strong first impression.
Understanding the Relationship Between Resolution and File Size

The resolution of an image determines the level of detail it contains, with higher resolutions packing more data into each pixel.
This increased detail results in a larger file size. To reduce the file size, one effective method is to lower the resolution without altering the image’s dimensions.
By keeping the resample option enabled while resizing in Photoshop, the software adjusts the amount of pixel data within the image.
This process reduces the file size while preserving the overall dimensions, ensuring that the document size remains unchanged.
With this in mind, let’s take a closer look at how to easily resize an image in Photoshop.
High-Quality & Consistent
Real Estate Photo Editing
Hire a dedicated editor with performance metrics from $7/hour.
How to Easily Resize an Image in Photoshop (Step-by-Step)
Resizing images in Photoshop is straightforward. By following these steps, you can adjust the size of your images while preserving the original.
You can either watch the video tutorial or continue reading the text below:
How to Resize an Image in Photoshop Using the Image Size Dialogue Box
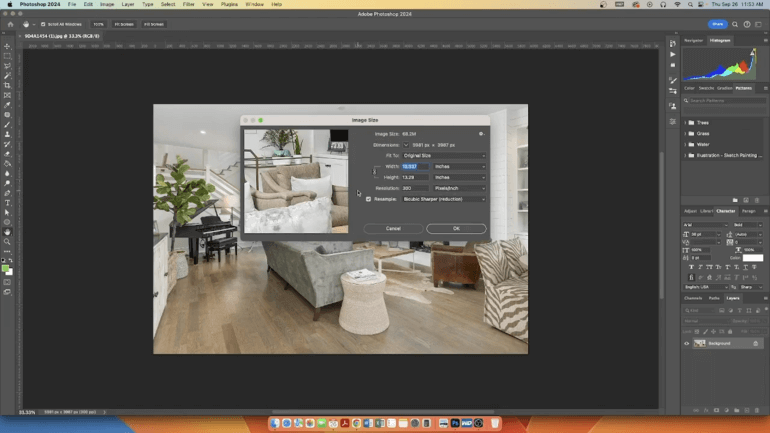
Step 1. With your image open, navigate to Image > Image Size. The Image Size dialogue box will appear.
Step 2. In the Image Size dialogue box, you will see options to change the Width and Height of your image.
Step 3. Make sure the Constraint Proportions checkbox is checked to maintain the aspect ratio.
Step 4. Enter the new dimensions for your image. You can choose to input the size and Pixels, Inches, Centimeters, and more.
Step 5. Now, choose the Resampling Method. Below the Dimensions, you will find the Resample option. This determines how Photoshop adds or removes pixels. Select a resampling method from the dropdown.
Step 6. At the top of Dimensions, you will see the estimated file size. Adjust the Dimensions and Resampling method until you get a file size close to your target.
Step 7. Once you are satisfied with a new size, click OK to apply the changes.
You’ve now learned how to resize an image in Photoshop!
Let’s move on to showing you how to create a smaller file size without losing image quality.
How to Create a Smaller File Size Without Losing Image Quality
If you want to resize a photo in Photoshop while keeping the original file size intact, you can use the Export Method.
This is what to do:
Step 1. Navigate to File > Export > Export As. The Export As dialogue box will appear.
Step 2. In the Export As dialog box, you will see options to change the Width and Height of your image. Enter the new dimensions for your image.
Step 3. Select the desired File Format from the dropdown menu. Choose the one that best suits your needs.
How to Adjust the Quality Settings
Step 4. Use the Quality slider to adjust the Compression level. Lower quality means more compression and a smaller file size while higher quality means less compression and a larger file size.
Step 5. Keep an eye on the Estimated file size displayed on the left side of the dialogue box. Adjust the quality slider until you achieve the desired file size.
Step 6. Once you are satisfied with the new size and quality settings, click Export. You can export the image as a JPEG and reduce the quality to further decrease the file size.
Additionally, use PNG or PSD format if you want to keep a transparent background.
Your original file will remain unchanged, ensuring you maintain the highest quality version.
And that’s it!
How to Compress the Image File Size Using Online Tools

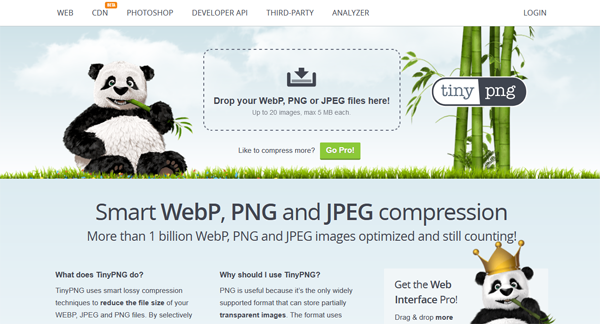
If you don’t want to resize your images but change their file size, you can use free online image optimizers such as:
- TinyPNG for PNG & JPG files
- CompressJPEG for JPG files
- Optimizilla for PNG & JPG files
These online optimization tools can help you reduce the image file size by 70% or more. This will positively impact your site speed if uploading your images to your website. It’ll also make emailing images to clients easier.
Have You Ever Thought To
Outsource Photo Editing?
Try it today with 10 free edits from three professional photo editors.
Let PhotoUp Help You Edit Your Real Estate Photos!
At PhotoUp, we know just how crucial top-notch real estate photos are for making a lasting impression.


Whether you’re a real estate photographer aiming to streamline your workflow or an agent looking to elevate your property listings, our dedicated team of expert editors is here to support you every step of the way.
So, what exactly is a dedicated editor?
A dedicated editor is someone who consistently works on all your images and accounts, ensuring that your photos maintain a cohesive style and quality.
Browse Top Dedicated
Real Estate Photo Editors
Ready-to-hire editors for real estate photo editing, and more.
This personalized approach means your editor gets to know your unique preferences, allowing for greater consistency across all your images.
Beyond editing, they can assist with various tasks, such as:
- Photo culling and organization
- Consistent style and quality
- Custom branding and labeling
- Account management, photo delivery, and placement
The best part? Utilizing a dedicated editor not only enhances your images but also saves you valuable time and money.
On average, a dedicated editor can deliver over 1,800 edits per month, bringing the cost down to just $0.72 per edit—and sometimes even as low as $0.50 per edit. That’s an affordable solution without compromising quality.
Imagine the time savings and the boost in image quality that a dedicated editor brings to your workflow!
Get Help With Real Estate Marketing


But that’s not all. A dedicated editor can also assist with other essential real estate marketing tasks, such as:
- Virtual house tours
- Virtual staging
- Floor plans
- Real estate walk-through videos
- Single property websites
- Property flyers
- Custom house portraits
- And more!
Investing in a dedicated real estate photo editor isn’t just about great photos; it’s about growing your business and attracting more clients.
Let us help you make your mark in the real estate market!
How to Get Started
Getting started with a dedicated editor starts with a FREE dedicated editor consultation.
Simply, schedule a meeting and we’ll get in touch with you.
PhotoUp Dedicated Editing – Real Estate Photo Editing
To see how easy it is to get started with a dedicated editor, check out our dedicated editing demo:
As simple as that!
During the free trial period, PhotoUp remains committed to collaborating with you until you are completely satisfied with the results and service.
After evaluating the edited images, you can schedule interviews with the most suitable editor(s), leading seamlessly into a one-month trial period.
So, why wait?
Sign up for a free PhotoUp account and get started today!
We hope this guide helped you learn how to resize an image in Photoshop and also change its file size without losing quality. Before you go, you may also want to check out the following resources:


