


Table of Contents
- Why Lens Correction Is Important for Property Photos
- When to Use Lens Correction in Real Estate Photography
- How to Do Lens Correction in Photoshop (2 Methods)
- Leave the Time-Consuming Editing to PhotoUp!
Do you want to learn how to do lens correction in Photoshop?
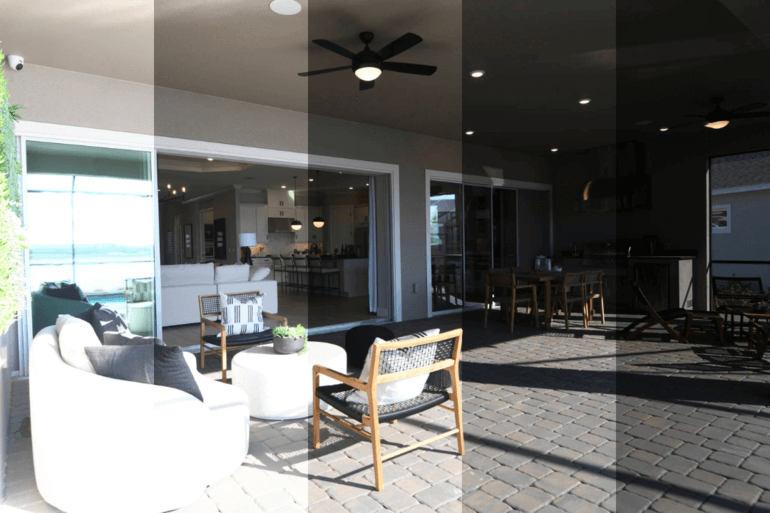
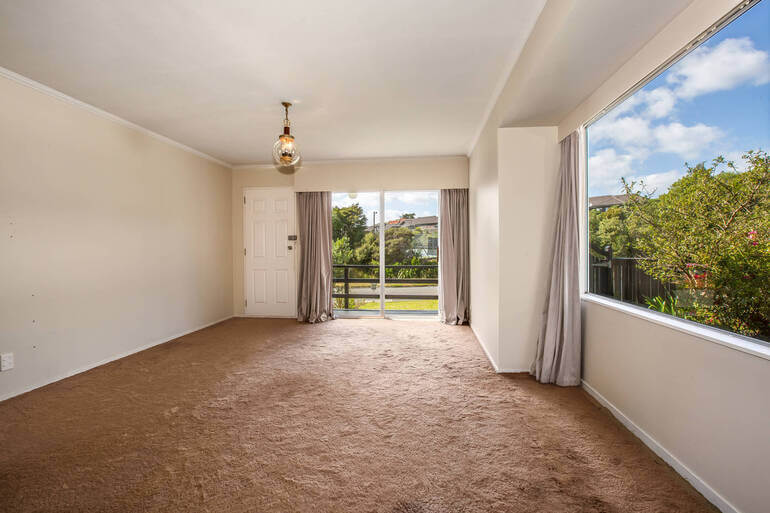
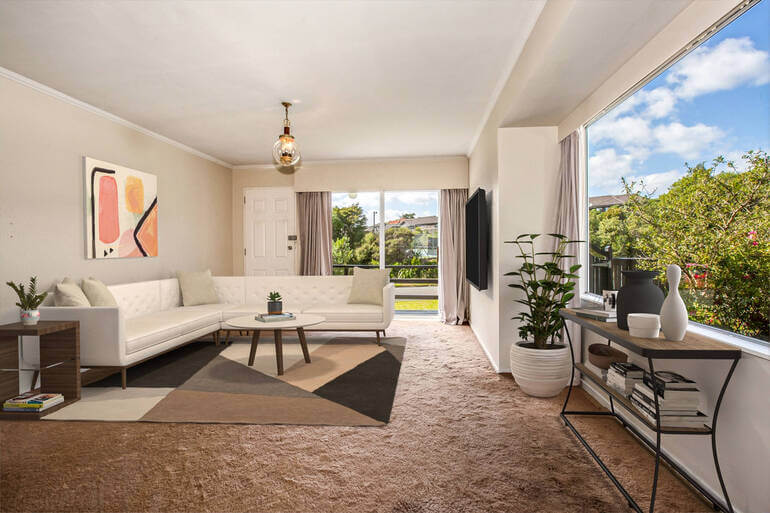
Lens distortion is a common issue in real estate photography, especially when using wide-angle lenses to capture entire rooms or outdoor spaces. Straight lines can appear curved, and vertical lines may tilt, giving an unrealistic portrayal of the property.
In this guide, we’ll walk you through how to do lens correction in Photoshop using the Lens Correction Filter and how to perform manual adjustments when the automatic feature doesn’t quite meet your needs.
But first, let’s take a look at why this edit is so important for real estate photography.
Why Lens Correction Is Important for Property Photos
When photographing real estate, wide-angle lenses are often used to capture as much of the property as possible.

However, these lenses can introduce barrel or pincushion distortion, where straight lines bow outward or inward.
This can create a misleading or unprofessional image, distorting the architecture of the property.
Correcting lens distortion helps maintain the structural integrity of the image and presents the property in a more realistic and appealing way.
It’s especially important for:
- Exterior shots where buildings may appear curved or distorted
- Interior shots where vertical lines, like walls, doors, or windows, may tilt unnaturally
When to Use Lens Correction in Real Estate Photography


Lens correction is essential in many real estate photography situations, especially when you want to provide an accurate and appealing portrayal of the property.
Here are a few common scenarios where lens correction is necessary:
- Wide-Angle Distortion: Wide-angle lenses used for interior and exterior real estate shots can distort the straight lines of walls, floors, and ceilings. Correcting this distortion is crucial for providing a more natural view of the property
- Architectural Photography: Buildings and structures should appear straight and proportional. Lens distortion can make vertical lines appear to converge or diverge, which can be visually unappealing
- Room Interiors: When shooting the inside of a property, distorted vertical lines or walls can make a room look unnatural, potentially turning off buyers or renters. Lens correction ensures rooms are presented in their true form
To recap, lens correction is a must-have technique in real estate photography, as it corrects distortions that can detract from a property’s appeal.
By mastering lens correction in Photoshop, you’ll enhance your images, making properties look their best and helping potential buyers visualize the space more clearly.
Have You Ever Thought To
Outsource Photo Editing?
Try it today with 10 free edits from three professional photo editors.

How to Do Lens Correction in Photoshop (2 Methods)
With this in mind, let’s take a look at how to do lens correction in Photoshop using the Lens Correction Filter, as well as performing this technique manually.
You can either watch the video or continue reading the text below:
There are two ways to do Lens Correction in Photoshop. First, we have the Lens Correction Filter. Let’s show you how to use this tool.
1. Using the Lens Correction Filter
Photoshop’s Lens Correction Filter is a built-in tool that automatically detects lens distortion and adjusts it based on camera and lens profiles.
Here’s how you can apply this to your real estate images:
Step 1. Access the Lens Correction Filter by navigating to Filter, then choose Lens Correction. This will open the Lens Correction dialogue box.
Step 2. In the Lens Correction dialogue box, Photoshop may automatically detect the lens used and apply corrections. If not, you can manually select your camera make and model from the Auto Correction tab.
Step 3. Switch to the Custom tab for more control. Here, you can manually remove Distortion and Chromatic Aberration. You can also adjust Vignette to correct any darkening or lightening at the edges of the image.
Step 4. Use the Preview checkbox to see the before and after effects. Once satisfied, click Ok to apply the corrections.
Now, let’s move on to showing you how to manually do lens correction.
2. Manual Lens Correction in Photoshop
In some cases, especially with unique or third-party lenses, Photoshop may not have the correct lens profile available. In these instances, you can manually correct lens distortion by using Photoshop’s Transform Tools.
Step 1. With your image open, create a duplicate layer by right-clicking on the background layer and selecting Duplicate Layer.
Step 2. Then, go to Edit > Transform > Warp. Use the warp grid to manually adjust and correct any distortion in the image. This method is more hands-on and allows for precise control.
And that’s it! You have now learned how to do lens correction in Photoshop.
Have You Ever Thought To
Outsource Photo Editing?
Try it today with 10 free edits from three professional photo editors.
Leave the Time-Consuming Editing to PhotoUp!
Real estate photographers must master these post-production skills to enhance their portfolio’s quality.

With practice, these techniques will become quick and easy fixes, further perfecting your craft.
However, if you rather spend your time shooting more properties and building lasting relationships with clients, you should consider leaving the editing to PhotoUp.
PhotoUp has a team of highly talented real estate photo editors who are ready and waiting to professionally edit your images at the low cost of $1.50 per image for on-demand editing (with access to more affordable subscriptions).
Browse Top Dedicated
Real Estate Photo Editors
Ready-to-hire editors for real estate photo editing, and more.
Our skilled photo editors can help with the following issues:
- Improper exposure levels
- Harsh shadows, lack of light, etc.
- Blurred images that were taken without a tripod
- Images that need cropping or other effects
- Lawn greening and sky replacements
- Twilight editing
- Clutter and object removal
- Line and angle corrections
- And much more!
We will handle all types of issues – from basic to complex editing!
With PhotoUp’s user-friendly software, you can easily upload and receive photos, send instructions and feedback, track and manage team members and clients, and deliver photos directly to your clients.
How to Get Started
Getting started with PhotoUp is a breeze! This is what to do:
Step 1. Sign up for a free PhotoUp account.
Step 2. Upload your photos to our easy-to-use software.
Step 3. Choose the level of editing that you need and provide instructions (optional).
Step 4. Wait for PhotoUp professional editors to edit and return the photos in less than 24 hours (48 hours for virtual staging).
Step 5. Download and start using your beautifully edited photos.
PhotoUp Real Estate Photo Editing Uploader Demo
For more details, check out our real estate photo editing uploader demo:
It’s really as easy as 1-2-3 to get beautifully edited images!
A Complete Real Estate Marketing Partner
On top of that, PhotoUp is a complete real estate marketing partner and also offers additional services such as:
- Virtual staging
- Virtual house tours
- Custom websites
- Single property websites
- Property flyers
- Floor plans
- House portraits
- And Virtual Assistants
We have everything you need to enhance and market real estate photography in one user-friendly platform!
So, don’t wait!
Sign up for a free PhotoUp account today and we’ll help you with lens correction and fixing other imperfections in less than 24 hours.
Did we mention that you get 10 free credits when you sign up for an account that you can use for any of our services?!
We hope this blog post helped you learn how to do lens correction in Photoshop. If you found this guide useful, you may also want to check out the following resources:

