


Table of Contents
- What Does Deselecting Mean in Photoshop?
- When Do You Need to Deselect in Photoshop?
- How to Deselect in Photoshop
- Tired of Editing Photos? Let PhotoUp Help!
Do you want to know how to deselect in Photoshop?
If you’re a real estate photographer or Photoshop user, you know how critical it is to master the basics. One essential skill you need to learn is how to deselect in Photoshop. This seemingly simple action can save you time and help prevent unwanted edits.
In this guide, we’ll show you how to deselect in Photoshop using 4 simple ways to avoid unintended edits or simply complete an edit.
But first, let’s take a look at what deselecting in Photoshop is and when to use this tool.
What Does Deselecting Mean in Photoshop?
In Photoshop, selecting parts of an image allows you to change specific areas without affecting the rest of the image.
Deselecting means removing those selections, so you can work on other parts of your project or make global adjustments without restrictions.
When Do You Need to Deselect in Photoshop?

Understanding when to deselect is just as important as knowing how to do it. Here are some common scenarios where you might want to use the deselect option in Photoshop:
- After making a selection and applying changes, you want to start working on a different area
- You accidentally selected something and need to get rid of the selection to avoid unintended edits
- You’re finished with a specific task and want to perform global adjustments to your entire image
With the common uses in mind, let’s now show you how to deselect in Photoshop.
Have You Ever Thought To
Outsource Photo Editing?
Try it today with 10 free edits from three professional photo editors.

How to Deselect in Photoshop
Whether you’re a seasoned Photoshop pro or just starting, knowing how to deselect in Photoshop is a fundamental skill that will make your editing process smoother.
Let’s go through the steps of how to do it using 4 simple ways. You can either watch the video tutorial or continue reading the text below:
Deselect Using Keyboard Shortcuts
To get started, one of the quickest ways to deselect is by using keyboard shortcuts:
Step 1. Assuming you have an active selection, simply press Ctrl + D on Windows or Command + D on Mac.
This keyboard shortcut will instantly remove the selection.
Deselect Using the Menu
If you prefer navigating through menus instead of using shortcuts, follow these steps:
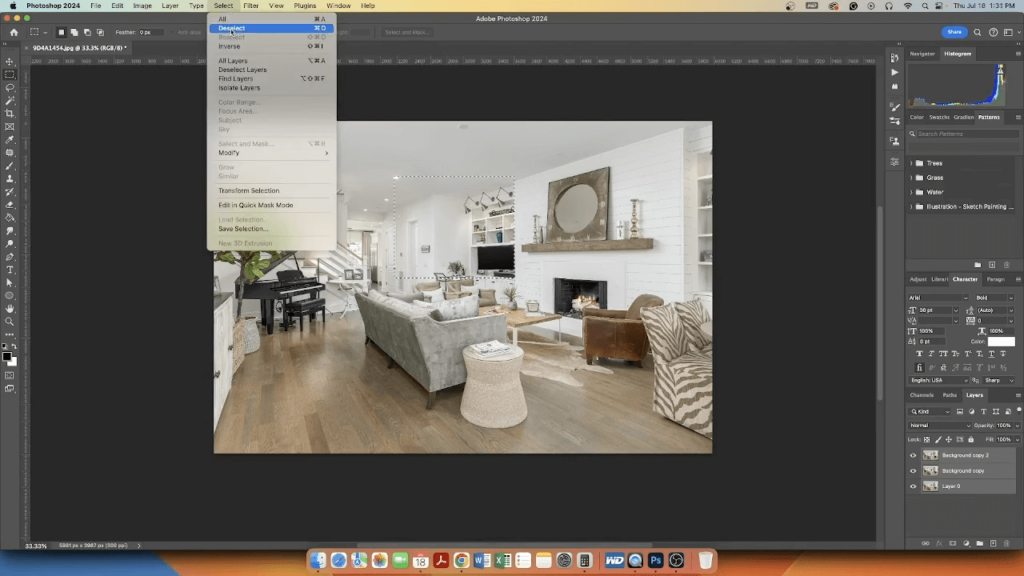
Step 2. With an active selection, go to the top menu bar. Click on Select, and from the dropdown menu, choose Deselect.
This will clear the current selection.
Deselect Using the Right-Click Method
There’s an even easier method for those who love using the mouse:
Step 3. To deselect using the Right-Click Method, right-click anywhere inside the selected area.
Step 4. From the Context menu that appears, select Deselect.
This will remove the selection from your project.
Deselect Using the Layers Panel
If you’re working with multiple layers, you can deselect using the following method:
Step 5. Go to the Layers panel on the right side of the Photoshop interface. Click on a space within the Layers panel, but not on any layer.
This will deselect any selected layers.
And that’s it! You’ve now learned how to deselect in Photoshop.
Have You Ever Thought To
Outsource Photo Editing?
Try it today with 10 free edits from three professional photo editors.
Tired of Editing Photos? Let PhotoUp Help!
Managing your photo editing workload can be overwhelming, especially when you’re juggling multiple properties or deadlines.


That’s where PhotoUp comes in!
We offer top-notch real estate photo editing services that can save you time and enhance the quality of your images.
Why Choose PhotoUp?
- Expert Editors – Our team comprises skilled editors who understand the nuances of real estate photography
- Quick Turnaround – Get your edited photos back within 12 to 24 hours
- Cost-Effective – Affordable packages tailored to your needs, starting from the low cost of $1.10 per image
- Quality Assurance – Rigorous quality checks and dedicated editing to ensure your photos look their best. Photographers give Good or Amazing ratings on orders over 99% of the time and have 3X fewer revisions when using a dedicated editor
PhotoUp’s professional photo editors can handle any editing job – big, small, or complex.
Browse Top Dedicated
Real Estate Photo Editors
Ready-to-hire editors for real estate photo editing, and more.
But that’s not all…
A One-Stop-Shop for Real Estate Marketing

On top of that, PhotoUp is a complete one-stop-shop for real estate marketing and also offers additional services such as:
- Virtual staging
- Virtual house tours
- Home walk-through videos
- Custom websites
- Single property websites
- Property flyers
- House portraits
- Floor plans
- And Virtual Assistants
Trust us, PhotoUp is the ideal choice to bring your real estate photos to life!
How to Get Started
Getting started with PhotoUp is super easy.
When signing up for a free PhotoUp account, you’ll get access to our user-friendly software where you can upload and receive photos, send instructions, and give feedback.
It also allows you to track and manage team members and clients, store final images, and more!
PhotoUp Real Estate Photo Editing Uploader Demo
To see how easy it is to get started, have a look at our real estate photo editing uploader demo:
It’s really as easy as 1-2-3!
Ready to elevate your real estate photography? Get started with PhotoUp today!
Sign up for a free PhotoUp account and let our expert real estate photo editors help you edit your photos to perfection.
And the best part? When you sign up for an account, you’ll receive a bonus of 10 free credits to use however you please!
We hope this blog post helped you learn how to deselect in Photoshop. If you found this post useful, you may also want to check out the following resources:

