


Table of Contents
- What Does Decluttering a Property Photo Entail?
- Why Should You Declutter Your Real Estate Photography?
- How to Declutter Photos (2 Effective Techniques)
- Save Time! Let PhotoUp Declutter Your Photos
Research shows that homes featuring professionally edited photos receive 47% higher asking prices per square foot. A clean, well-organized photo can make a significant difference in attracting potential buyers and selling for a high price.
In other words, the importance of clutter-free images cannot be overstated when it comes to marketing and selling real estate.
But what does decluttering a photo entail, and how can you achieve it effectively? Let’s explore two techniques on how to declutter photos in Photoshop.
We will use real estate photography as examples for our tutorials but these methods can be applied to any type of photography.
What Does Decluttering a Property Photo Entail?


Decluttering a photo involves removing distractions that may take away from the primary subject of the image, which, in real estate photography, is the property itself.
Unwanted items can obscure the beauty of a room and its furnishings, preventing buyers from appreciating the full value of a property.
Let’s face it; few people want to buy a home that looks unkempt, uncared for, and disorganized.
The process of decluttering can include:
- Removing personal items such as family photos, toys, or knick-knacks
- Eliminating unnecessary furniture or decorations that clutter the space and make it look disorganized
- Fixing any visible imperfections like stains, cracks, or damage
- Enhancing the overall aesthetic appeal by ensuring the space looks open and inviting
There are many situations when decluttering your photos is necessary to make them look clean and professional. Let’s take a look at why this is crucial for real estate photography, especially.
Why Should You Declutter Your Real Estate Photography?


Statistics by the National Association of Realtors show that 87% of homebuyers on the internet find images to be among the most useful features of listing websites when looking for new homes.
This is why viewers spend 60% of the time checking images and only 20% read the listing description.
With this in mind, here are some reasons why you should declutter your real estate photography to ensure clean and professional images that will attract potential buyers.
1. Highlight the Property’s Best Features
Decluttering your real estate photography allows the main features of the property to stand out.
This allows buyers to focus on, for example:
- The spaciousness of the living room
- The modern appliances in the kitchen
- Or the luxurious feel of the master bedroom
This can be achieved when the viewer doesn’t have to be distracted by personal belongings and other clutter spread out all over the place.
2. Improve Aesthetic Appeal
Additionally, a clean and well-organized photo is naturally more attractive and improves the overall aesthetic appeal.
It creates a sense of order and calm, which can be very appealing to potential buyers.
This can, in turn, lead to more interest and viewings, and potentially quicker sales for higher prices.
3. Increase Perceived Value
Furthermore, decluttered photos can make the property appear more valuable.
As mentioned in the intro, homes featuring professionally edited photos receive 47% higher asking prices per square foot, which is a lot more money to be made.
When a space looks tidy and well-maintained, it gives the impression that the property has been cared for, which can justify a higher asking price.
With that being said, let’s look at how to actually declutter and clean up your photos next.
How to Declutter Photos (2 Effective Techniques)


According to studies, 32% of homes with high-quality photographs sell faster than those without visuals. To ensure your real estate photos look impeccable and capture viewers’ attention, you need to know how to make them look clean and organized.
Let’s begin by showing you how to declutter your photos using the Clone Stamp Tool in Photoshop.
Decluttering Photos Using the Clone Stamp Tool
The Clone Stamp Tool is a game-changer for real estate photographers. It’s like having a magic wand to make unwanted objects disappear from your interior shots.
All you need to do is select an area, clone its pixels and colors, and poof! The object vanishes, leaving behind a flawless background.
This is how to use the Clone Stamp Tool:
Step 1. Select the Clone Stamp Tool, and navigate to the area containing the object you want to remove.

Step 2. Hold the Alt button until the cursor turns into a crosshair, and Click on the area you want to sample.

Step 3. With the Clone Stamp Tool activated, Brush on the object you want to remove. This will copy the pixels of the sample area you selected in step 3. A small plus sign will show the sample area that the brush is copying over the object you want to remove.

Decluttering photos using the Clone Stamp Tool is an effortless way to create stunning real estate photos that capture the true essence of a property. No more distractions, just picture-perfect interiors.
How to Remove a Car From a Driveway in Photoshop
To see this editing technique in action, this video tutorial walks you through how to remove a car from the driveway using the Clone Stamp Tool:
And that’s how you use the Clone Stamp Tool to declutter photos!
Now, let’s move on to showing you how to declutter photos with the help of virtual staging.
How to Declutter Photos With Virtual Staging


Virtual staging involves using CAD software to add, remove, or rearrange furniture and decor in your photos.
This technique can help neutralize, depersonalize, and declutter messy rooms to make them appeal to everyone.
Not only does this technology allow you to declutter photos, but it also allows you to do the following:
- Add furniture and decor items
- Update flooring, cabinets, and other fixtures
- Remodel and renovate any room or space
- Showcase rooms and areas in a variety of decor styles
- Improve the landscaping and more
This will help potential buyers imagine themselves living in the home and seeing its full potential.
Learning how to declutter photos with the help of virtual staging requires time and effort, so the absolute easiest way is to outsource virtual staging to a professional editing service like PhotoUp.
With PhotoUp’s virtual staging service, you’ll get your virtually staged images returned to you in only 48 hours for the low cost of $20 to $30 per image.
All you need to do is take photos of your property, upload your images, select furniture and export settings, and then sit back and wait for your staged images to be delivered.
The Ultimate All-in-One
Real Estate Photographer Business Platform
Grow a successful real estate photography business with PhotoUp.

PhotoUp Virtual Staging Demo
To illustrate just how easy it is, let’s show you how to virtually stage a room using PhotoUp’s virtual staging software next. You can either watch the video tutorial or read the text below:
Step 1. Sign Up for a PhotoUp Account
To begin, sign up for a free PhotoUp account on PhotoUp’s website by entering your email address and creating a password.

Step 2. Choose Virtual Staging
Once you’ve signed up for an account, it’ll take you to the PhotoUp Dashboard, where you can choose Virtual Staging » New Order.

Step 3. Choose Your Preferred Turnaround Time
In the next step, you can choose your preferred turnaround time. PhotoUp offers either 24 or 48 hours turnaround.

Step 4. Upload Your Photos
Now it’s time to upload your real estate photos. Although virtually staging empty spaces is the most common option, you can also choose to declutter and redecorate your photos, or even make virtual renovations.
To begin uploading your images, click on the Browse button in the New Order window and select your photos. Or, you can simply drag and drop up to 11 images at the same time.

Step 5. Choose Your Furniture
After you’ve uploaded your photos, you need to choose your furniture.
Start by marking the photo you want to add furniture to, and then click on the furniture set you want to add to your image.
You can choose up to 3 sets per photo. And you can either use the Style Filter or Room Filter option, or Search by ID for furniture sets.
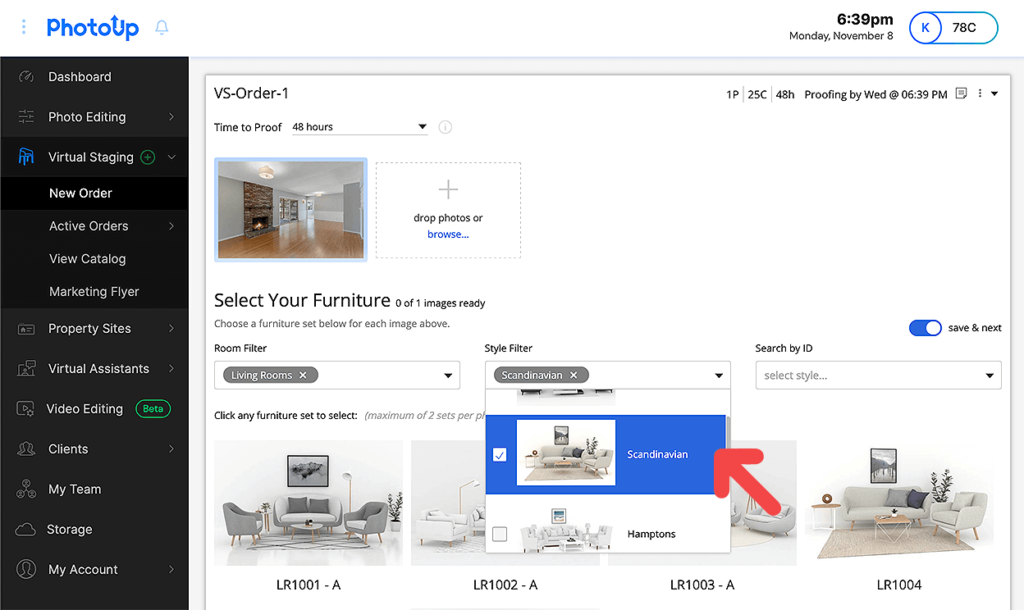

Once you’ve clicked on the set you wish to add to your photo, you’ll see thumbnails of them at the bottom right corner of the uploaded image.

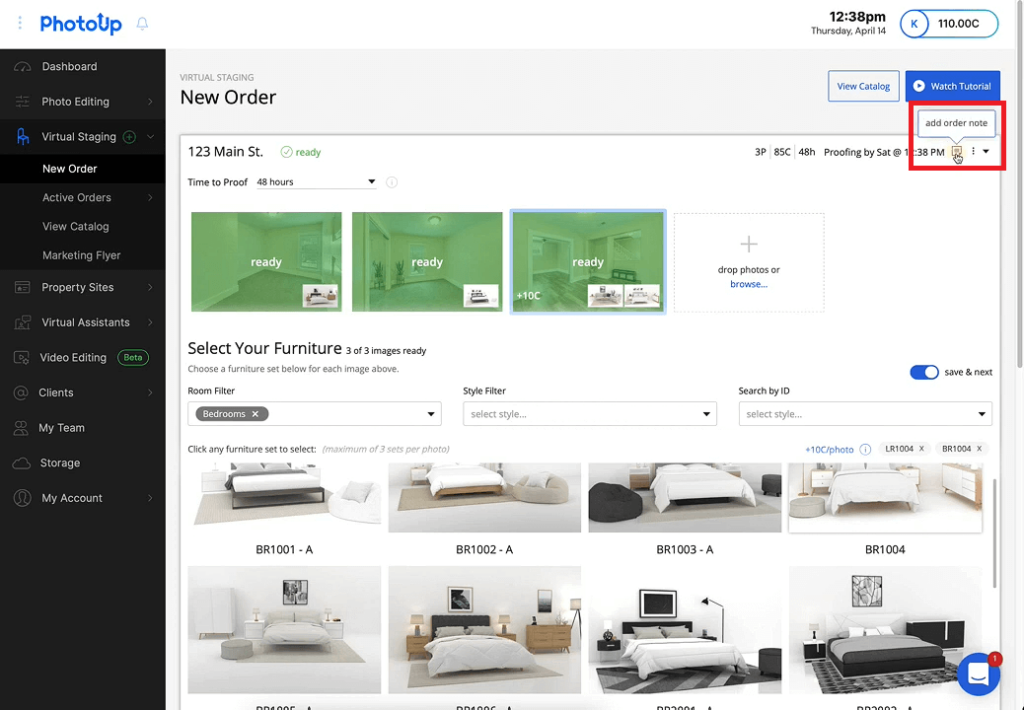
You also have the option to add your comments and instructions in Add order note in the menu in the top right corner of the dashboard. Or, you can leave your comments on each individual photo.
Step 6. Choose Your Export Settings
Once you’ve selected the furniture you want to stage your photos with, you need to scroll down and choose your preferred Export Settings.

This will be the type of image format you want your photos to be delivered in.
Additionally, you can also choose to have your images watermarked. Simply click on the + add watermark button below the export settings and upload your logo or icon.
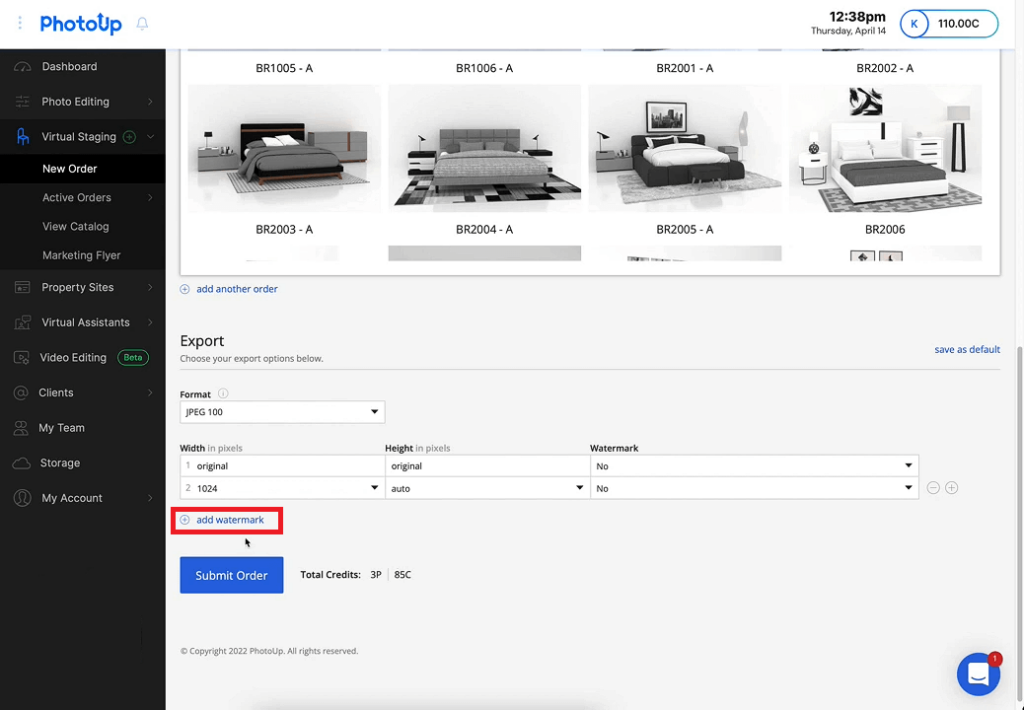
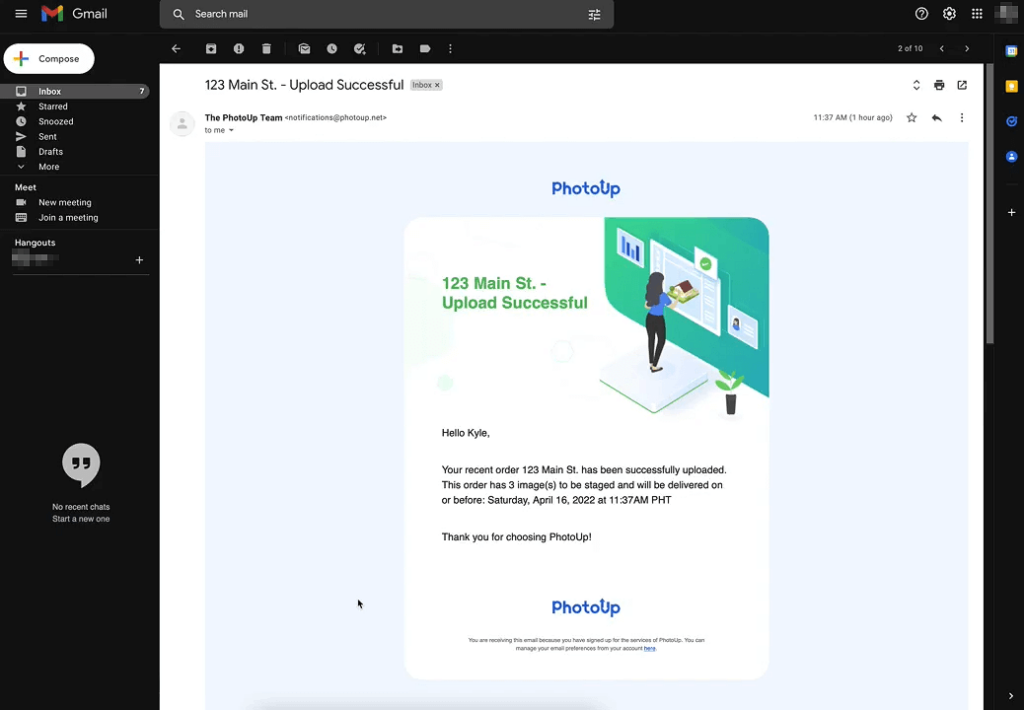
Then, click on the Submit Order button, and you’ll get a confirmation of your order. You’ll also receive a separate email that your upload was successful.
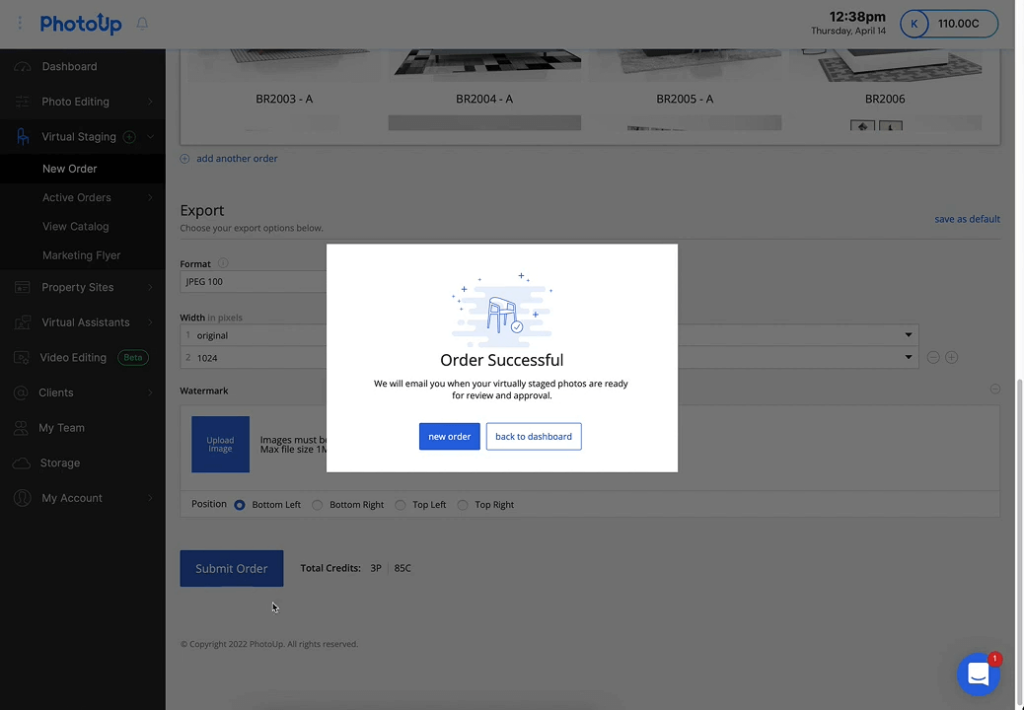
Now, you’re almost finished!
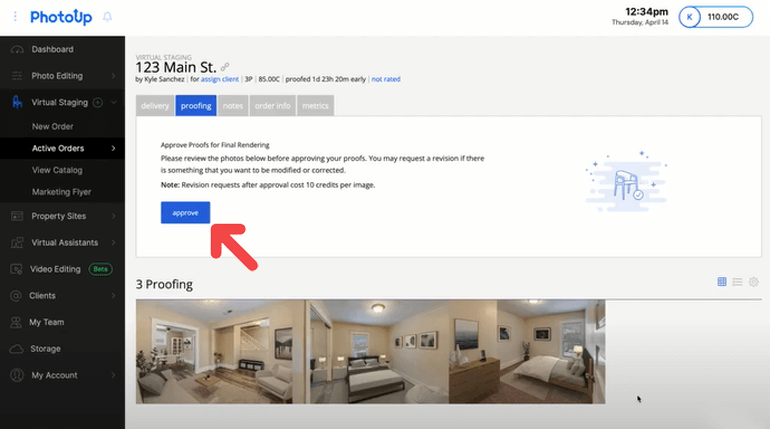
Step 7. Proofing Your Virtually Staged Photos
The final step is to review your virtually staged photos. When your photos are ready for proofing, you’ll receive an email containing a link.
This link will take you to an order page where you have the ability to view your photos and request revisions if needed or approve your order. Just click on the proofing button and review your images.

Additionally, PhotoUp offers 2 free revisions and then each additional revision costs 10 credits.
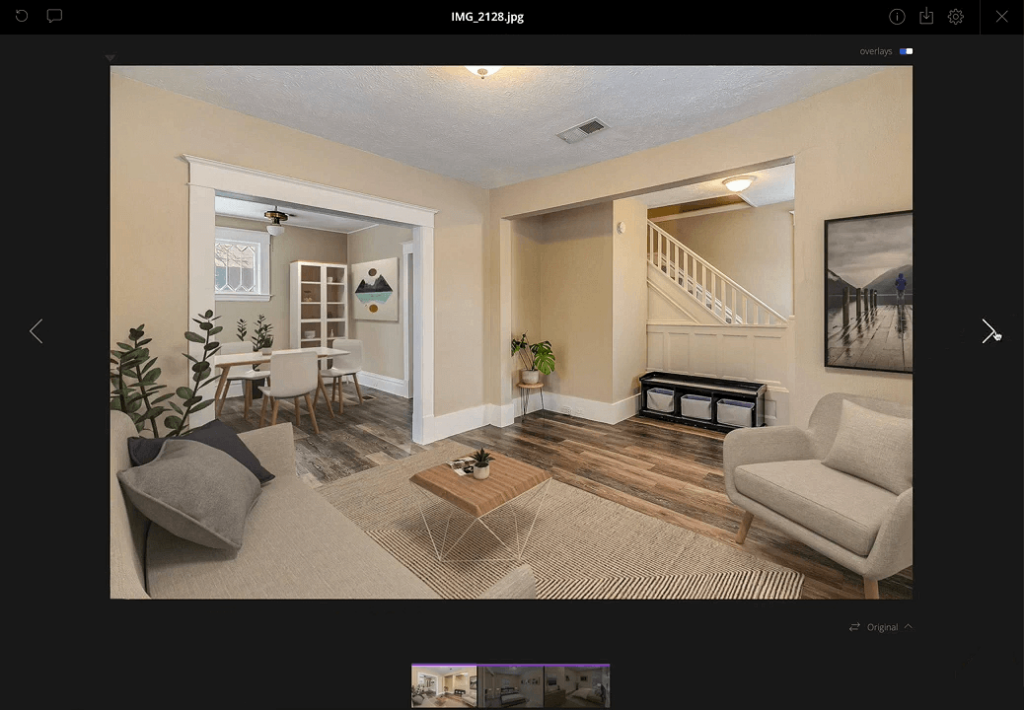
Further, each image contains a before and after slider of the image. Simply, drag the slider back and forth to see the original photo and the final image.
8. Approve & Download Your Rendered Images
If everything looks okay, you can go ahead and Approve the order.
When the images are fully rendered you’ll receive a notification email. And when you click on the link in the email, it’ll take you back to the order page where you can download your high-resolution photos.
And that’s it! You are now ready to share your beautifully decluttered and staged real estate photos.
For more ways to declutter photos, you can check out our blog post on 5 simple editing techniques to remove objects in exterior photos or 4 simple editing techniques to remove objects in interior photos.
Have You Ever Thought To
Outsource Photo Editing?
Try it today with 10 free edits from three professional photo editors.
Save Time! Let PhotoUp Declutter Your Photos


At PhotoUp, we understand the importance of pristine, clutter-free real estate images.
With over a decade of experience, our team of expert real estate photo editors can help you transform your photos, ensuring they highlight the true beauty of the property.
Why Choose PhotoUp?
There are many reasons why you should consider outsourcing your editing to PhotoUp. Here are some of our strengths:
User-Friendly Platform
PhotoUp’s platform is super easy to use. You can upload your photos, provide instructions, and get your images edited in a heartbeat.
Expert Editors
Our team of skilled real estate photo editors ensures that every image is polished to perfection. Plus, our customer support team is locally based in the US and available to address your concerns and provide real-time updates 24/6.
Fast Turnaround Time
With PhotoUp, you can benefit from a quick turnaround time of 12 to 24 hours for regular editing and 48 hours for virtual staging, regardless of your location.
Affordable Pricing
We offer competitive rates without compromising on quality, starting at the low cost of $0.50 per image (for dedicated editing).
Consistent Image Quality
With PhotoUp, you can trust that each photo will meet your high standards, helping you maintain a consistent brand image. If you choose to work with a dedicated editor, they are 100% dedicated to you and your business and will learn your unique style.
Trusted Brand
PhotoUp is a trusted brand and has been featured on some of the most well-respected real estate photography blogs/podcasts like the PFRE and Shooting Spaces, plus other big new stations such as NBC, Fox News, USA Today, and CBS.
What Type of Editing Can PhotoUp Help With?
Any editing! For example, our skilled team of editors can assist you with the following issues:
- Brightness and color correction
- Vertical and horizontal line adjustments
- Advanced object removal and decluttering
- Day-to-dusk conversion and twilight editing
- Lawn greening and sky replacements
- HDR editing
- Flambient editing
- Panoramic stitching
- And much more!
No editing task is too small, too big, or too complex for PhotoUp to handle.
Browse Top Dedicated
Real Estate Photo Editors
Ready-to-hire editors for real estate photo editing, and more.
A Complete Real Estate Marketing Partner


Beyond photo editing, PhotoUp is a complete real estate marketing partner. We also offer a suite of additional marketing services, such as:
- Virtual staging
- Virtual house tours
- Floor plans
- Video editing
- Single property websites
- Real estate photographer websites
- House portraits
- Property flyers
- And Virtual Assistants
As you can see, PhotoUp has everything you need to enhance and market real estate photography in one user-friendly software.
How to Get Started
Getting started with PhotoUp is super easy!
All you need to do is sign up for a free PhotoUp account, and you’ll get access to our easy-to-use photo management system where you can upload and receive photos, send instructions, and give feedback.
It also allows you to manage team members and clients, store final images, and more. It can’t be easier to run and grow your photography business!
PhotoUp Real Estate Photo Editing Uploader Demo
To see how easy it is to get started with PhotoUp, have a look at our real estate photo editing uploader demo:
As simple as that! So what are you waiting for?
Sign up for a free PhotoUp account and let our professional editors help declutter your photos and make them look captivating!
Plus, when you sign up for an account, you’ll receive a bonus of 10 free credits to use on any of our services.
We hope this blog post helped you learn two techniques on how to declutter photos. Before you go, you may also want to check out the following resources:

