


Table of Contents
- Understanding RAW and JPEG Image Formats
- Why Shoot in RAW?
- How to Convert RAW Images to JPEG in Lightroom
- How to Convert RAW Images to JPEG in Photoshop
- How to Convert RAW Images to JPEG Online for Free
- Need Help With Real Estate Photo Editing? Use Photoup!
Learn how to convert RAW images to JPEG using 3 different methods and software in our step-by-step guide.
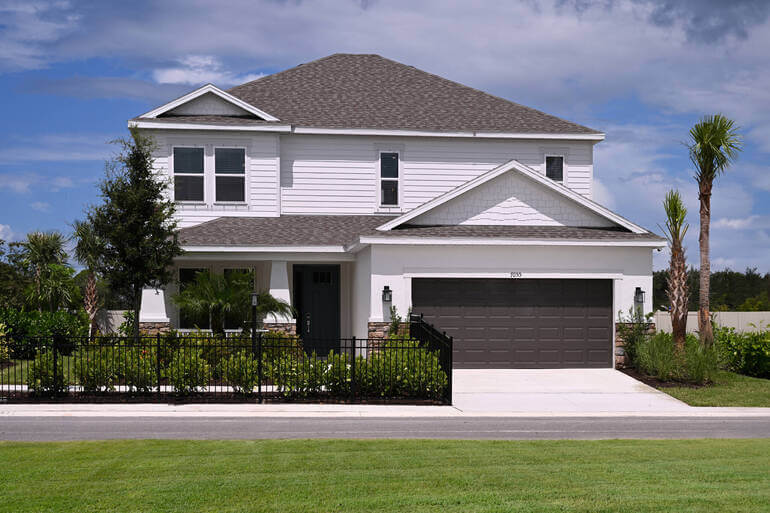
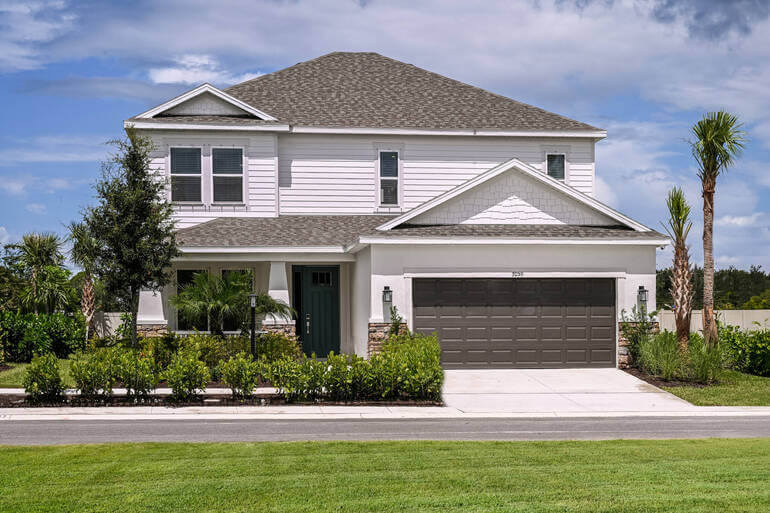
Whether you’re a seasoned real estate photographer or an aspiring photography enthusiast, understanding how to convert your RAW files into a more accessible image format like JPEG is crucial.
Shooting in RAW offers tremendous control over the editing process; however, sharing these images or printing them requires converting RAW files into a more universally accepted format such as JPEG.
In this guide, we’ll show you how to convert RAW images to JPEG in Lightroom and Photoshop, as well as using a free online tool.
Let’s get started!
Understanding RAW and JPEG Image Formats
Before we get into the conversion process, it’s vital to understand what RAW and JPEG formats are:
| RAW | JPEG |
| RAW is an uncompressed, unprocessed image format that captures all the data from your camera sensor. It gives you greater flexibility to modify aspects of an image, like exposure and white balance, without degrading quality. | JPEG, on the other hand, is a compressed image file format that processes the information and reduces the file size significantly. This format is widely used because it’s supported by almost all software and hardware. |
For more information on image formats, you can visit our blog post on the differences between image file formats (RAW, DNG, TIFF, GIF, PNG, JPEG).
Now that you know the difference between these two main image formats, let’s take a look at why you should always shoot in RAW.
Why Shoot in RAW?
Shooting in RAW allows photographers to capture the highest level of detail and provides more latitude in post-processing.
Especially for real estate photography, where lighting conditions can vary and details matter, RAW enables photographers to make substantial adjustments without compromising image quality.

However, due to its large file size and incompatibility with most standard photo viewers, converting RAW to JPEG sometimes becomes necessary for final delivery.
With this in mind, let’s explore various methods of converting RAW images to JPEG.
How to Convert RAW Images to JPEG (3 Simple Methods)
RAW images are favored by photographers for their high quality and flexibility in post-processing.
However, sharing and printing often require converting these RAW files into a more widely supported format like JPEG.
This tutorial will guide you through the process of converting RAW images to JPEG using Adobe Lightroom and Adobe Photoshop. Below, you can also find out how to do this using a free online tool.
You can either watch the video tutorial or continue reading the text below:
How to Convert RAW Images to JPEG in Lightroom
Step 1. To import RAW images into Lightroom, open Adobe Lightroom. Click the Import button located at the bottom left of the Library module.
Step 2. Navigate to the folder containing your RAW images in the Source panel. Select the images you want to import and click the Import button at the bottom right.
Step 3. To export RAW images as JPEG, select the images you want to export in the Library or Develop module. Right-click on the selected images and choose Export from the Context menu.
Step 4. In the Export dialog box, set the Export Location to where you want to save the JPEG.
Step 5. Under File Settings, choose JPEG as the format. Adjust the Quality slider to control the file size and image quality. Then, click the Export button at the bottom right.
And that’s it!
Have You Ever Thought To
Outsource Photo Editing?
Try it today with 10 free edits from three professional photo editors.

How to Convert RAW Images to JPEG in Photoshop
Now, let’s try the same process using Adobe Photoshop.
Step 1. To open RAW images in Photoshop, go to File > Open and navigate to your RAW file, select it, and click Open.
Step 2. Now, convert your image and save it as JPEG. Go to File > Save a Copy or press Shift + Ctr + S for Windows and Shift + Command + S for Mac.
Step 3. In the Save As dialog box, select JPEG from the format drop-down menu and click Save.
Step 4. In the JPEG Options dialog box that appears, adjust the Quality slider to set your preferred balance between file size and image quality.
Step 5. Lastly, click OK to save the image.
You’ve now successfully converted your RAW images to JPEG using both Adobe Lightroom and Adobe Photoshop.
Lightroom is excellent for batch processing and making quick adjustments, while Photoshop offers more detailed control for individual images.
Choose the method that best fits your workflow and project requirements.
How to Convert RAW Images to JPEG Online for Free
You can also convert RAW images to JPEG online using free online website tools. It’s super quick and easy and works like this:
Step 1. Open a web browser and go to an online conversion site like raw.pics.io or zamzar.com. In this example, we use raw.pics.io.
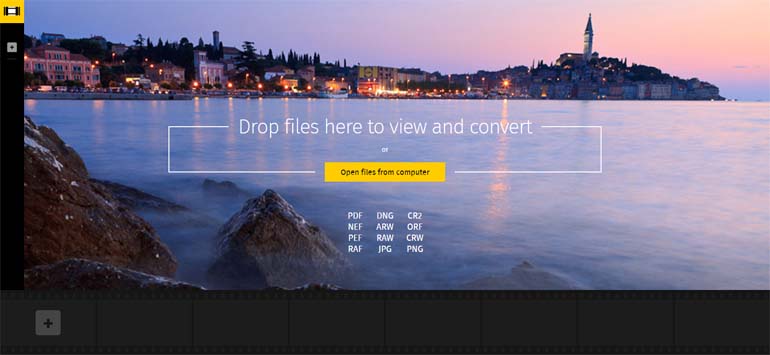
Step 2. Next, upload or “drag and drop” your RAW file using the provided instructions.
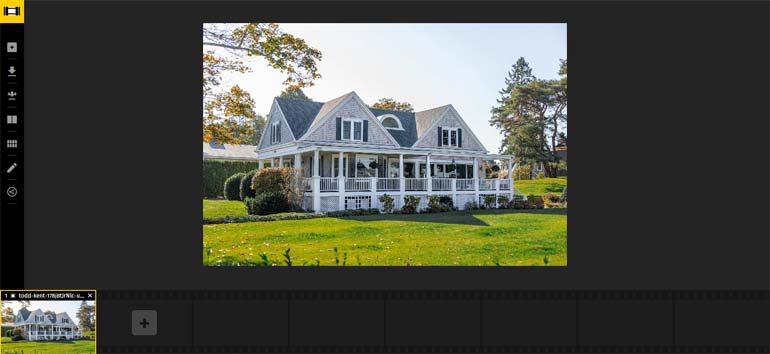
Step 3. Select JPEG as your output format and adjust any settings if available.
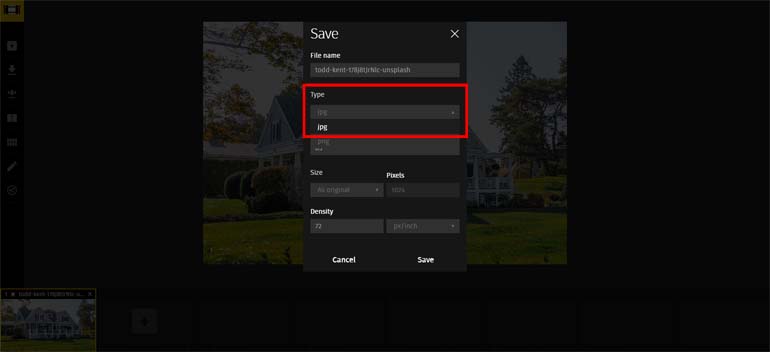
Step 4. Start the conversion process and download your JPEG file once done.
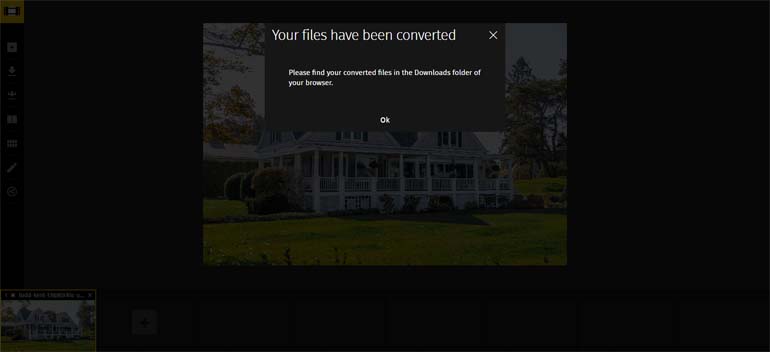
As simple as that!
Now that we’ve walked through all conversion methods, let’s take a look at what happens when we compress photos and how that affects your image quality.
Understanding Compression and Quality Settings
During the conversion process, paying attention to compression and quality settings is essential.
Higher compression leads to smaller file sizes but can degrade image quality, resulting in loss of detail and artifacts.
You should always aim to find a balance between image quality and file size, depending on your intended use.
For example, if your purpose is to upload your image to your website or other online platforms, you can use higher compression and save it as JPEG or PNG.
But if your goal is to print your image, you need to keep it as a larger file size of 300 dpi to avoid blurry and pixelated images.
Conclusion
RAW to JPEG conversion is a necessary task for most professional real estate photographers, as well as beginners, and understanding how to do it efficiently is key to maintaining a smooth workflow.
Whether you’re using professional software like Photoshop or Lightroom, or in need of a quick conversion with online tools, the ability to adapt RAW images for various uses is an invaluable skill.
Now that you know how to convert your RAW images like a pro, experiment with the settings and methods to find what works best for your personal or professional needs.
Good luck, and happy converting!
Have You Ever Thought To
Outsource Photo Editing?
Try it today with 10 free edits from three professional photo editors.
Need Help With Real Estate Photo Editing? Use Photoup!
If you need help editing your real estate photos, PhotoUp has got your back!
Based in the US, PhotoUp provides a full array of skilled, yet affordable, photo editing services for professional real estate and architectural photographers, such as:
- Brightness and color correction
- Advanced object removal
- Day-to-dusk conversion
- Lawn greening and sky replacements
- HDR editing
- Manual blending
- Flambient editing
- And much more!
PhotoUp’s team of real estate photo editors can handle any editing job — big or small, complex or simple.
Best of all, our pricing is also affordable, with most photo editing services starting at only $1.50 per image for on-demand editing with a short turnaround time of 12 to 24 hours.
Dedicated editing can go as low as $0.50 per image, depending on your style and editing batch.
Browse Top Dedicated
Real Estate Photo Editors
Ready-to-hire editors for real estate photo editing, and more.
PhotoUp Does More Than Just Photo Editing


On top of that, PhotoUp is a complete one-stop-shop for real estate marketing and also offers other powerful services like:
- Virtual staging
- Virtual house tours
- Single property websites
- Floor plans
- Property flyers
- And custom house portraits
How to Get Started
Getting started with PhotoUp is super easy!
Here’s all you need to do:
Step 1. Sign up for a free PhotoUp account.
Step 2. Upload your photos to our easy-to-use software.
Step 3. Choose the level of editing that you need and provide instructions (optional).
Step 4. Wait for PhotoUp professional editors to edit and return the photos in less than 24 hours (48 hours for virtual staging).
Step 5. Download and start using your beautifully edited photos.
PhotoUp Real Estate Photo Editing Uploader Demo
To see how easy it is to get started using PhotoUp’s software, you can check out our real estate editing uploader demo:
It’s really that easy!
Sign up for a free PhotoUp account today, and save time and effort on post-processing!
Using PhotoUp’s expert real estate editing service will help you free up time you can spend on shooting more properties and growing your real estate photography business.
For a limited time, you’ll even get 10 free credits you can use on any of our services when signing up for an account!
We hope this blog post helped you learn how to convert RAW images to JPEG using any of these 3 methods. If you found this blog post useful, you may also want to check out some related resources:

