Table of Contents
- Why Compress Images?
- How to Compress Images in Photoshop (6 Easy Steps)
- 3 Online Image Optimizers for Image Compression
- WP Image Optimization Plugins
- Boost Site Speed and Improve Image Quality
Do you want to know how to easily compress images in Photoshop to make your image file size smaller?
Not only can this help you to boost site speed, but also make it easier to email image proofs to your customers when your email client doesn’t have the capacity to send large, high-resolution files.
In this post, we’ll show you how to compress images in Photoshop to decrease their overall file size, as well as by using some other alternatives for image optimization.
But first, let’s take a look at why you should compress your images.
Why Compress Images?

If you’re planning to upload images on your website, you should always compress them to make the file size smaller. Too large images will make your overall website file size very large, which will slow down the page load speed of your site.
In May 2021, Google made website loading speed a part of its Core Web Vitals. These are factors that Google considers necessary for giving users the best experience when visiting your site.
For example, it’ll look at your site speed, responsiveness, and how quickly different elements like fonts and images load. This means that a slow website will decrease your chances of ranking your content on Google and other popular search engines.
It is also not good for the user experience and may lead to a higher bounce rate. In today’s internet era, people get more and more impatient and expect websites to load quickly. Studies have shown that 53% of mobile users abandon a page that takes over 3 seconds to load.
Additionally, if you need to email images to your clients and alike, your email server may not be able to send too large files.
Many email clients have a maximum file size of 10MB to 25MB for sending attachments. So in that case, it’s always best to send compressed images with smaller file sizes.
Besides, it also reduces the upload and download time for you and the responder.
How to Compress Images in Photoshop (6 Easy Steps)
Now that you know why you should compress images, let’s show you how to quickly and easily compress images in Photoshop next.
Step 1. To get started, open your image in Photoshop.
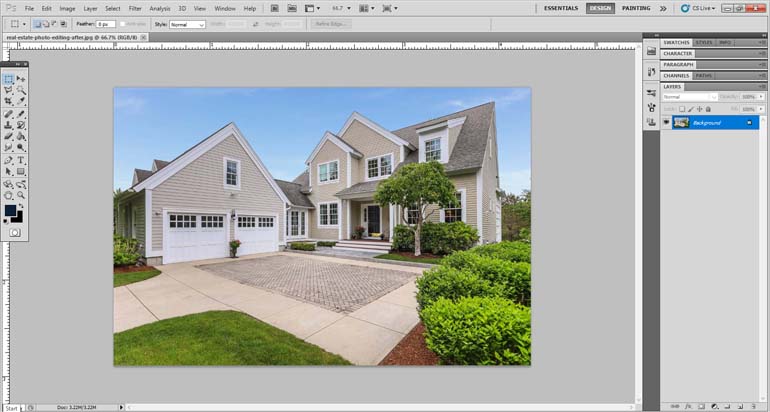
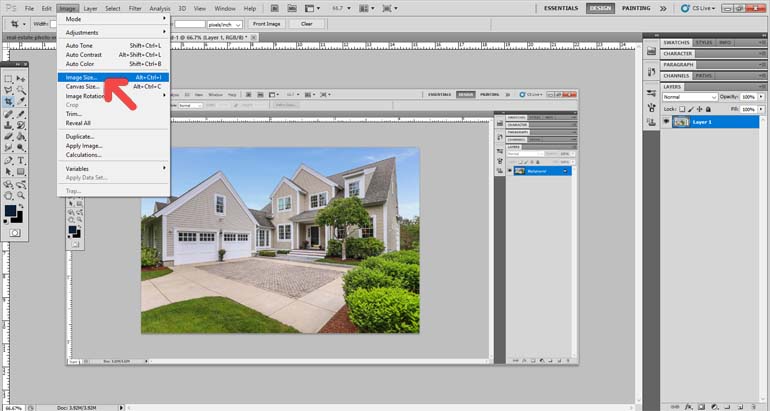
Step 2. Navigate to Image and then select Image Size.
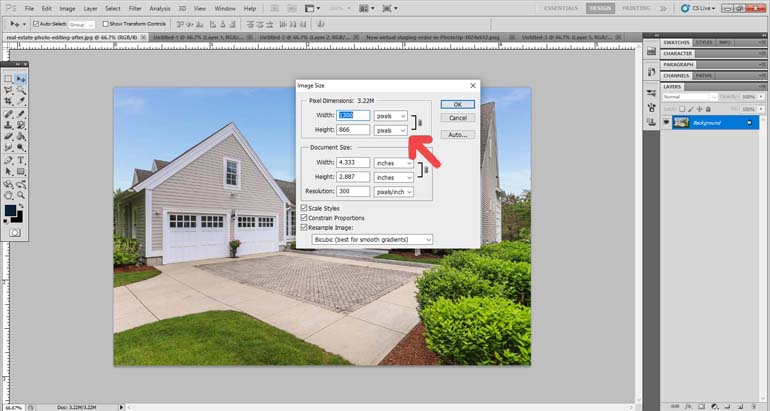
Step 3. Make sure your image measures your photo in Pixels and Resize it to the correct dimensions and then click OK.
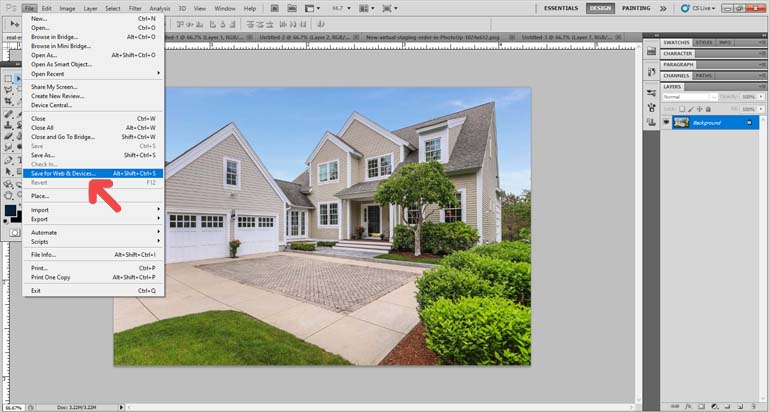
Step 4. Now, go to File and choose the Save for Web & Devices option.
Step 5. Compress the file in the Quality setting to somewhere between 60% to 80%.
You can use the photo viewer to the left to determine the image quality. If the image starts looking blurry, you can just adjust the compression percentage to 50% or lower.
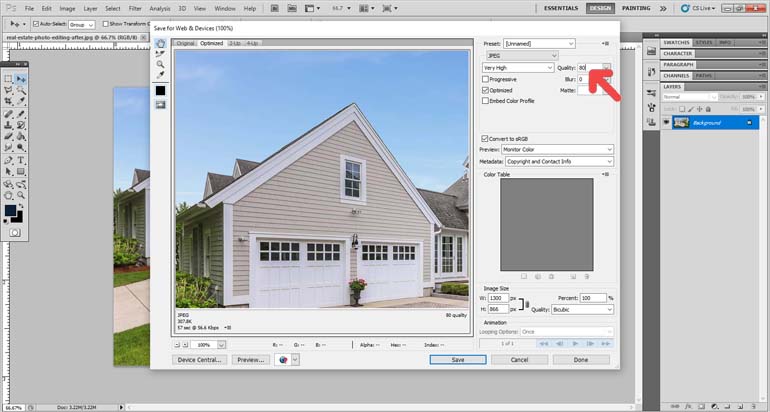
Step 6. Once you’re happy with your image resolution and compression, you simply click on the Save button.
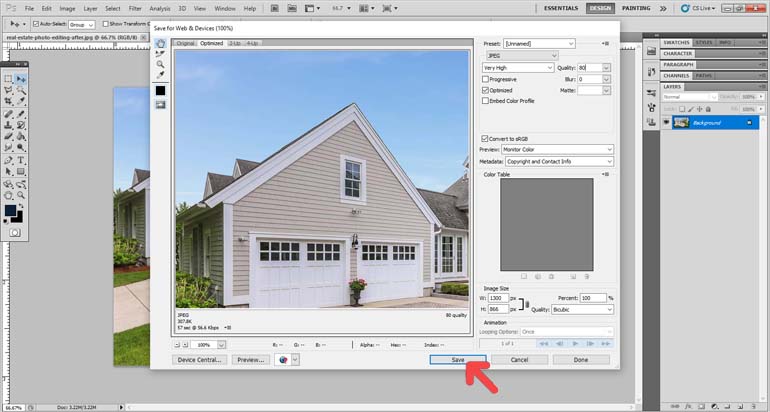
And that’s it!
3 Online Image Optimizers for Image Compression
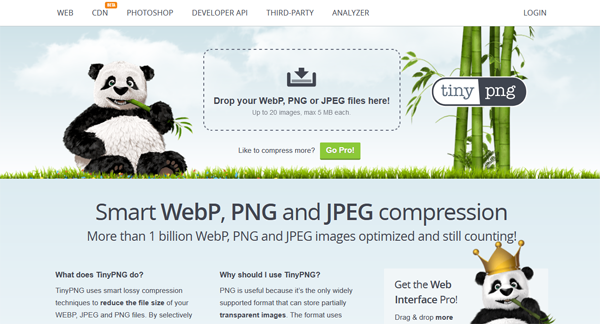
If you don’t want to use Photoshop to compress your images, you can use free online image optimizers such as:
- TinyPNG for PNG & JPG files
- CompressJPEG for JPG files
- Optimizilla for PNG & JPG files
These online optimization tools can help you reduce the image file size by 70% or more, which will positively impact your site speed and make emailing images easier.
WP Image Optimization Plugins
Furthermore, if you have a WordPress website, you can install an image optimization plugin that will automatically compress your images once you upload them to your site.
Some examples of image compressor plugins for WordPress are:
Some of these plugins also use cache and lazy load features, which will help speed up page loading as well.
The cache function serves a cached version of your website when a user is visiting it for the second time, which significantly reduces page loading time.
And the lazy load feature loads your images from top to bottom when a user scrolls down the site to help improve site speed.
Boost Site Speed and Improve Image Quality
As you can see, there are many ways to compress images and reduce their file size. If your goal with compressing images is to boost website speed, you should also consider:
- Installing a cache plugin like WP Fastest Cache
- Use responsive images
- Serving your images via an image CDN (Content Delivery Network) like Cloudflare
- And create a Google AMP (Accelerated Mobile Pages) version of your website
Before you go, we also want to mention that PhotoUp is here for all your real estate photo editing needs — big or small.
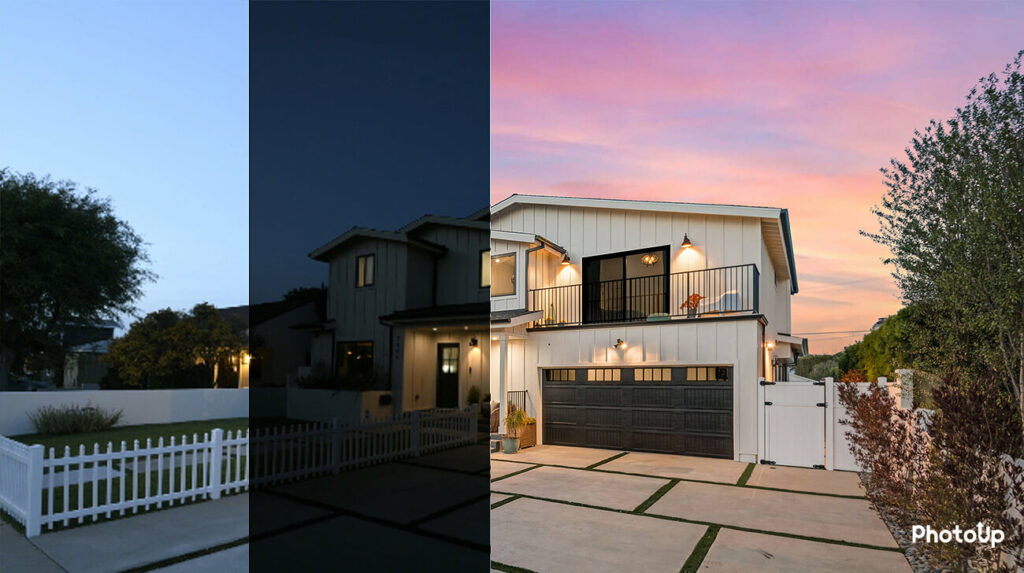
PhotoUp is a complete one-stop-shop for real estate marketing and offers services such as:
- Real estate photo editing
- Home walk-through videos
- Custom websites
- Single property websites
- Property flyers
- House portraits
- Virtual assistants
- And more.
Sign up for a PhotoUp account, and try out our services for yourself. For a limited time, you’ll even get 10 edits for free!
We hope this blog post helped you learn how to compress images in Photoshop. Use these tips and you’ll improve your page load speed and ensure your emails, including attachments, will reach the responder in no time.
If you enjoyed reading this post, you may also want to check out the following resources:


